In this tutorial, we will show you how to install WSL on Windows 10. For those of you who didn’t know, Windows Subsystem for Linux (WSL) is an optional feature in Windows 10 that allows developers and system administrators to run Linux shells and command-line applications without installing Linux in a virtual machine (VM). In this new version, the feature runs a real Linux kernel, which improves performance and app compatibility over the previous version while maintaining the same experience as the first release.
This article assumes you have at least basic knowledge of Linux, know how to use the shell, and most importantly, you host your site on your own VPS. The installation is quite simple and assumes you are running in the root account, if not you may need to add ‘sudo‘ to the commands to get root privileges. I will show you the step-by-step installation of WSL 2 on Windows 10. You can follow the same instructions for Ubuntu 18.04, 16.04, and any other Debian-based distribution like Linux Mint.
Requirements
- Windows 10 May 2020 (2004), Windows 10 May 2019 (1903), or Windows 10 November 2019 (1909) or later
- A computer with Hyper-V Virtualization support
Install WSL 2 on Windows 10
Step 1. Enable the Windows Subsystem for Linux 2.
You must first enable the “Windows Subsystem for Linux” optional feature before installing any Linux distributions on Windows. Now run the following command below to enable it:
Open PowerShell as Administrator and run:
dism.exe /online /enable-feature /featurename:Microsoft-Windows-Subsystem-Linux /all /norestart
Step 2. Enable Virtual Machine Feature.
Before installing WSL 2, you must enable the Virtual Machine Platform optional feature. Your machine will require virtualization capabilities to use this feature.
To enable Virtual Machine Platform on Windows 10 (2004) open PowerShell as Administrator and run:
dism.exe /online /enable-feature /featurename:VirtualMachinePlatform /all /norestart
Step 3. Set WSL 2 as your default version.
We set WSL 2 as default. Now open PowerShell as Administrator and run this command to set WSL 2 as the default version of WSL:
wsl --set-default-version 2
Step 4. Installing Your Linux Distribution.
With WSL and the necessary virtualization tech all in place, all that is left for you to do is pick and install a Linux distro from the Microsoft Store. Several different distros are available, including OpenSUSE, Pengwin, Fedora Remix, and Alpine Linux.
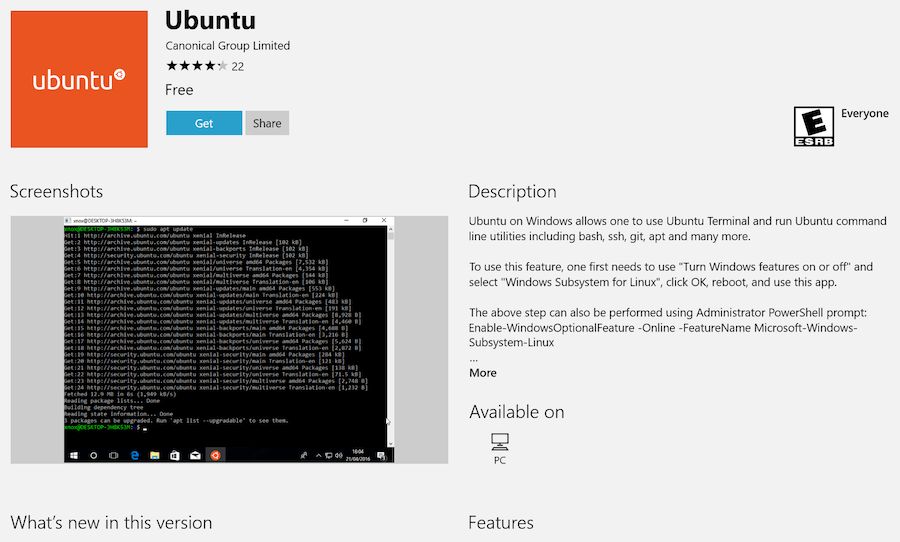
To install Ubuntu on Windows 10 open the Microsoft Store app, search for “Ubuntu 20.04”, and hit the “Get” button:

Step 5. Installing Windows Terminal.
Whilst you in the Microsoft Store I highly recommend that you also install the open-source Windows Terminal app. This tool is designed to give you the best possible WSL experience.
Step 6. Accessing Windows Subsystem for Linux 2.
When you installed Ubuntu a shortcut was added to the Start Menu. Use this to “open” Ubuntu. The first time you run the distro things will seem a little slow. This is expected; the distro has to unpack and decompress all of its contents, just don’t interrupt the process.
Congratulations! You have successfully installed WSL 2. Thanks for using this tutorial for installing the latest stable version of the Windows Subsystem for Linux 2 (WSL 2) on the Ubuntu 20.04 LTS (Focal Fossa) system. For additional help or useful information, we recommend you check the official Ubuntu website.