How To Install XWiki on Debian 12

In this tutorial, we will show you how to install XWiki on Debian 12. For those of you who didn’t know, XWiki is a powerful and versatile open-source collaboration platform that allows teams to create, organize, and share knowledge effectively.
This article assumes you have at least basic knowledge of Linux, know how to use the shell, and most importantly, you host your site on your own VPS. The installation is quite simple and assumes you are running in the root account, if not you may need to add ‘sudo‘ to the commands to get root privileges. I will show you the step-by-step installation of the XWiki system on a Debian 12 (Bookworm).
Prerequisites
- A server running one of the following operating systems: Debian 12 (Bookworm).
- It’s recommended that you use a fresh OS install to prevent any potential issues.
- SSH access to the server (or just open Terminal if you’re on a desktop).
- An active internet connection. You’ll need an internet connection to download the necessary packages and dependencies for XWiki.
- A
non-root sudo useror access to theroot user. We recommend acting as anon-root sudo user, however, as you can harm your system if you’re not careful when acting as the root.
Install XWiki on Debian 12 Bookworm
Step 1. Before we install any software, it’s important to make sure your system is up to date by running the following apt commands in the terminal:
sudo apt update
sudo apt upgrade
Step 2. Installing OpenJDK.
Now we install the default OpenJDK package using the following command below:
sudo apt install default-jdk
Confirm that Java is installed correctly by running the following command:
java -version
For additional resources on installing Java, read the post below:
Step 3. Installing XWiki on Debian 12.
By default, XWiki is not available on the Debian 12 base repository. So, now we need to add the repo and the GPG key since they are not added in the default repo of Debian 12:
wget https://maven.xwiki.org/xwiki-keyring.gpg -O /usr/share/keyrings/xwiki-keyring.gpg
wget "https://maven.xwiki.org/stable/xwiki-stable.list" -O /etc/apt/sources.list.d/xwiki-stable.list
After the repository is updated, you can install the latest version of XWiki using the following command:
sudo apt install xwiki-tomcat9-mariadb
During the installation, on the first window, hit Yes. It is for MySQL confirmation.

Select Yes and hit Enter. You will need to set a password for the XWiki database as shown below:

Step 4. Configure Nginx for XWiki.
Now we run the following command below to install Nginx to your Debian system:
sudo apt install nginx
After the installation is complete, start Nginx and add it to automatically start on your system start-up using:
sudo systemctl start nginx
sudo systemctl enable nginx
Verify the installation:
nginx -v
Now create an Nginx configuration file and set up the reverse proxy so you can access it via the domain name:
nano /etc/nginx/conf.d/xwiki.conf
Add the following lines of code:
server {
    listen       80;
    server_name  your-domian.com;
    charset utf-8;
    client_max_body_size 64M;

    root /var/www/html;

    location /
    {
        rewrite ^ $scheme://$server_name/xwiki$request_uri? permanent;
    }

    location ^~ /xwiki
    {
       proxy_pass              http://127.0.0.1:8080;
       proxy_cache             off;
       proxy_set_header        X-Real-IP $remote_addr;
       proxy_set_header        X-Forwarded-For $proxy_add_x_forwarded_for;
       proxy_set_header        Host $host;
       proxy_set_header        X-Forwarded-Proto $scheme;
       expires                 $expires;
    }
}
Save and close the file then activate the Nginx virtual host with the following command:
sudo systemctl restart nginx
Step 5. Configure Firewall.
If you have an active firewall, open the necessary ports to allow incoming connections to XWiki. For example, to enable HTTP and HTTPS access, use the following commands:
sudo ufw allow OpenSSH
sudo ufw allow 'Nginx Full'
sudo ufw enable
Step 6. Accessing XWiki Web Interface.
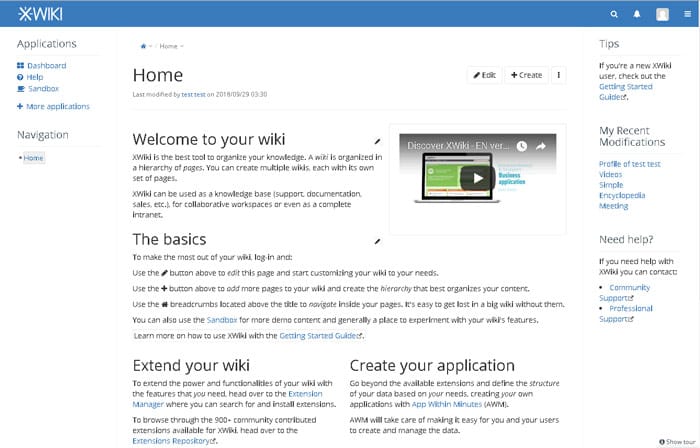
Once successfully installed, open your web browser and access the XWiki Web UI using the URL http://xwiki.your-domain.com. You will be redirected to the following page:

Congratulations! You have successfully installed XWiki. Thanks for using this tutorial for installing the latest version of the XWiki on Debian 12 (Bookworm). For additional help or useful information, we recommend you check the official XWiki website.