How To Install Zulip on Ubuntu 24.04 LTS

In today’s fast-paced digital world, effective team communication is crucial for success. Zulip, an open-source team chat application, has emerged as a powerful solution for organizations seeking seamless collaboration. This guide will walk you through the process of installing Zulip on Ubuntu 24.04 LTS, empowering you to take control of your team’s communication infrastructure.
Zulip stands out from other chat platforms with its unique threading model, powerful search capabilities, and extensive integration options. By self-hosting Zulip, you gain complete control over your data, ensuring privacy and customization tailored to your organization’s needs. Whether you’re a small startup or a large enterprise, Zulip’s flexibility makes it an excellent choice for fostering productive team discussions.
Prerequisites
Before diving into the installation process, let’s ensure you have everything needed to set up Zulip successfully on your Ubuntu 24.04 LTS server.
System Requirements
To run Zulip smoothly, your server should meet the following minimum specifications:
- CPU: 2 cores
- RAM: 4GB (8GB recommended for larger teams)
- Storage: 10GB of free disk space
- Operating System: Ubuntu 24.04 LTS (Focal Fossa)
For optimal performance, especially for larger organizations, consider scaling up these resources accordingly.
Initial Setup
Before installing Zulip, prepare your Ubuntu server with these essential steps:
- Update your system:
sudo apt update && sudo apt upgrade -y - Install necessary dependencies:
sudo apt install python3 python3-pip postgresql nginx certbot -y
These commands ensure your system is up-to-date and equipped with the required software components for a smooth Zulip installation.
Step-by-Step Installation Guide
Now that we’ve laid the groundwork, let’s proceed with the step-by-step process of installing Zulip on your Ubuntu 24.04 LTS server.
Step 1: Setting Up the Server Environment
Begin by provisioning a fresh Ubuntu 24.04 LTS server. If you’re using a cloud provider like DigitalOcean, AWS, or Google Cloud Platform, select Ubuntu 24.04 LTS as your operating system when creating a new instance.
Once your server is up and running, connect to it via SSH and configure some basic settings:
- Set the hostname:
sudo hostnamectl set-hostname zulip.yourdomain.comReplace “zulip.yourdomain.com” with your actual domain or desired hostname.
- Configure the timezone:
sudo timedatectl set-timezone Your/TimezoneReplace “Your/Timezone” with your preferred timezone (e.g., “America/New_York”).
These configurations help maintain consistency and proper time management for your Zulip instance.
Step 2: Downloading Zulip
With your server environment set up, it’s time to download the latest Zulip release:
- Navigate to the /tmp directory:
cd /tmp - Download the latest Zulip release:
wget https://download.zulip.com/server/zulip-server-latest.tar.gz - Extract the downloaded file:
tar -xvzf zulip-server-latest.tar.gz
This process fetches the most recent version of Zulip, ensuring you have access to the latest features and security updates.
Step 3: Installing Zulip
Now that you have the Zulip files, let’s proceed with the installation:
- Navigate to the extracted Zulip directory:
cd zulip-server-* - Run the installation script:
sudo ./scripts/setup/install --certbot --email=admin@yourdomain.com --hostname=zulip.yourdomain.comReplace “
admin@yourdomain.com” with your admin email and “zulip.yourdomain.com” with your actual domain.
This command initiates the Zulip installation process, configuring email notifications and setting up SSL certificates using Certbot for secure connections.
Troubleshooting Common Installation Issues
During the installation, you might encounter some issues. Here are solutions to common problems:
- Dependency conflicts: If you encounter package conflicts, try running
sudo apt --fix-broken installbefore rerunning the installation script. - SSL certificate errors: Ensure your domain’s DNS is properly configured and pointing to your server’s IP address. If issues persist, you can use the
--self-signed-certoption instead of--certbotfor testing purposes. - Port conflicts: If ports 80 or 443 are already in use, stop any conflicting services or choose different ports for Zulip in the configuration.
Step 4: Configuring Zulip
After a successful installation, it’s time to fine-tune your Zulip configuration:
- Open the Zulip configuration file:
sudo nano /etc/zulip/settings.py - Modify the following settings:
EXTERNAL_HOST = 'zulip.yourdomain.com'
ZULIP_ADMINISTRATOR = 'admin@yourdomain.com'
Ensure these match your actual domain and admin email.
- Save the file and exit the editor (Ctrl+X, then Y, then Enter in nano).
- Restart the Zulip server to apply changes:
sudo systemctl restart zulip
These configurations ensure your Zulip instance is properly set up for your domain and administrative contact.
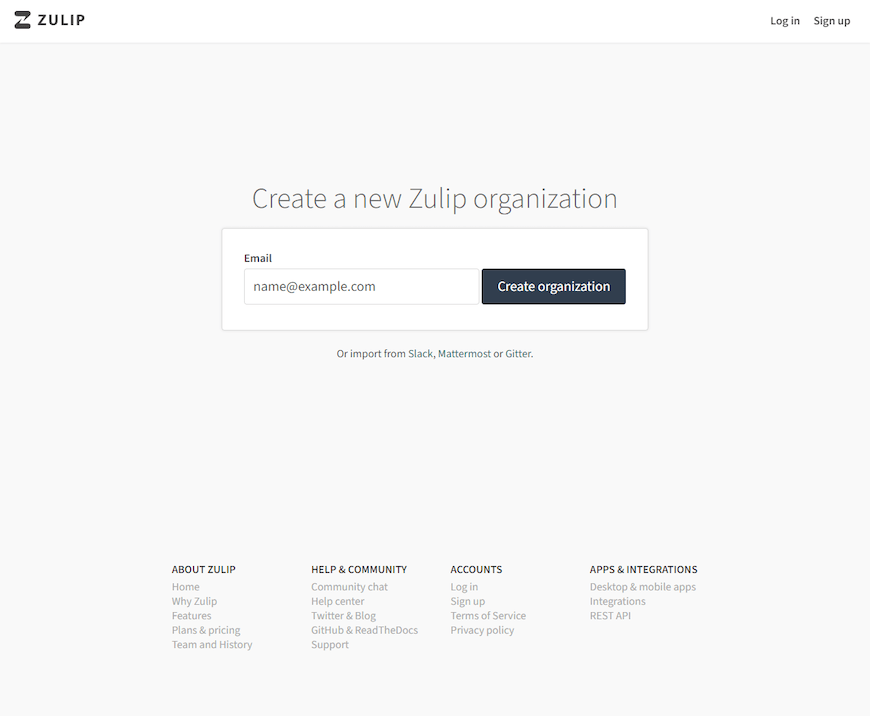
Step 5: Creating a Zulip Organization
With Zulip installed and configured, it’s time to create your organization:
- Locate the one-time organization creation link in the installation output. It should look similar to:
https://zulip.yourdomain.com/new/ - Open this link in a web browser and follow the prompts to create your Zulip organization.
- Set up your initial user account, which will have administrator privileges.
This process establishes your Zulip organization and prepares it for team use.

Post-Installation Steps
To ensure your Zulip instance runs smoothly and securely, consider these additional steps:
Security Enhancements
Bolster your server’s security with these measures:
- Configure a firewall using UFW (Uncomplicated Firewall):
sudo ufw allow 22/tcp sudo ufw allow 80/tcp sudo ufw allow 443/tcp sudo ufw enable - Enable automatic security updates:
sudo apt install unattended-upgrades
sudo dpkg-reconfigure -plow unattended-upgrades
These steps help protect your server from unauthorized access and keep it updated with the latest security patches.
Performance Optimization
Enhance Zulip’s performance with these optimizations:
- Configure Redis for caching:
sudo apt install redis-server sudo systemctl enable redis-server sudo systemctl start redis-server - Optimize PostgreSQL settings by editing
/etc/postgresql/13/main/postgresql.conf:shared_buffers = 1GB work_mem = 16MB maintenance_work_mem = 256MBAdjust these values based on your server’s available RAM.
These optimizations can significantly improve Zulip’s responsiveness, especially for larger teams.
Backup and Recovery
Implement a robust backup strategy to safeguard your Zulip data:
- Create a backup script:
#!/bin/bash BACKUP_DIR="/path/to/backup/directory" DATE=$(date +"%Y%m%d") sudo -u zulip /home/zulip/deployments/current/manage.py backup --output=$BACKUP_DIR/zulip-backup-$DATE.tar.gz - Schedule regular backups using cron:
0 2 * * * /path/to/backup/script.shThis example runs the backup daily at 2 AM.
Regular backups ensure you can quickly recover your Zulip instance in case of unexpected issues.
Congratulations! You have successfully installed Zulip. Thanks for using this tutorial for installing the Zulip Chat Server on Ubuntu 24.04 LTS system. For additional help or useful information, we recommend you check the official Zulip website.