![]()
In this tutorial, we will show you how to install Apache Hadoop on CentOS 7. For those of you who didn’t know, Apache Hadoop is an open-source software framework written in Java for distributed storage and distribution processes, it handles very large size of data sets by distributing it across computer clusters. Rather than rely on hardware to deliver high availability, the library itself is designed to detect and handle failures at the application layer, so delivering a highly-available service on top of a cluster of computers, each of which may be prone to failures.
This article assumes you have at least basic knowledge of Linux, know how to use the shell, and most importantly, you host your site on your own VPS. The installation is quite simple. I will show you the step-by-step installation of Apache Hadoop on CentOS 7.
Prerequisites
- A server running one of the following operating systems: CentOS 7.
- It’s recommended that you use a fresh OS install to prevent any potential issues.
- SSH access to the server (or just open Terminal if you’re on a desktop).
- A
non-root sudo useror access to theroot user. We recommend acting as anon-root sudo user, however, as you can harm your system if you’re not careful when acting as the root.
Install Apache Hadoop on CentOS 7
Step 1. Install Java.
Since Hadoop is based on java, make sure you have Java JDK installed on the system. If you don’t have Java installed on your system, use the following link to install it first.
root@idroot.us ~# java -version
java version "1.8.0_45"
Java(TM) SE Runtime Environment (build 1.8.0_45-b14)
Java HotSpot(TM) 64-Bit Server VM (build 25.45-b02, mixed mode)
Step 2. Install Apache Hadoop.
It is recommended to create a normal user to configure apache Hadoop, create a user using the following command:
useradd hadoop
passwd hadoop
After creating a user, it is also required to set up key-based ssh to its own account. To do this use execute the following commands:
su - hadoop
ssh-keygen -t rsa
cat ~/.ssh/id_rsa.pub >> ~/.ssh/authorized_keys
chmod 0600 ~/.ssh/authorized_keys
Download the latest stable version of Apache Hadoop, At the moment of writing this article it is version 2.7.0:
wget http://www.apache.org/dyn/closer.cgi/hadoop/common/hadoop-2.7.0/hadoop-2.7.0.tar.gz
tar xzf hadoop-2.7.0.tar.gz
mv hadoop-2.7.0 hadoop
Step 3. Configure Apache Hadoop.
Setup environment variables used by Hadoop. Edit ~/.bashrc file and append the following values at end of the file:
export HADOOP_HOME=/home/hadoop/hadoop
export HADOOP_INSTALL=$HADOOP_HOME
export HADOOP_MAPRED_HOME=$HADOOP_HOME
export HADOOP_COMMON_HOME=$HADOOP_HOME
export HADOOP_HDFS_HOME=$HADOOP_HOME
export YARN_HOME=$HADOOP_HOME
export HADOOP_COMMON_LIB_NATIVE_DIR=$HADOOP_HOME/lib/native
export PATH=$PATH:$HADOOP_HOME/sbin:$HADOOP_HOME/bin
Apply environmental variables to the currently running session:
source ~/.bashrc
Now edit $HADOOP_HOME/etc/hadoop/hadoop-env.sh file and set JAVA_HOME environment variable:
export JAVA_HOME=/usr/jdk1.8.0_45/
Hadoop has many configuration files, which need to configure as per the requirements of your Hadoop infrastructure. Let’s start with the configuration with a basic Hadoop single node cluster setup:
cd $HADOOP_HOME/etc/hadoop
Edit core-site.xml:
<configuration>
<property>
  <name>fs.default.name</name>
    <value>hdfs://localhost:9000</value>
</property>
</configuration>
Edit hdfs-site.xml:
<configuration>
<property>
 <name>dfs.replication</name>
 <value>1</value>
</property>

<property>
  <name>dfs.name.dir</name>
    <value>file:///home/hadoop/hadoopdata/hdfs/namenode</value>
</property>

<property>
  <name>dfs.data.dir</name>
    <value>file:///home/hadoop/hadoopdata/hdfs/datanode</value>
</property>
</configuration>
Edit mapred-site.xml:
<configuration>
 <property>
  <name>mapreduce.framework.name</name>
   <value>yarn</value>
 </property>
</configuration>
Edit yarn-site.xml:
<configuration>
 <property>
  <name>yarn.nodemanager.aux-services</name>
    <value>mapreduce_shuffle</value>
 </property>
</configuration>
Now format namenode using the following command, do not forget to check the storage directory:
hdfs namenode -format
Start all Hadoop services use the following command:
cd $HADOOP_HOME/sbin/
start-dfs.sh
start-yarn.sh
To check if all services are started well use ‘jps‘ command:
jps
Step 4. Accessing Apache Hadoop.
Apache Hadoop will be available on HTTP port 8088 and port 50070 by default. Open your favorite browser and navigate to http://your-domain.com:50070 or http://server-ip:50070. If you are using a firewall, please open ports 8088 and 50070 to enable access to the control panel.

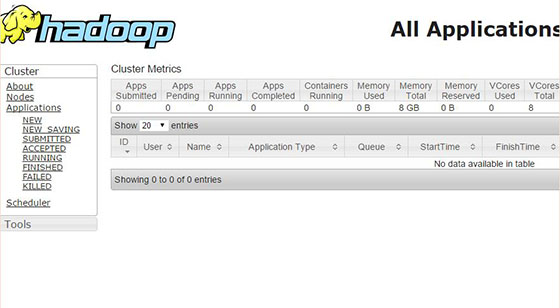
Now access port 8088 for getting the information about the cluster and all applications:
Congratulations! You have successfully installed Apache Hadoop. Thanks for using this tutorial for installing Apache Hadoop on CentOS 7 system. For additional help or useful information, we recommend you check the official Apache Hadoop website.
[su_box title=”VPS Manage Service Offer” style=”bubbles” box_color=”#000000″ radius=”10″]If you don’t have time to do all of this stuff, or if this is not your area of expertise, we offer a service to do “VPS Manage Service Offer”, starting from $10 (Paypal payment). Please contact us to get the best deal![/su_box]