In this tutorial, we will show you how to install Nagios on CentOS 7. For those of you who didn’t know, Nagios is open-source software that can be used for network and infrastructure monitoring. Nagios will monitor servers, switches, applications, and services. It alerts the System Administrator when something went wrong and also alerts back when the issues have been rectified. Resources that can be monitored include CPU, memory, and disk space loads, log files, temperature, or hardware errors. It can monitor various parameters and problems for services like HTTP, SMTP, and DNS with the help of plugins, it can be highly extended.
This article assumes you have at least basic knowledge of Linux, know how to use the shell, and most importantly, you host your site on your own VPS. The installation is quite simple. I will show you the step-by-step installation of Nagios on CentOS 7.
Prerequisites
- A server running one of the following operating systems: CentOS 7.
- It’s recommended that you use a fresh OS install to prevent any potential issues.
- SSH access to the server (or just open Terminal if you’re on a desktop).
- A
non-root sudo useror access to theroot user. We recommend acting as anon-root sudo user, however, as you can harm your system if you’re not careful when acting as the root.
Install Nagios on CentOS 7
Step 1. First, install the required packages and dependencies.
yum install httpd php php-cli gcc glibc glibc-common gd gd-devel net-snmp wget -y
Step 2. Create “nagios” user and add “apache” user to Nagios group.
useradd nagios
passwd nagios
Now create a groud for nagios setup “nagcmd” and add nagios user to this group. Also, add nagios user in apache group:
groupadd nagcmd
usermod -a -G nagcmd nagios
usermod -a -G nagcmd apache
Step 3. Install Nagios on CentOS 7.
Download Nagios source code from the official site:
cd /opt/
wget https://assets.nagios.com/downloads/nagioscore/releases/nagios-4.4.6.tar.gz
tar xzf nagios-4.4.6.tar.gz
cd nagios-4.4.6
./configure --with-command-group=nagcmd
make all
make install
make install-init
make install-config
make install-commandmode
make install-webconf
Next, download latest nagios-plugins source and install using the following commands:
cd /opt
wget http://nagios-plugins.org/download/nagios-plugins-2.0.3.tar.gz
tar xzf nagios-plugins-2.0.3.tar.gz
cd nagios-plugins-2.0.3
./configure --with-nagios-user=nagios --with-nagios-group=nagios
make
make install
Step 4. Configure Apache authentication.
We need to set up the password for the user nagiosadmin. This username will be used to access the web interface so it is important to remember the password that you will input here. Set the password running the following command and enter the password twice:
# htpasswd -s -c /usr/local/nagios/etc/htpasswd.users nagiosadmin
New password:
Re-type new password:
Adding password for user nagiosadmin
Step 5. Run Nagios configuration check.
Next, we have to make Nagios start at boot time, so first verify that the configuration file has no errors running the following command:
/usr/local/nagios/bin/nagios -v /usr/local/nagios/etc/nagios.cfg
And you should get the output:
Nagios Core 4.0.10
Copyright (c) 2009-present Nagios Core Development Team and Community Contributors
Copyright (c) 1999-2009 Ethan Galstad
Last Modified: 11-1-2016
License: GPL

Website: http://www.nagios.org
Reading configuration data...
 Read main config file okay...
 Read object config files okay...

Running pre-flight check on configuration data...

Checking objects...
 Checked 8 services.
 Checked 1 hosts.
 Checked 1 host groups.
 Checked 0 service groups.
 Checked 1 contacts.
 Checked 1 contact groups.
 Checked 24 commands.
 Checked 5 time periods.
 Checked 0 host escalations.
 Checked 0 service escalations.
Checking for circular paths...
 Checked 1 hosts
 Checked 0 service dependencies
 Checked 0 host dependencies
 Checked 5 timeperiods
Checking global event handlers...
Checking obsessive compulsive processor commands...
Checking misc settings...

Total Warnings: 0
Total Errors: 0

Things look okay - No serious problems were detected during the pre-flight check
Step 6. Start the Apache and Nagios service.
systemctl enable httpd
systemctl start httpd
chkconfig nagios on
/etc/init.d/nagios start
Step 7. Access Nagios Web Interface.
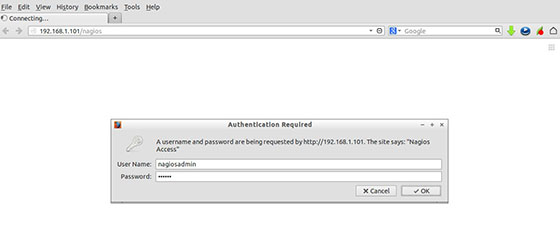
Nagios creates its own apache configuration file /etc/httpd/conf.d/nagios.conf. There is no need to make any changes to it. Simply open the URL in the browser http://nagios-server-ip/nagios.
When prompted for a username and password you will introduce the username “nagiosadmin” and the password that you entered in step 4. In case you forget this password you can modify it by rerunning the htpasswd command in step 4.

Congratulations! You have successfully installed Nagios. Thanks for using this tutorial for installing Nagios on CentOS 7 systems. For additional help or useful information, we recommend you to check the official Nagios website.