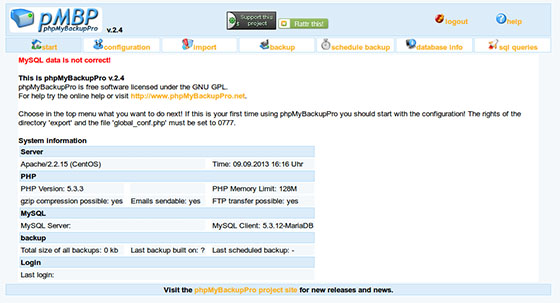
In this tutorial, we will show you how to install phpMyBackupPro on CentOS 6. For those of you who didn’t know, phpMyBackupPro is a great and helpful web-based application for backing up MySQL databases. With this free and PHP-based application, you can create a backup of your database with just a few clicks. You can also schedule your backups, manage, download, restore the backups, and a lot more. It supports three compression levels of backups (No compression, zip, or gzip compression). It also supports two alternative security login methods, HTTP and HTML authentication.
This article assumes you have at least basic knowledge of Linux, know how to use the shell, and most importantly, you host your site on your own VPS. The installation is quite simple. I will show you the step-by-step installation phpMyBackupPro on CentOS 6.
Prerequisites
- A server running one of the following operating systems: CentOS 6.
- It’s recommended that you use a fresh OS install to prevent any potential issues.
- SSH access to the server (or just open Terminal if you’re on a desktop).
- A
non-root sudo useror access to theroot user. We recommend acting as anon-root sudo user, however, as you can harm your system if you’re not careful when acting as the root.
Install phpMyBackupPro on CentOS 6
Step 1. First, Install Apache and the latest PHP version on your server.
yum install httpd php php-mysql -y
Step 2. Download the latest stable release of phpMyBackupPro.
wget http://downloads.sourceforge.net/project/phpmybackup/phpMyBackupPro/phpmyBackupPro%202.4/phpMyBackupPro-2.4.zip
Extract the zip file using the command:
unzip phpMyBackupPro-2.4.zip -d /opt/
Rename the directory to something simpler:
mv /opt/phpMyBackupPro-2.4/ /opt/phpmybackup
Set apache as an owner of the directory where the files are extracted:
chown -R apache: /opt/phpmybackup/
Step 3. Configure Apache webserver.
Create new a virtual host apache:
##nano /etc/httpd/conf/phpmybackuppro.conf

<IfModule mod_alias.c>
Alias /phpmybackuppro /opt/phpmybackup/phpMyBackupPro
</IfModule>
<Directory /opt/phpmybackup/phpMyBackupPro>
Options None
Order allow,deny
allow from all
</Directory>
We need to include the ‘phpmybackuppro.conf’ the configuration file in the web server configuration (put the line at the end of the file):
##nano /etc/httpd/conf/httpd.conf
Include /etc/httpd/conf/phpmybackuppro.conf
Step 4. Finally, restart the Apache service.
/etc/init.d/httpd restart
Step 5. Access phpMyBackupPro.
Now you will be able to access phpMyBackupPro from your browser with the URL http://your-ip-address/phpmybackuppro or http://domain-name/phpmybackuppro. Enter your MySQL details, such as MySQL username and password, FTP username and password, etc., and save the changes. After you save the changes, log out from phpMyBackupPro and log in back again using your MySQL username and password.

Congratulations! You have successfully installed phpMyBackupPro. Thanks for using this tutorial for installing phpMyBackupPro on CentOS 6 systems. For additional help or useful information, we recommend you to check the official phpMyBackupPro website.