In this tutorial, we will show you how to install Seafile on Ubuntu 14.04. For those of you who didn’t know, Seafile is an open-source cloud storage software. It offers file sharing and syncing for individual users and groups, it provides client-side encryption and easy access from mobile devices. Also easily integrated with local services such as LDAP and WebDAV or can be deployed using advanced network services and databases like MySQL, SQLite, PostgreSQL, Memcached, Nginx, or Apache Web Server.
This article assumes you have at least basic knowledge of Linux, know how to use the shell, and most importantly, you host your site on your own VPS. The installation is quite simple. I will show you the step-by-step installation of Seafile on Ubuntu 14.04.
Prerequisites
- A server running one of the following operating systems: Ubuntu 14.04, and any other Debian-based distribution.
- It’s recommended that you use a fresh OS install to prevent any potential issues.
- SSH access to the server (or just open Terminal if you’re on a desktop).
- A
non-root sudo useror access to theroot user. We recommend acting as anon-root sudo user, however, as you can harm your system if you’re not careful when acting as the root.
Install Seafile on Ubuntu 14.04
Step 1. First, you need to update the system to ensure that we have all of the latest software installed.
apt-get update
Step 2. Install the required packages.
Install LAMP:
sudo apt-get install apache2 mysql-server php5 libapache2-mod-php5
Install Python modules:
sudo apt-get install python2.7 sqlite python-simplejson python-setuptools python-imaging python-mysqldb
Step 3. Download the Seafile components.
You need to download the last release of Seafile:
wget https://bitbucket.org/haiwen/seafile/downloads/seafile-server_4.0.6_x86-64.tar.gz
Extract the tarball into the current directory:
tar xzvf seafile-server*
cd seafile-server*
Step 4. Install the Seafile server on Ubuntu.
Run this script which will create the required databases and directories for the Seafile server and answer all questions using the following configuration options, after the script verifies the existence of all Python required modules:
./setup-seafile-mysql.sh
After the Seafile server successfully installs, it will generate some useful information such as what ports need to be open on your Firewall to allow external connection and what scripts to handle in order to start the server.
Step 5. Starting the Seafile services.
Create a startup script for the Seafile server like this:
nano /etc/init.d/seafile
#!/bin/bash
# Change the value of "user" to your linux user name
user=haiwen
# Change the value of "seafile_dir" to your path of seafile installation
seafile_dir=/data/haiwen
script_path=${seafile_dir}/seafile-server-latest
seafile_init_log=${seafile_dir}/logs/seafile.init.log
seahub_init_log=${seafile_dir}/logs/seahub.init.log
# Change the value of fastcgi to true if fastcgi is to be used
fastcgi=false
# Set the port of fastcgi, default is 8000. Change it if you need different.
fastcgi_port=8000
case "$1" in
        start)
                sudo -u ${user} ${script_path}/seafile.sh start >> ${seafile_init_log}
                if [  $fastcgi = true ];
                then
                        sudo -u ${user} ${script_path}/seahub.sh start-fastcgi ${fastcgi_port} >> ${seahub_init_log}
                else
                        sudo -u ${user} ${script_path}/seahub.sh start >> ${seahub_init_log}
                fi
        ;;
        restart)
                sudo -u ${user} ${script_path}/seafile.sh restart >> ${seafile_init_log}
                if [  $fastcgi = true ];
                then
                        sudo -u ${user} ${script_path}/seahub.sh restart-fastcgi ${fastcgi_port} >> ${seahub_init_log}
                else
                        sudo -u ${user} ${script_path}/seahub.sh restart >> ${seahub_init_log}
                fi
        ;;
        stop)
                sudo -u ${user} ${script_path}/seafile.sh $1 >> ${seafile_init_log}
                sudo -u ${user} ${script_path}/seahub.sh $1 >> ${seahub_init_log}
        ;;
        *)
                echo "Usage: /etc/init.d/seafile {start|stop|restart}"
                exit 1
        ;;
esac
Add directory for log files:
mkdir /path/to/seafile/dir/logs
Create a file /etc/init/seafile.conf:
nano /etc/init/seafile.conf
start on (started mysql
and runlevel [2345])
stop on (runlevel [016])

pre-start script
/etc/init.d/seafile-server start
end script

post-stop script
/etc/init.d/seafile-server stop
end script,
Make the seafile-sever script executable:
sudo chmod +x /etc/init.d/seafile
Now try using the service and command to start a new Seafile server instance:
service seafile start
Step 6. Accessing Seafile.
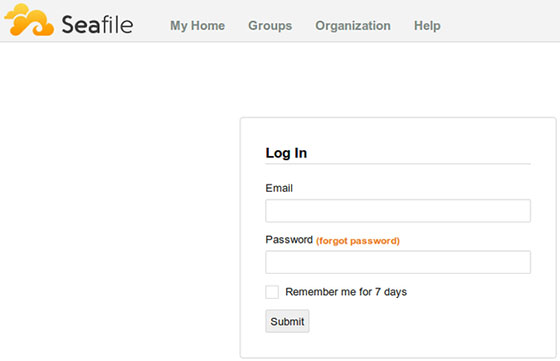
Seafile cloud storage will be available on HTTP port 8000 by default. Open your favorite browser and navigate to http://your-domain.com:8000 or http://server-ip:8000. Enter the admin email id and password to log in which you have created at the time of installation. If you are using a firewall, please open port 8000 to enable access to the control panel.

Congratulations! You have successfully installed Seafile. Thanks for using this tutorial for installing Seafile open-source cloud storage on Ubuntu 14.04 system. For additional help or useful information, we recommend you to check the official Seafile website.