In this tutorial, we will show you how to install Sentora on CentOS 7. For those of you who didn’t know, Sentora is an open-source web hosting control panel that provides a comprehensive solution for managing web servers. Developed by the original members of the ZPanel project, Sentora aims to deliver a reliable and user-friendly experience. It offers a range of features, including DNS management, email services, and security enhancements, making it a versatile tool for web hosting.
This article assumes you have at least basic knowledge of Linux, know how to use the shell, and most importantly, you host your site on your own VPS. The installation is quite simple. I will show you the step-by-step installation Sentora open-source web hosting control panel on CentOS 7.
Prerequisites
- A server running one of the following operating systems: CentOS Linux.
- It’s recommended that you use a fresh OS install to prevent any potential issues.
- A domain name (you can use a free domain or purchase one from a domain registrar).
- A
non-root sudo useror access to theroot user. We recommend acting as anon-root sudo user, however, as you can harm your system if you’re not careful when acting as the root.
Install Sentora on CentOS 7
Step 1. It’s crucial to keep your CentOS 7 system up-to-date with the latest security patches and software updates. Here’s how you can update your system before proceeding with the Sentora installation:
yum -y update
Step 2. Installing Sentora on CentOS.
Sentora is not in the repository, available for installation, so we will need to download the installation script from the web. To download files from the web we can use the wget command. Wget is not installed in the minimal installation of CentOS. To install wget issue the following command:
yum install wget
Download the installation script file using wget and make it executable:
wget http://sentora.org/install
chmod +x install
Run the installation script using the command:
./install
############################################################
# Welcome to the Official Sentora Installer 1.0.1 #
############################################################
Checking that minimal requirements are ok
Detected : CentOs 7 x86_64
Ok.
DB server will be mariaDB
-- Installing wget and dns utils required to manage inputs
Loaded plugins: fastestmirror
Loading mirror speeds from cached hostfile
* base: mirrors.psychz.net
* extras: mirror.keystealth.org
* updates: mirrors.easynews.com
No packages marked for update
Package 32:bind-utils-9.9.4-14.el7_0.1.x86_64 already installed and latest version
Package wget-1.14-10.el7_0.1.x86_64 already installed and latest version
Preparing to select timezone, please wait a few seconds...
Package tzdata-2015a-1.el7_0.noarch already installed and latest version
Please identify a location so that time zone rules can be set correctly.
Please select a continent or ocean.
1) Africa
2) Americas
3) Antarctica
4) Arctic Ocean
5) Asia
6) Atlantic Ocean
7) Australia
8) Europe
9) Indian Ocean
10) Pacific Ocean
11) none - I want to specify the time zone using the Posix TZ format.
#? 2
Please select a country.
1) Anguilla
2) Antigua & Barbuda
3) Argentina
4) Aruba
5) Bahamas
6) Barbados
7) Belize
8) Bolivia
9) Brazil
10) Canada
11) Caribbean Netherlands
12) Cayman Islands
13) Chile
14) Colombia
15) Costa Rica
16) Cuba
17) Curacao
18) Dominica
19) Dominican Republic
20) Ecuador
21) El Salvador
22) French Guiana
23) Greenland
24) Grenada
25) Guadeloupe
26) Guatemala
27) Guyana
28) Haiti
29) Honduras
30) Jamaica
31) Martinique
32) Mexico
33) Montserrat
34) Nicaragua
35) Panama
36) Paraguay
37) Peru
38) Puerto Rico
39) St Barthelemy
40) St Kitts & Nevis
41) St Lucia
42) St Maarten (Dutch part)
43) St Martin (French part)
44) St Pierre & Miquelon
45) St Vincent
46) Suriname
47) Trinidad & Tobago
48) Turks & Caicos Is
49) United States
50) Uruguay
51) Venezuela
52) Virgin Islands (UK)
53) Virgin Islands (US)
#? 49
Please select one of the following time zone regions.
1) Eastern Time
2) Eastern Time - Michigan - most locations
3) Eastern Time - Kentucky - Louisville area
4) Eastern Time - Kentucky - Wayne County
5) Eastern Time - Indiana - most locations
6) Eastern Time - Indiana - Daviess, Dubois, Knox & Martin Counties
7) Eastern Time - Indiana - Pulaski County
8) Eastern Time - Indiana - Crawford County
9) Eastern Time - Indiana - Pike County
10) Eastern Time - Indiana - Switzerland County
11) Central Time
12) Central Time - Indiana - Perry County
13) Central Time - Indiana - Starke County
14) Central Time - Michigan - Dickinson, Gogebic, Iron & Menominee Counties
15) Central Time - North Dakota - Oliver County
16) Central Time - North Dakota - Morton County (except Mandan area)
17) Central Time - North Dakota - Mercer County
18) Mountain Time
19) Mountain Time - south Idaho & east Oregon
20) Mountain Standard Time - Arizona (except Navajo)
21) Pacific Time
22) Pacific Standard Time - Annette Island, Alaska
23) Alaska Time
24) Alaska Time - Alaska panhandle
25) Alaska Time - southeast Alaska panhandle
26) Alaska Time - Alaska panhandle neck
27) Alaska Time - west Alaska
28) Aleutian Islands
29) Hawaii
#? 1
The following information has been given:
United States
Eastern Time
Therefore TZ='America/New_York' will be used.
Local time is now: Mon May 4 10:00:00 EDT 2015.
Universal Time is now: Mon May 4 15:00:00 UTC 2015.
Is the above information OK?
1) Yes
2) No
#? 1
=== Informations required to build your server ===
The installer requires 2 pieces of information:
1) the sub-domain that you want to use to access Sentora panel,
- do not use your main domain (like domain.com)
- use a sub-domain, e.g panel.domain.com
- or use the server hostname, e.g server1.domain.com
- DNS must already be configured and pointing to the server IP
for this sub-domain
2) The public IP of the server.
Enter the sub-domain you want to access Sentora panel: sentora.lecturesnippets.com
Enter (or confirm) the public IP for this server: 192.168.8.323
OK: DNS successfully resolves sentora.lecturesnippets.com to 192.168.8.323
All is ok. Do you want to install Sentora now (y/n)? y
Daemon run complete! (10:10 4th May 2015 EDT)
Restarting mariadb
Restarting httpd
Restarting postfix
Restarting dovecot
Restarting crond
Restarting named
Restarting proftpd
Restarting atd
########################################################
Congratulations Sentora has now been installed on your
server. Please review the log file left in /root/ for
any errors encountered during installation.
Login to Sentora at http://yourdomain.com
Sentora Username : idroot
Sentora Password : idroot323
MySQL Root Password : asdf1234MAHOD
MySQL Postfix Password : OOIUERN5622MM44ES
MySQL ProFTPd Password : JJK98SXMN1F2KOPe
MySQL Roundcube Password : aQSGm105yPwTCOpD
(theses passwords are saved in /root/passwords.txt)
########################################################
Restart your server now to complete the install (y/n)? y
Step 2. Accessing Sentora Web Interface.
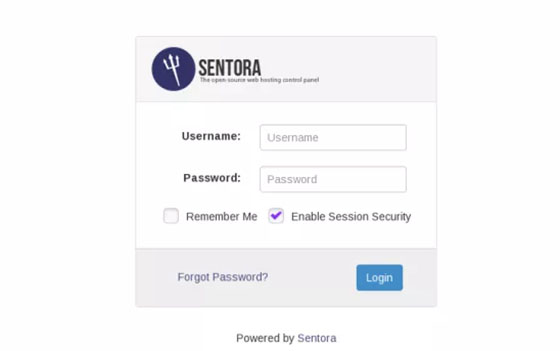
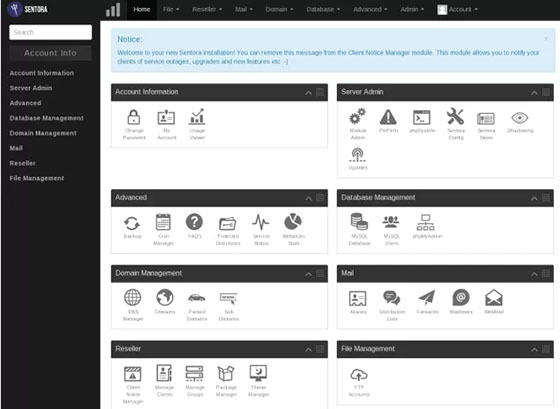
Sentora will be available on HTTP port 80 by default. Open your favorite browser and navigate to http://your-domain.com or http://server-ip-address. Use the username/password generated by the installation script to log in. Once you log in you can start creating new domains, web hostings, and email hostings. If you are using a firewall, please open port 80 to enable access to the control panel.


Congratulations! You have successfully installed Sentora. Thanks for using this tutorial for installing the Sentora web hosting panel on CentOS 7 system. For additional help or useful information, we recommend you check the official Sentora website.