In this tutorial, we will show you how to install and configure a DNS server on Ubuntu 16.04 LTS. For those of you who didn’t know, BIND is a widely used DNS Server. Ideally, a DNS server consists of 2 machines that work together simultaneously, one acts as a master, and the other one acts as a slave. If your domain registrar doesn’t provide you with a free DNS server, or if you want to create a custom DNS record, then you might need to host your own DNS server.
This article assumes you have at least basic knowledge of Linux, know how to use the shell, and most importantly, you host your site on your own VPS. The installation is quite simple and assumes you are running in the root account, if not you may need to add ‘sudo‘ to the commands to get root privileges. I will show you the step-by-step installation and configure the DNS server on ubuntu on a Ubuntu 16.04 (Xenial Xerus) server.
Prerequisites
- A server running one of the following operating systems: Ubuntu 16.04 (Xenial Xerus).
- It’s recommended that you use a fresh OS install to prevent any potential issues.
- SSH access to the server (or just open Terminal if you’re on a desktop).
- A
non-root sudo useror access to theroot user. We recommend acting as anon-root sudo user, however, you can harm your system if you’re not careful when acting as the root.
Install and Configure DNS Server on Ubuntu 16.04 LTS
| Host | Role | Private FQDN | Private IP Address |
|---|---|---|---|
| ns1 | Primary DNS Server | 108.100.100.1 | |
| ns2 | Secondary DNS Server | 108.100.100.2 | |
| host | Generic Host | your-domain.com | 216.239.38.120 |
Step 1. First, make sure that all your system packages are up-to-date by running the following apt-get commands in the terminal.
sudo apt-get update
sudo apt-get upgrade
Step 2. Installing DNS Server Bind9.
After updating the system, run the following command to install BIND9 packages which are used to setup DNS server:
apt-get install bind9 bind9utils bind9-doc
Step 3. Configure Bind9.
It is time to show you a basic configuration of how to set up your domain to resolve to your server:
### nano /etc/bind/named.conf.options

options {
    directory "/var/cache/bind";
    additional-from-auth no;
    additional-from-cache no;
    version "Bind Server";

    // If there is a firewall between you and nameservers you want
    // to talk to, you may need to fix the firewall to allow multiple
    // ports to talk.  See http://www.kb.cert.org/vuls/id/800113

    // If your ISP provided one or more IP addresses for stable
    // nameservers, you probably want to use them as forwarders.
    // Uncomment the following block, and insert the addresses replacing
    // the all-0's placeholder.

     forwarders {
         8.8.8.8;
        8.8.4.4;
     };

    //========================================================================
    // If BIND logs error messages about the root key being expired,
    // you will need to update your keys.  See https://www.isc.org/bind-keys
    //========================================================================
    dnssec-validation auto;
    allow-recursion { 127.0.0.1; };
    auth-nxdomain no;    # conform to RFC1035
    listen-on-v6 { any; };
};
Step 4. Configure Local File.
Next, we will configure the local file, to specify our DNS zones:
### nano /etc/bind/named.conf.local

//place these lines at the bottom of file

zone "your-domain.com" {
        type master;
        file "/etc/bind/zones/your-domain.com.db";
        allow-transfer { 108.200.200.2; };
        also-notify { 108.200.200.200.2; };
};
Because in the above config we put zone file in “/etc/bind/zones/your-domain.com.db“, then we need to create the folder and file:
mkdir /etc/bind/zones
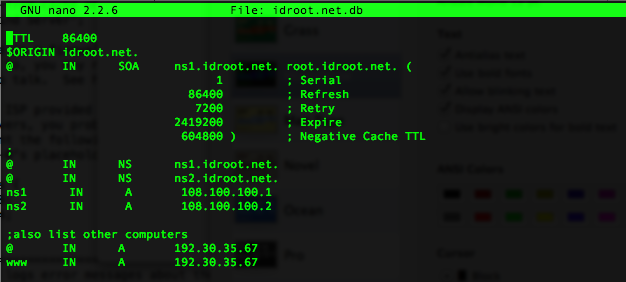
nano /etc/bind/zones/your-domain.com.db
$TTL    86400
$ORIGIN your-domain.com.
@       IN      SOA     ns1.your-domain.com. root.your-domain.com. (
                              1         ; Serial
                          86400         ; Refresh
                           7200         ; Retry
                        2419200         ; Expire
                         604800 )       ; Negative Cache TTL
;
@       IN      NS      ns1.your-domain.com.
@       IN      NS      ns2.your-domain.com.
ns1      IN      A       108.100.100.1
ns2      IN      A       108.100.100.2

;also list other computers
@       IN      A       216.239.38.120
www     IN      A       216.239.38.120

And then restart bind9 service to take effect the changes:
systemctl restart bind9
Step 5. Configure Secondary DNS Server.
Configure slave bind options:
### nano /etc/bind/named.conf.options

zone "your-domain.com" {
	type slave;
	file "/var/cache/bind/your-domain.com.db";
	masters {108.100.100.1;};
};
Restart bind9 service to take effect the changes:
systemctl restart bind9
This DNS server will not work until you change your domain’s nameserver. It can be done from your domain’s registrar’s website. In this scenario, we change the nameserver to:
ns1.your-domain.com
ns2.your-domain.com
Step 6. Testing BIND.
Finally, this test could be done either on the DNS server itself or from another server, or from your own PC. In this case, we will do the test from another server running Ubuntu OS.
Install dnsutils:
apt-get install dnsutils
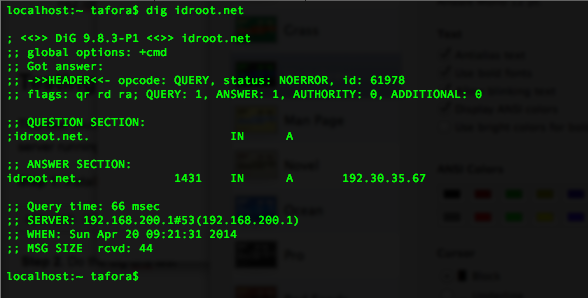
Do the dig DNS test:
dig your-domain.com

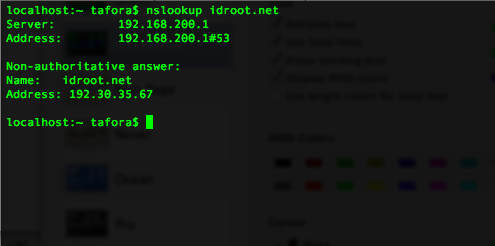
Do the nslookup dns test:
nslookup your-domain.com

Congratulations! You have successfully installed the DNS server. Thanks for using this tutorial for installing the DNS server on Ubuntu 16.04 LTS (Xenial Xerus) system. For additional help or useful information, we recommend you to check the official bind9 website.