How To Install LAMP Stack on Ubuntu 24.04 LTS

In this tutorial, we will show you how to install LAMP Stack on Ubuntu 24.04 LTS. The LAMP stack is a powerful combination of open-source software that enables developers to build and host dynamic websites and web applications. It comprises Linux as the operating system, Apache as the web server, MySQL/MariaDB as the database management system, and PHP as the server-side scripting language. Ubuntu 24.04 LTS, being a widely used and stable Linux distribution, provides an excellent platform for setting up a LAMP stack.
This article assumes you have at least basic knowledge of Linux, know how to use the shell, and most importantly, you host your site on your own VPS. The installation is quite simple and assumes you are running in the root account, if not you may need to add ‘sudo‘ to the commands to get root privileges. I will show you the step-by-step installation of LAMP Stack on Ubuntu 24.04 (Noble Numbat). You can follow the same instructions for Ubuntu 22.04 and any other Debian-based distribution like Linux Mint, Elementary OS, Pop!_OS, and more as well.
Prerequisites
- A server running one of the following operating systems: Ubuntu and any other Debian-based distribution like Linux Mint.
- It’s recommended that you use a fresh OS install to prevent any potential issues.
- SSH access to the server (or just open Terminal if you’re on a desktop).
- An active internet connection. You’ll need an internet connection to download the necessary packages and dependencies.
- An Ubuntu 24.04 system with root access or a user with sudo privileges.
Install LAMP Stack on Ubuntu 24.04 LTS Noble Numbat
Step 1. Updating the Package Repository.
It’s always a good practice to update the package repositories before installing any new software. This ensures that you have access to the latest available versions and security updates. Open your terminal and run the following commands:
sudo apt update
Step 2. Installing Apache Web Server.
Apache is a widely used and robust web server that powers a significant portion of the internet. To install Apache on your Ubuntu 24.04 LTS system, execute the following command:
sudo apt install apache2
After installation, verify that Apache is running:
sudo systemctl status apache2
You should see an output indicating that the Apache service is active and running. To allow Apache through the firewall, execute:
sudo ufw allow 'Apache'
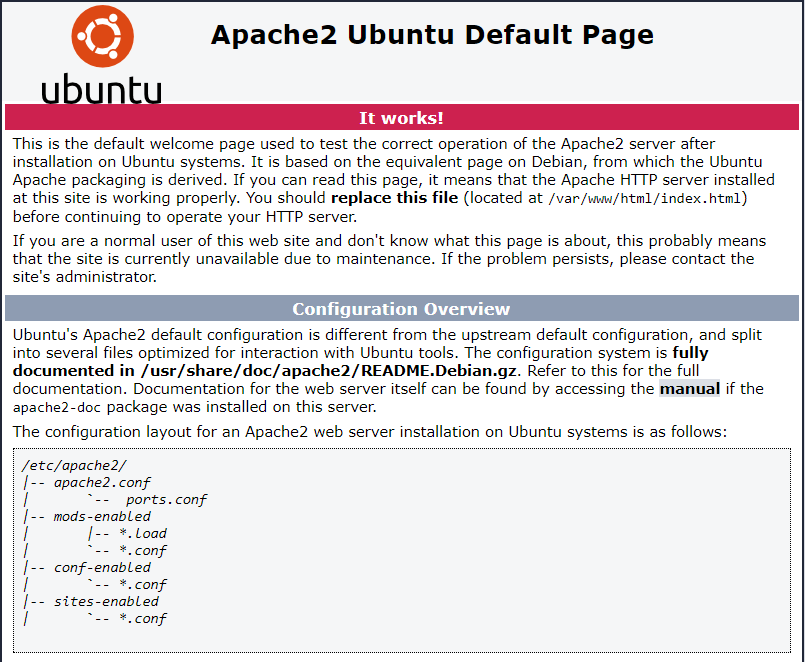
Once the installation is complete, verify that Apache is running by accessing your server’s IP address or domain name in a web browser. You should see the default Apache welcome page.

Step 3. Installing MySQL/MariaDB Database Server.
The LAMP stack typically includes either MySQL or MariaDB as the database management system. MariaDB is a drop-in replacement for MySQL and is often preferred for its enhanced performance and security features. To install MariaDB, run the following command:
sudo apt install mariadb-server
After installation, start and enable the MariaDB service:
sudo systemctl start mariadb
sudo systemctl enable mariadb
Next, secure your MariaDB installation by running the following script:
sudo mysql_secure_installation
This script will guide you through setting up a root password, removing anonymous users, disallowing remote root login, removing test databases, and reloading privilege tables.
Create a test database and user to ensure everything is working correctly:
sudo mysql -u root -p
CREATE DATABASE testdb;
CREATE USER 'testuser'@'localhost' IDENTIFIED BY 'your-password';
GRANT ALL PRIVILEGES ON testdb.* TO 'testuser'@'localhost';
FLUSH PRIVILEGES;
EXIT;
Step 4. Installing PHP.
PHP is the server-side scripting language that powers dynamic web content. To install PHP and the necessary modules for Apache integration, run the following command:
sudo apt install php8.3 php8.3-cli php8.3-{bz2,curl,mbstring,intl}
This command installs PHP, the Apache PHP module, and the PHP MySQL extension, which allows PHP to communicate with the MySQL/MariaDB database.
Verify the PHP installation:
php -v
Step 5. Configure Apache for PHP.
By default, Apache is not configured to handle PHP files. To enable this functionality, you need to modify the Apache configuration file. Open the file using your preferred text editor:
sudo nano /etc/apache2/mods-enabled/dir.conf
Find the following line:
<IfModule mod_dir.c>
DirectoryIndex index.html
</IfModule>
And modify it to include the PHP index file:
<IfModule mod_dir.c>
DirectoryIndex index.php index.html
</IfModule>
Save the changes and exit the text editor, then restart the Apache service to apply the new settings:
sudo systemctl restart apache2
Step 6. Test the LAMP Stack.
To verify that the LAMP stack is installed and working correctly, create a PHP test file in the Apache document root directory:
sudo nano /var/www/html/info.php
Add the following PHP code to the file:
<?php
phpinfo();
Save the changes and exit the text editor.
Now, open your web browser and navigate to http://your_server_ip/info.php or http://your_domain/info.php. You should see the PHP information page, confirming that the LAMP stack is installed and functioning correctly.
Step 7. Configure Apache Virtual Hosts.
Apache virtual hosts allow you to host multiple websites on a single server. To create a new virtual host configuration file:
sudo nano /etc/apache2/sites-available/your_domain.conf
Add the following content:
<VirtualHost *:80>
ServerAdmin webmaster@your_domain
ServerName your_domain
ServerAlias www.your_domain
DocumentRoot /var/www/your_domain
ErrorLog ${APACHE_LOG_DIR}/error.log
CustomLog ${APACHE_LOG_DIR}/access.log combined
</VirtualHost>
Save and close the file. Enable the new virtual host:
sudo a2ensite your_domain.conf
sudo systemctl reload apache2
Create the document root directory and set the appropriate permissions:
sudo mkdir -p /var/www/your_domain
sudo chown -R $USER:$USER /var/www/your_domain
Create an index.html file to test the virtual host:
sudo nano /var/www/your_domain/index.html
Add the following content:
<!DOCTYPE html>
<html>
<head>
<title>Welcome to Your Domain!</title>
</head>
<body>
<h1>Success! The your_domain virtual host is working!</h1>
</body>
</html>
Save and close the file. Access http://your_domain in a web browser to see the test page.
Congratulations! You have successfully installed LAMP. Thanks for using this tutorial for installing LAMP Stack on the Ubuntu 24.04 LTS system. For additional help or useful information, we recommend you check the Ubuntu website.