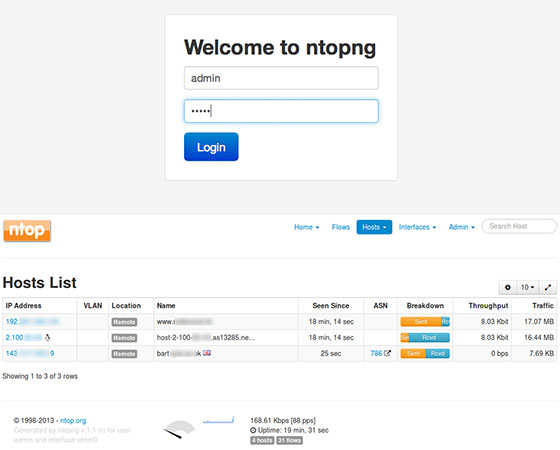
In this tutorial, we will show you how to install Ntopng on CentOS 6. For those of you who didn’t know, Ntopng is a relatively useful tool if you are looking to monitor different network protocols on your servers. It provides a bunch of tools for monitoring various protocols, traffic variants, and yes, bandwidth across multiple time frames. ntopng is based on libpcap and it has been written in a portable way in order to virtually run on every Unix platform, macOS, and on Win32 as well.
This article assumes you have at least basic knowledge of Linux, know how to use the shell, and most importantly, you host your site on your own VPS. The installation is quite simple. I will show you the step-by-step installation Ntopng on CentOS 6.
Prerequisites
- A server running one of the following operating systems: CentOS 6.
- It’s recommended that you use a fresh OS install to prevent any potential issues.
- SSH access to the server (or just open Terminal if you’re on a desktop).
- A
non-root sudo useror access to theroot user. We recommend acting as anon-root sudo user, however, as you can harm your system if you’re not careful when acting as the root.
Install Ntopng on CentOS 6
Step 1. First, we need to add the EPEL repository to our system.
## RHEL/CentOS 6 64-Bit ##
# wget http://download.fedoraproject.org/pub/epel/6/x86_64/epel-release-6-8.noarch.rpm
# rpm -ivh epel-release-6-8.noarch.rpm
## RHEL/CentOS 6 32-Bit ##
# wget http://download.fedoraproject.org/pub/epel/6/i386/epel-release-6-8.noarch.rpm
# rpm -ivh epel-release-6-8.noarch.rpm
Step 2. Install Ntopng on CentOS 6.
yum update
yum install redis hiredis
yum install pfring n2disk nProbe ntopng ntopng-data nbox
Step 3. Configure Ntopng.
Next, we need to create configuration files for ntopng. In this article, we use nano as a text editor. You can use your favorite text editor to create ntopng configuration files:
#nano /etc/ntopng/ntopng.start

##Put these lines##

--local-networks 192.168.0.0  ## give your local IP Ranges here.
--interface 1
Step 4. Start ntopng and Redis server.
service redis start
service ntopng start
Step 5. Configure IPTables or firewall.
-A INPUT -m state --state NEW -m tcp -p tcp --dport 3000 -j ACCEPT
Step 6. Access Ntopng.
If all is well, now you can test your Ntopng application by typing http://your-domain.com:3000. You will see ntopng login page. For the first time, you can use user ‘admin’ and password ‘admin’.

Congratulations! You have successfully installed Ntopng. Thanks for using this tutorial for installing Ntopng server monitoring on centos 6 systems. For additional help or useful information, we recommend you to check the official Ntopng website.