In this tutorial, we will show you how to install Ampache on Ubuntu 20.04 LTS. For those of you who didn’t know, Ampache is an open-source music streaming service that allows you to host your own music streaming server. With Ampache, you can access your music and video over the internet. You can view, edit, and play your music via a web browser or any media streaming client.
This article assumes you have at least basic knowledge of Linux, know how to use the shell, and most importantly, you host your site on your own VPS. The installation is quite simple and assumes you are running in the root account, if not you may need to add ‘sudo‘ to the commands to get root privileges. I will show you the step-by-step installation of the Ampache music streaming server on Ubuntu 20.04 (Focal Fossa). You can follow the same instructions for Ubuntu 18.04, 16.04, and any other Debian-based distribution like Linux Mint.
Prerequisites
- A server running one of the following operating systems: Ubuntu 20.04, 18.04, 16.04, and any other Debian-based distribution like Linux Mint.
- It’s recommended that you use a fresh OS install to prevent any potential issues.
- SSH access to the server (or just open Terminal if you’re on a desktop).
- A
non-root sudo useror access to theroot user. We recommend acting as anon-root sudo user, however, as you can harm your system if you’re not careful when acting as the root.
Install Ampache on Ubuntu 20.04 LTS Focal Fossa
Step 1. First, make sure that all your system packages are up-to-date by running the following apt commands in the terminal.
sudo apt update
sudo apt upgrade
Step 2. Installing the LAMP stack.
A Ubuntu 20.04 LAMP server is required. If you do not have LAMP installed, you can follow our guide here.
Step 3. Installing Ampache on Ubuntu 20.04.
Now we download the Ampache package from the official download page:
wget https://github.com/ampache/ampache/releases/download/4.1.1/ampache-4.1.1_all.zip
sudo unzip ampache-4.1.1_all.zip -d /var/www/ampache
We will need to change some folders permissions:
sudo chown -R www-data:www-data /var/www/ampache/
sudo chmod -R 755 /var/www/ampache/
Step 4. Configuring MariaDB databases for Ampache.
By default, MariaDB is not hardened. You can secure MariaDB using the mysql_secure_installation script. you should read and below each step carefully which will set a root password, remove anonymous users, disallow remote root login, and remove the test database and access to secure MariaDB:
mysql_secure_installation
Configure it like this:
- Set root password? [Y/n] y
- Remove anonymous users? [Y/n] y
- Disallow root login remotely? [Y/n] y
- Remove test database and access to it? [Y/n] y
- Reload privilege tables now? [Y/n] y
Next, we will need to log in to the MariaDB console and create a database for the PrestaShop. Run the following command:
mysql -u root -p
This will prompt you for a password, so enter your MariaDB root password and hit Enter. Once you are logged in to your database server you need to create a database for PrestaShop installation:
MariaDB [(none)]> CREATE DATABASE ampachedb;
MariaDB [(none)]> CREATE USER 'ampache'@'localhost' IDENTIFIED BY 'your-strong-passwd';
MariaDB [(none)]> GRANT ALL PRIVILEGES ON ampachedb.* TO 'ampache'@'localhost';
MariaDB [(none)]> FLUSH PRIVILEGES;
MariaDB [(none)]> EXIT;
Step 5. Configuring Apache for Ampache.
Now we create a new virtual host directive in Apache. For example, create a new Apache configuration file named ‘ampache.conf’ on your virtual server:
sudo nano /etc/apache2/sites-available/ampache.conf
Add the following lines:
<VirtualHost *:80>
     ServerAdmin admin@your-domain.com
     DocumentRoot /var/www/ampache
     ServerName example.com
     ServerAlias www.your-domain.com

     <Directory /var/www/glpi/>
        Options +FollowSymlinks
        AllowOverride All
        Require all granted
     </Directory>

     ErrorLog ${APACHE_LOG_DIR}/error.log
     CustomLog ${APACHE_LOG_DIR}/access.log combined

</VirtualHost>
Now, we can restart the Apache webserver so that the changes take place:
sudo a2enmod rewrite
sudo a2ensite ampache.conf
sudo systemctl restart apache2.service
Step 6. Accessing Ampache Web Interface.
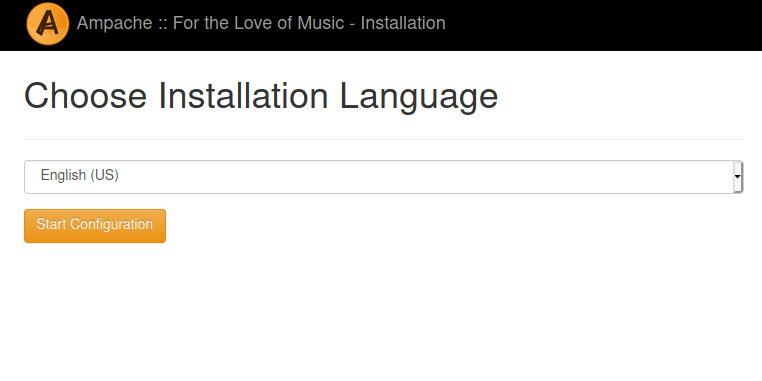
Ampache will be available on HTTP port 80 by default. Open your favorite browser and navigate to http://your-domain.com/ and complete the required steps to finish the installation. If you are using a firewall, please open port 80 to enable access to the control panel.
Select Ampache’s interface language and click the Start Configuration button to continue.

Congratulations! You have successfully installed Ampache. Thanks for using this tutorial for installing the Ampache music streaming server on Ubuntu 20.04 LTS Focal Fossa system. For additional help or useful information, we recommend you to check the official Ampache website.