In this tutorial, we will show you how to install Apache Hadoop on Debian 11. For those of you who didn’t know, Apache Hadoop is an open-source, Java-based software platform that manages data processing and storage for big data applications. It is designed to scale up from single servers to thousands of machines, each offering local computation and storage.
This article assumes you have at least basic knowledge of Linux, know how to use the shell, and most importantly, you host your site on your own VPS. The installation is quite simple and assumes you are running in the root account, if not you may need to add ‘sudo‘ to the commands to get root privileges. I will show you the step-by-step installation of the Apache Hadoop on a Debian 11 (Bullseye).
Prerequisites
- A server running one of the following operating systems: Debian 11 (Bullseye).
- It’s recommended that you use a fresh OS install to prevent any potential issues.
- SSH access to the server (or just open Terminal if you’re on a desktop).
- A
non-root sudo useror access to theroot user. We recommend acting as anon-root sudo user, however, as you can harm your system if you’re not careful when acting as the root.
Install Apache Hadoop on Debian 11 Bullseye
Step 1. Before we install any software, it’s important to make sure your system is up to date by running the following apt commands in the terminal:
sudo apt update
sudo apt upgrade
Step 2. Installing Java.
Apache Hadoop is a Java-based application. So you will need to install Java in your system:
sudo apt install default-jdk default-jre
Verify the Java installation:
java -version
Step 3. Creating Hadoop User.
Run the following command to create a new user with the name Hadoop:
adduser hadoop
Next, switch to Hadoop user once the user has been created:
su - hadoop
Now it’s time to generate an ssh key because Hadoop requires ssh access to manage its node, remote or local machine so for our single node of the setup of Hadoop we configure it such that we have access to the localhost:
ssh-keygen -t rsa
After that, give permission to the authorized_keys file:
cat ~/.ssh/id_rsa.pub >> ~/.ssh/authorized_keys
chmod 0600 ~/.ssh/authorized_keys
Then, verify the passwordless SSH connection with the following command:
ssh your-server-IP-address
Step 4. Installing Apache Hadoop on Debian 11.
First, switch to Hadoop user and download the latest version of Hadoop from the official page using the following wget command:
su - hadoop
wget https://www.apache.org/dyn/closer.cgi/hadoop/common/hadoop-3.3.1/hadoop-3.3.1-src.tar.gz
Next, extract the downloaded file with the following command:
tar -xvzf hadoop-3.3.1.tar.gz
Once it is unpacked, change the current directory to the Hadoop folder:
su root
cd /home/hadoop
mv hadoop-3.3.1 /usr/local/hadoop
Next, create a directory to store logs with the following command:
mkdir /usr/local/hadoop/logs
Change the ownership of the Hadoop directory to Hadoop:
chown -R hadoop:hadoop /usr/local/hadoop
su hadoop
After that, we configure the Hadoop environment variables:
nano ~/.bashrc
Add the following configuration:
export HADOOP_HOME=/usr/local/hadoop
export HADOOP_INSTALL=$HADOOP_HOME
export HADOOP_MAPRED_HOME=$HADOOP_HOME
export HADOOP_COMMON_HOME=$HADOOP_HOME
export HADOOP_HDFS_HOME=$HADOOP_HOME
export YARN_HOME=$HADOOP_HOME
export HADOOP_COMMON_LIB_NATIVE_DIR=$HADOOP_HOME/lib/native
export PATH=$PATH:$HADOOP_HOME/sbin:$HADOOP_HOME/bin
export HADOOP_OPTS="-Djava.library.path=$HADOOP_HOME/lib/native"
Save and close the file. Then, activate the environment variables:
source ~/.bashrc
Step 5. Configure Apache Hadoop.
- Configure Java environment variables:
sudo nano $HADOOP_HOME/etc/hadoop/hadoop-env.sh
Add the following configuration:
export JAVA_HOME=/usr/lib/jvm/java-11-openjdk-amd64
export HADOOP_CLASSPATH+=" $HADOOP_HOME/lib/*.jar"
Next, we need to download the Javax activation file:
cd /usr/local/hadoop/lib
sudo wget https://jcenter.bintray.com/javax/activation/javax.activation-api/1.2.0/javax.activation-api-1.2.0.jar
Verify the Apache Hadoop version:
hadoop version
Output:
Hadoop 3.3.1
- Configure the core-site.xml file:
nano $HADOOP_HOME/etc/hadoop/core-site.xml
Add the following file:
<configuration>
 <property>
            <name>fs.default.name</name>
        <value>hdfs://0.0.0.0:9000</value>
        <description>The default file system URI</description>
 </property>
</configuration>
- Configure hdfs-site.xml file:
Before configuring create a directory for storing node metadata:
mkdir -p /home/hadoop/hdfs/{namenode,datanode}
chown -R hadoop:hadoop /home/hadoop/hdfs
Next, edit the hdfs-site.xml file and define the location of the directory:
nano $HADOOP_HOME/etc/hadoop/hdfs-site.xml
Add the following line:
<configuration>
     <property>
            <name>dfs.replication</name>
        <value>1</value>
     </property>

     <property>
        <name>dfs.name.dir</name>
        <value>file:///home/hadoop/hdfs/namenode</value>
     </property>

     <property>
        <name>dfs.data.dir</name>
        <value>file:///home/hadoop/hdfs/datanode</value>
     </property>
</configuration>
- Configure mapred-site.xml file:
Now we edit the mapred-site.xml file:
nano $HADOOP_HOME/etc/hadoop/mapred-site.xml
Add the following configuration:
<configuration>
 <property>
        <name>mapreduce.framework.name</name>
        <value>yarn</value>
 </property>
</configuration>
- Configure yarn-site.xml file:
You would need to edit the yarn-site.xml file and define YARN-related settings:
nano $HADOOP_HOME/etc/hadoop/yarn-site.xml
Add the following configuration:
<configuration>
 <property>
        <name>yarn.nodemanager.aux-services</name>
        <value>mapreduce_shuffle</value>
 </property>
</configuration>
- Format HDFS NameNode.
Run the following command to format the Hadoop Namenode:
hdfs namenode -format
- Start the Hadoop Cluster.
Now we start the NameNode and DataNode with the following command below:
start-dfs.sh
Next, start the YARN resource and node managers:
start-yarn.sh
You can now verify them with the following command:
jps
Output:
hadoop@idroot.us:~$ jps
58000 NameNode
54697 DataNode
55365 ResourceManager
55083 SecondaryNameNode
58556 Jps
55365 NodeManager
Step 6. Accessing Hadoop Web Interface.
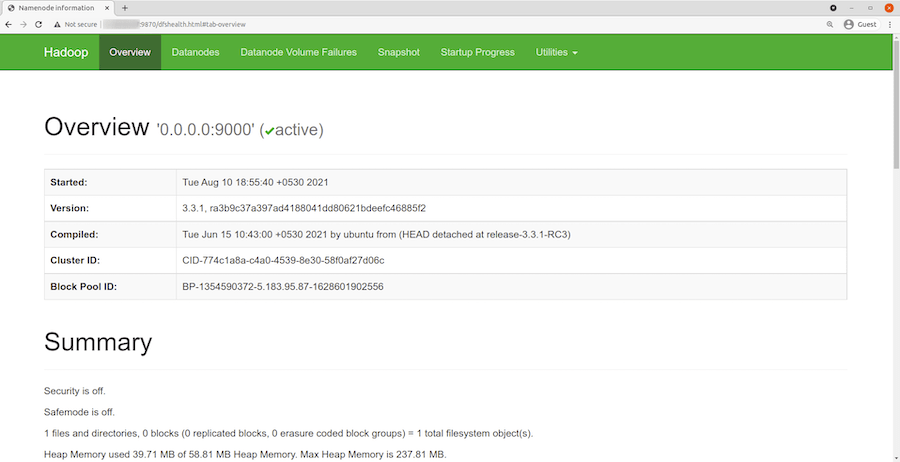
Once successfully installed, open your web browser and access Apache Hadoop using the URL http://your-server-ip-address:9870. You will be redirected to the Hadoop web interface:

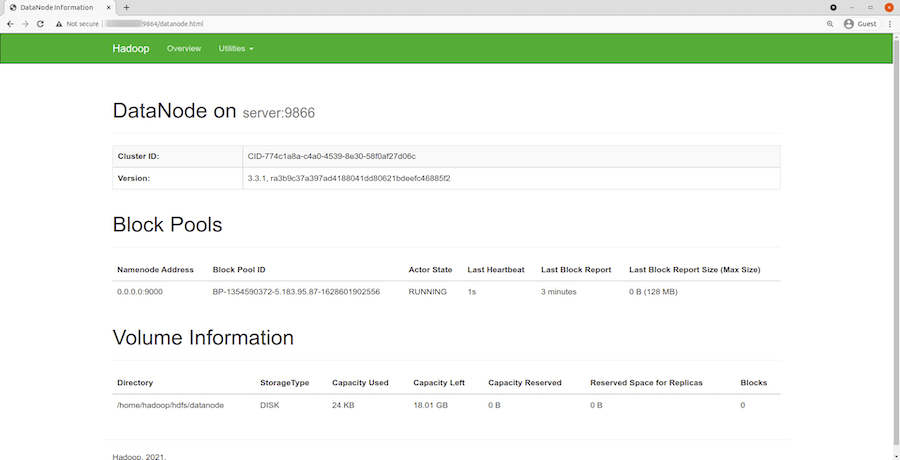
Navigate your localhost URL or IP to access individual DataNodes : http://your-server-ip-address:9864

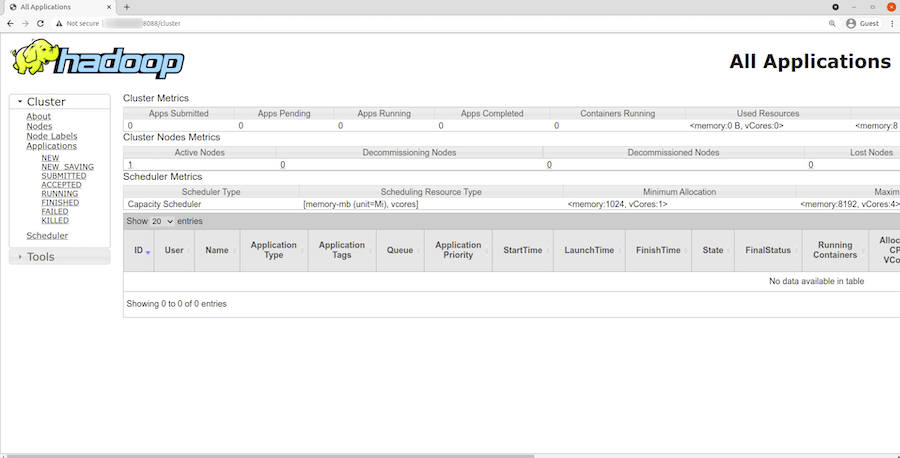
To access the YARN Resource Manager, use the URL http://your-server-ip-adddress:8088. You should see the following screen:

Congratulations! You have successfully installed Hadoop. Thanks for using this tutorial for installing the latest version of Apache Hadoop on Debian 11 Bullseye. For additional help or useful information, we recommend you check the official Apache website.