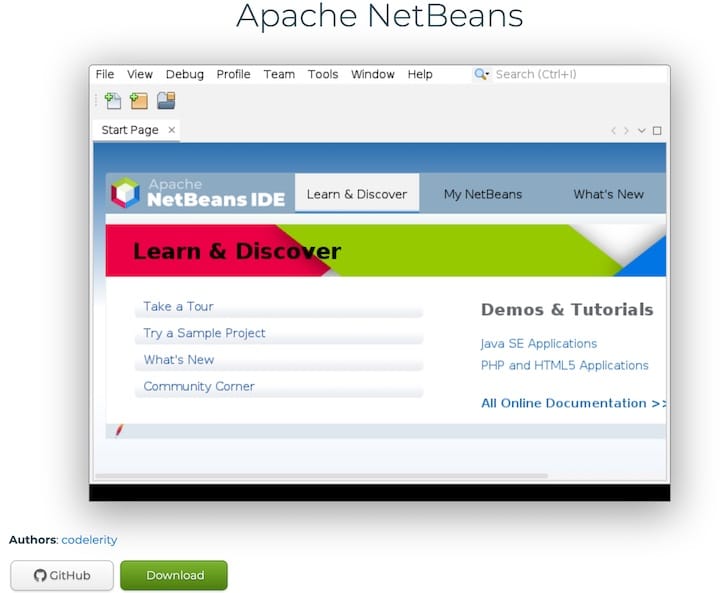
How To Install Apache NetBeans on Debian 12

In this tutorial, we will show you how to install Apache NetBeans on Debian 12. Apache NetBeans is a powerful, versatile Integrated Development Environment (IDE) that has become a favorite among developers for its robust features and support for multiple programming languages. Whether you’re a seasoned Java developer or a newcomer to web development, installing NetBeans on your Debian 12 system can significantly enhance your coding experience. This guide will walk you through various installation methods, configuration steps, and troubleshooting tips to ensure a smooth setup process.
Introduction to Apache NetBeans on Debian 12
Apache NetBeans stands out as a feature-rich IDE that caters to a wide range of development needs. Originally designed for Java development, NetBeans has evolved to support PHP, C/C++, and web technologies, making it a Swiss Army knife for programmers. Its intuitive interface, coupled with powerful code analysis tools and an extensive plugin ecosystem, makes it an excellent choice for both beginners and experienced developers.
Key features of Apache NetBeans include:
- Intelligent code completion and refactoring
- Robust debugging tools
- Built-in GUI builder for rapid application development
- Version control system integration
- Cross-platform compatibility
Debian 12, codenamed “Bookworm,” provides an ideal environment for running NetBeans due to its stability, long-term support, and compatibility with the latest Java versions. The combination of Debian’s reliability and NetBeans’ versatility creates a powerful development setup that can handle projects of any scale.
Prerequisites for Installation
Before diving into the installation process, it’s crucial to ensure your system meets the necessary requirements. Here’s what you’ll need:
System Requirements:
- Debian 12 (Bookworm) installed with sudo privileges
- Minimum 2GB RAM (4GB or more recommended for optimal performance)
- At least 1GB of free disk space
- A stable internet connection for downloading packages
Software Dependencies:
The most critical dependency for Apache NetBeans is the Java Development Kit (JDK). NetBeans requires JDK 11 or later. Here’s how to install the default JDK on Debian 12:
sudo apt update
sudo apt install default-jdk
After installation, verify the Java version:
java -version
javac -version
These commands should display the installed Java version. If you see output indicating Java 11 or higher, you’re good to go.
Lastly, ensure your system is up to date:
sudo apt update && sudo apt upgrade -y
With these prerequisites in place, you’re ready to explore the various methods of installing Apache NetBeans on your Debian 12 system.
Method 1: Install via Snap Package
Snap packages offer a convenient way to install and manage software across different Linux distributions. Here’s how to use Snap to install NetBeans:
Step 1: Enable Snap Support
Debian 12 doesn’t come with Snap pre-installed. To enable it:
sudo apt install snapd
sudo systemctl enable --now snapd.socket
Step 2: Install NetBeans
With Snap enabled, installing NetBeans is straightforward:
sudo snap install netbeans --classic
The `--classic` flag grants the NetBeans snap full system access, which is necessary for proper functionality.
Step 3: Launch NetBeans
You can now launch NetBeans either from the terminal by typing `netbeans` or by finding it in your application menu.
Pros and Cons of Snap Installation:
Pros:
- Automatic updates ensure you always have the latest version
- Easy installation and removal
- Consistent experience across different Linux distributions
Cons:
- Slightly slower startup times compared to native installations
- Some users may experience issues with system integration due to the sandboxed nature of Snap packages
Method 2: Native .deb Package Installation
For those who prefer a more traditional approach, installing NetBeans via a .deb package offers greater control and system integration.
Step 1: Download the .deb Package
Visit the official Apache NetBeans website and download the latest .deb package. Alternatively, use wget:
wget https://dlcdn.apache.org/netbeans/netbeans-installers/24/apache-netbeans_24-1_all.deb
Step 2: Install the Package
Install the downloaded package using the following command:
sudo apt install ./apache-netbeans_24-1_all.deb
If you encounter any dependency errors, resolve them with:
sudo apt --fix-broken install
GUI Alternative
For users who prefer a graphical approach, you can use the Gdebi package installer or the Software Center. Simply double-click the downloaded .deb file, and the system will guide you through the installation process.
Pros and Cons of .deb Installation:
Pros:
- Full system integration
- Potentially faster performance compared to containerized solutions
- Greater control over the installation process
Cons:
- Manual updates required
- Potential for dependency conflicts with other system packages
Method 3: APT Repository Installation
While not always providing the latest version, installing NetBeans through the APT repository can be a straightforward option for many users.
Step 1: Add the Universe Repository
Ensure you have access to the universe repository:
sudo add-apt-repository universe
sudo apt update
Step 2: Install NetBeans
With the repository added, install NetBeans using:
sudo apt install netbeans
Limitations of APT Installation
While this method is simple, it may not provide the most recent version of NetBeans. The version available in the Debian repositories might lag behind the official releases. However, it ensures better system integration and easier management through the APT package system.
Method 4: Flatpak Installation
Flatpak offers another containerized solution for installing NetBeans, providing a balance between isolation and system integration.
Step 1: Install Flatpak
First, install the Flatpak framework:
sudo apt install flatpak
Step 2: Add Flathub Repository
Add the Flathub repository, which hosts a wide range of Flatpak applications:
flatpak remote-add --if-not-exists flathub https://flathub.org/repo/flathub.flatpakrepo
Step 3: Install NetBeans
Now, install NetBeans using Flatpak:
flatpak install flathub org.apache.netbeans
Pros and Cons of Flatpak Installation:
Pros:
- Sandboxed environment for enhanced security
- Easy to update and manage
- Consistent experience across different Linux distributions
Cons:
- May require additional configuration for system integration
- Slightly larger disk space usage due to bundled dependencies
Post-Installation Configuration
After successfully installing Apache NetBeans, it’s time to configure the IDE for optimal performance and functionality.
Initial Setup
- Launch NetBeans from the terminal by typing `
netbeans` or find it in your application menu. - On first launch, NetBeans may prompt you to import settings from a previous installation or start with default settings.
- Configure the default JDK:
– Go to Tools → Java Platforms
– Verify that the correct JDK is selected (JDK 11 or later)
– If needed, add a new platform by clicking “Add Platform” and navigating to your JDK installation directory

Essential Plugins
Enhance your NetBeans experience by installing these useful plugins:
- PHP Tools: For PHP development support
- Git Integration: Streamline version control workflows
- Dark Theme: Customize the IDE’s appearance for reduced eye strain
To install plugins:
– Go to Tools → Plugins
– Browse available plugins or search for specific ones
– Select desired plugins and click “Install”
First Project Test
Verify your NetBeans installation by creating a simple “Hello World” Java project:
- File → New Project → Java → Java Application
- Name your project and click “Finish”
- In the main class file, add the following code:
public class HelloWorld {
    public static void main(String[] args) {
        System.out.println("Hello, NetBeans on Debian 12!");
    }
}
- Build and run the project using the Shift+F6 shortcut or the “Run” button
- Check the output in the IDE’s terminal window
If you see the “Hello, NetBeans on Debian 12!” message, congratulations! Your NetBeans installation is working correctly.
Troubleshooting Common Issues
Even with a smooth installation, you might encounter some issues. Here are solutions to common problems:
Java Version Conflicts
If NetBeans fails to recognize the correct Java version:
- Open a terminal and run:
sudo update-alternatives --config java- Select the appropriate Java version from the list
- Restart NetBeans
GUI Launch Failures
If NetBeans fails to launch or shows a blank window:
- Try resetting NetBeans preferences:
netbeans --reset- If the issue persists, check the NetBeans log file in `
~/.netbeans/version/var/log/messages.log` for specific error messages
Snap Permissions
For Snap installations, you might need to grant additional permissions:
sudo snap connect netbeans:removable-media
This allows NetBeans to access files outside of your home directory.
Uninstalling NetBeans
If you need to remove NetBeans, the process varies depending on your installation method:
Snap Removal
sudo snap remove netbeans
APT Removal
sudo apt purge netbeans
sudo apt autoremove
Flatpak Removal
flatpak uninstall org.apache.netbeans
For .deb installations, use the APT removal method.
Version Comparison: Snap vs .deb vs Flatpak
To help you choose the best installation method for your needs, here’s a comparison of the different approaches:
| Criteria | Snap | .deb | Flatpak |
|---|---|---|---|
| Update Frequency | Automatic | Manual | Manual |
| Isolation | Sandboxed | System-wide | Sandboxed |
| Disk Space | ~450MB | ~350MB | ~500MB |
| Dependency Handling | Bundled | System Packages | Bundled |
| System Integration | Limited | Full | Moderate |
Congratulations! You have successfully installed NetBeans. Thanks for using this tutorial for installing the latest version of Apache NetBeans on Debian 12 “Bookworm”. For additional help or useful information, we recommend you check the official Apache NetBeans website.