How To Install Apache Web Server on AlmaLinux 9

In this tutorial, we will show you how to install Apache Web Server on AlmaLinux 9. For those of you who didn’t know, Apache Web Server is a powerful and versatile open-source web server software that has been a cornerstone of the internet for decades. As one of the most popular web servers globally, Apache powers millions of websites and is known for its reliability, flexibility, and robust feature set. AlmaLinux 9, on the other hand, is a free, open-source, and community-driven Linux distribution that serves as a stable and production-ready alternative to CentOS.
This article assumes you have at least basic knowledge of Linux, know how to use the shell, and most importantly, you host your site on your own VPS. The installation is quite simple and assumes you are running in the root account, if not you may need to add ‘sudo‘ to the commands to get root privileges. I will show you the step-by-step installation of the Apache Web Server on AlmaLinux 9. You can follow the same instructions for CentOS and Rocky Linux.
Prerequisites
- A server running one of the following operating systems: AlmaLinux 9.
- It’s recommended that you use a fresh OS install to prevent any potential issues.
- SSH access to the server (or just open Terminal if you’re on a desktop).
- An active internet connection.
- A
non-root sudo useror access to theroot user. We recommend acting as anon-root sudo user, however, as you can harm your system if you’re not careful when acting as the root.
Install Apache Web Server on AlmaLinux 9
Step 1. Update the System.
Keeping your system up-to-date is crucial for maintaining security and ensuring compatibility with the latest software versions. Before installing Apache, it’s essential to update your AlmaLinux 9 system. Open your terminal and run the following commands:
sudo dnf clean all
sudo dnf update
sudo dnf groupinstall "Development Tools"
Step 2. Installing Apache Web Server on AlmaLinux 9.
By default, Apache is available on the AlmaLinux 9 base repository. Now we install the latest version of Apache using dnf the command:
sudo dnf install httpd httpd-tools
You can start the httpd service and configure it to run on startup by entering the following commands:
sudo systemctl start httpd
sudo systemctl enable httpd
sudo systemctl status httpd
Step 3. Configure Firewall.
To make your pages available to the public, you will have to edit your firewall rules to allow HTTP and HTTPS requests on your web server by using the following commands:
sudo firewall-cmd --permanent --zone=public --add-service=http
sudo firewall-cmd --permanent --zone=public --add-service=https
sudo firewall-cmd --reload
These commands add exceptions for HTTP (port 80) and HTTPS (port 443) traffic and then reload the firewall to apply the changes. The --permanent flag ensures that these rules persist across system reboots.
To verify that the ports are open, you can use the following command:
sudo firewall-cmd --list-all
Look for “http” and “https” in the services list to confirm the changes were applied successfully.
Step 4. Accessing Apache Web Interface.
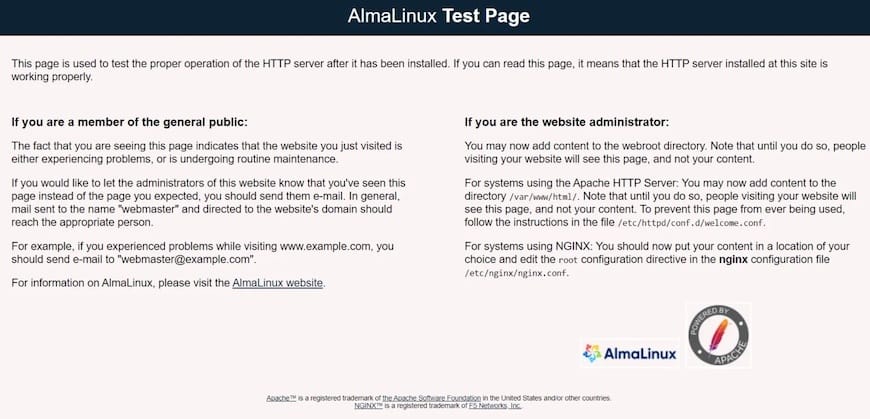
With Apache installed, running, and the firewall configured, it’s time to verify that everything is working correctly. Open a web browser and navigate to your server’s IP address or domain name.
If you don’t know your server’s IP address, you can find it by running:
ip addr show
Look for the inet value under your primary network interface (usually eth0 or ens3).

Step 5. Configure Virtual Hosts.
Virtual hosts allow you to host multiple websites on a single Apache server. This feature is particularly useful for efficiently managing multiple domains or subdomains.
Create a directory for your website:
sudo mkdir -p /var/www/html/example.com/public_html
Add some basic HTML content:
<html>
<head>
<title>Welcome to idroot.us</title>
</head>
<body>
<h1>Success! The idroot.us virtual host is working!</h1>
</body>
</html>
Set up the virtual host configuration file:
sudo nano /etc/httpd/conf.d/example.com.conf
Add the following configuration:
<VirtualHost *:80>
ServerName example.com
ServerAlias www.example.com
DocumentRoot /var/www/html/example.com/public_html
ErrorLog /var/log/httpd/example.com-error.log
CustomLog /var/log/httpd/example.com-access.log combined
</VirtualHost>
Adjust permissions:
sudo chown -R apache:apache /var/www/html/example.com
Restart Apache to apply changes:
sudo systemctl restart httpd
Remember to replace “example.com” with your actual domain name throughout these steps.
Step 7: Enable HTTPS with Let’s Encrypt.
Securing your website with HTTPS is crucial for protecting user data and improving search engine rankings. Let’s Encrypt provides free SSL certificates that are easy to set up.
First, install Certbot, a tool that automates the process of obtaining and renewing Let’s Encrypt certificates:
sudo dnf install certbot python3-certbot-apache
Next, run Certbot to obtain and install a certificate:
sudo certbot --apache -d example.com -d www.example.com
Follow the on-screen prompts to complete the process. Certbot will automatically modify your Apache configuration to use the new SSL certificate.
To verify the HTTPS configuration, visit your website using https:// in your browser. You should see a padlock icon indicating a secure connection.
Congratulations! You have successfully installed Apache. Thanks for using this tutorial for installing the Apache HTTP Server on your AlmaLinux 9 system. For additional help or useful information, we recommend you check the official Apache website.