How To Install ClamAV on Ubuntu 24.04 LTS

In this tutorial, we will show you how to install ClamAV on Ubuntu 24.04 LTS. ClamAV is a powerful, open-source antivirus software that provides robust protection against malware, viruses, and other security threats. While Linux systems are generally considered more secure than their Windows counterparts, it is still crucial to install antivirus software to ensure the integrity of your system.
This article assumes you have at least basic knowledge of Linux, know how to use the shell, and most importantly, you host your site on your own VPS. The installation is quite simple and assumes you are running in the root account, if not you may need to add ‘sudo‘ to the commands to get root privileges. I will show you the step-by-step installation of the ClamAV on Ubuntu 24.04 (Noble Numbat). You can follow the same instructions for Ubuntu 22.04 and any other Debian-based distribution like Linux Mint, Elementary OS, Pop!_OS, and more as well.
Prerequisites
- A server running one of the following operating systems: Ubuntu and any other Debian-based distribution like Linux Mint.
- It’s recommended that you use a fresh OS install to prevent any potential issues.
- SSH access to the server (or just open Terminal if you’re on a desktop).
- An active internet connection. You’ll need an internet connection to download the necessary packages and dependencies.
- An Ubuntu 24.04 system with root access or a user with sudo privileges.
Install ClamAV on Ubuntu 24.04 LTS
Step 1. Preparing Your System.
To begin, it’s essential to update your system packages to their latest versions. This ensures compatibility and security. Open a terminal and execute the following commands:
sudo apt update
sudo apt upgrade
The sudo apt update command refreshes the package list from the Ubuntu repositories, while sudo apt upgrade installs any available updates for your installed packages. This process may take a few minutes, depending on the number of updates available and your internet connection speed.
Step 2. Installing ClamAV on Ubuntu 24.04.
With your system updated, you can now proceed to install ClamAV. The main packages required are clamav and clamav-daemon. To install them, run the following command:
sudo apt install clamav clamav-daemon
The clamav package contains the core ClamAV scanner, while clamav-daemon runs the scanner as a background service. The package manager will handle the installation and any necessary dependencies.
Step 3. Update ClamAV Signature Database.
ClamAV relies on a virus signature database to detect and identify malware. It’s crucial to update this database regularly to ensure protection against the latest threats. Follow these steps to update the signature database:
-
- Stop the ClamAV daemon:
sudo systemctl stop clamav-freshclam
-
- Update the signature database:
sudo freshclam
-
- Start the ClamAV daemon:
sudo systemctl start clamav-freshclam
By stopping the daemon before updating, you prevent any conflicts that may arise during the update process. Once the update is complete, restart the daemon to ensure ClamAV is using the latest signatures.
Step 4. Basic Usage of ClamAV.
With ClamAV installed and the signature database updated, you can now perform basic scans on your system. Here are a few common examples:
-
- Scan a specific directory:
clamscan /path/to/directory
-
- Scan a specific file:
clamscan /path/to/file
-
- Scan a directory recursively and display infected files:
clamscan -r --bell -i /home/user/Downloads
The --bell option plays a sound when an infected file is found, while -i displays only infected files. The -r flag enables recursive scanning, allowing ClamAV to scan subdirectories as well.
Step 5. Automating ClamAV with Cron Jobs
Regular scanning is essential to maintain a secure system. You can automate ClamAV scans using cron jobs. Follow these steps to set up a cron job:
crontab -e
Add the following line to schedule a daily scan at 2 AM:
0 2 * * * /usr/bin/clamscan -r /home/user
The cron job will run the specified clamscan command every day at 2 AM, scanning the /home/user directory recursively. Adjust the directory path and schedule according to your needs.
Step 6. Installing ClamTK.
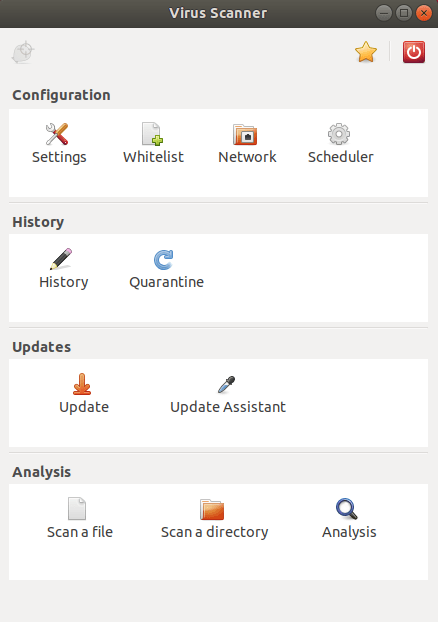
ClamTK is a graphical user interface (GUI) for ClamAV, providing a user-friendly way to interact with the antivirus software. To install ClamTK, run the following command:
sudo apt install clamtk
Once installed, you can launch ClamTK from your application menu and perform scans, view scan results, and update the signature database through the intuitive interface.

Congratulations! You have successfully installed ClamAV. Thanks for using this tutorial for installing the ClamAV on the Ubuntu 24.04 LTS system. For additional help or useful information, we recommend you check the ClamAV website.