How To Install CockroachDB on AlmaLinux 9

In this tutorial, we will show you how to install CockroachDB on AlmaLinux 9. In the ever-evolving landscape of database management systems, CockroachDB has emerged as a powerful and resilient solution for modern applications. Known for its scalability, strong consistency, and distributed architecture, CockroachDB is an excellent choice for businesses seeking to handle high-volume transactions and ensure data integrity across multiple nodes.
This article assumes you have at least basic knowledge of Linux, know how to use the shell, and most importantly, you host your site on your own VPS. The installation is quite simple and assumes you are running in the root account, if not you may need to add ‘sudo‘ to the commands to get root privileges. I will show you the step-by-step installation of the CockroachDB on AlmaLinux 9. You can follow the same instructions for CentOS and Rocky Linux or RHEL-based.
Prerequisites
- A server running one of the following operating systems: AlmaLinux 9.
- It’s recommended that you use a fresh OS install to prevent any potential issues.
- SSH access to the server (or just open Terminal if you’re on a desktop).
- An active internet connection. You’ll need an internet connection to download the necessary packages and dependencies.
- CockroachDB requires a minimum of 2 CPU cores and 4 GB of RAM. However, for optimal performance, it is recommended to have at least 4 CPU cores and 8 GB of RAM, especially for production environments.
- You’ll need root or sudo privileges to install CockroachDB and make system-wide changes. Make sure you have the necessary permissions before starting the installation process.
Install CockroachDB on AlmaLinux 9
Step 1. Update Your System.
To ensure a smooth installation process, it is recommended to update your AlmaLinux 9 system to the latest version. Open a terminal and run the following command:
sudo dnf clean all
sudo dnf update
This command will update all the installed packages to their latest versions, including any security patches and bug fixes.
Step 2. Installing Necessary Dependencies.
CockroachDB requires a few additional dependencies to function properly. Install them by executing the following command:
sudo dnf install wget curl tar
Step 3. Installing CockroachDB.
Open a web browser and navigate to the official CockroachDB download page. This page provides the latest stable version of CockroachDB for Linux systems.
On the download page, locate the “Linux” section and copy the download link for the latest stable version. At the time of writing, the latest stable version is v22.1.11. Use the following command to download the CockroachDB binary using wget:
wget https://binaries.cockroachdb.com/cockroach-v22.1.11.linux-amd64.tgz
To ensure the integrity of the downloaded file, you can compare the checksum of the downloaded archive with the provided checksum on the download page. Run the following command to calculate the SHA256 checksum of the downloaded file:
sha256sum cockroach-v22.1.11.linux-amd64.tgz
Compare the generated checksum with the one provided on the download page to verify that the file was downloaded correctly.
Next, use the tar command to extract the downloaded archive:
tar -xvf cockroach-v22.1.11.linux-amd64.tgz
Navigate to the extracted directory and move the CockroachDB binary to a system path, such as /usr/local/bin, to make it accessible system-wide:
cd cockroach-v22.1.11.linux-amd64
sudo mv cockroach /usr/local/bin/
To ensure that the CockroachDB binary has the necessary permissions to run, execute the following command:
sudo chmod +x /usr/local/bin/cockroach
To verify that CockroachDB is installed correctly, run the following command:
cockroach version
Step 4. Initializing the CockroachDB Cluster.
With CockroachDB installed, let’s initialize a single-node cluster:
Choose a directory where CockroachDB will store its data. For example, you can create a directory named cockroach-data in your home directory:
mkdir ~/cockroach-data
To start a single-node CockroachDB cluster, run the following command:
cockroach start-single-node --insecure --listen-addr=localhost --background
To ensure that the CockroachDB cluster starts automatically on system boot, you can create a systemd service. Create a file named cockroachdb.service in the /etc/systemd/system directory with the following content:
[Unit]
Description=CockroachDB
After=network.target

[Service]
Type=simple
ExecStart=/usr/local/bin/cockroach start-single-node --insecure --listen-addr=localhost
Restart=always
RestartSec=10

[Install]
WantedBy=multi-user.target
Save the file and run the following commands to enable and start the service:
sudo systemctl enable cockroachdb.service
sudo systemctl start cockroachdb.service
Step 5. Configuring CockroachDB.
Now that the CockroachDB cluster is up and running, let’s perform some basic configuration:
To interact with the CockroachDB cluster, you can use the built-in SQL shell. Run the following command to access the shell:
cockroach sql --insecure
Inside the SQL shell, create a new user by executing the following SQL statement:
CREATE USER myuser WITH PASSWORD 'mypassword';
To create a new database, run the following SQL statement:
CREATE DATABASE mydb;
To allow the newly created user to access and modify the database, grant the necessary privileges:
GRANT ALL ON DATABASE mydb TO myuser;
To exit the CockroachDB SQL shell, type \q and press Enter.
Step 6. Testing the Installation.
Let’s perform some basic tests to verify that the CockroachDB installation is functioning correctly:
Access the CockroachDB SQL shell again, this time using the newly created user:
cockroach sql --insecure --user=myuser --database=mydb
Inside the SQL shell, run some basic SQL commands to interact with the database. For example:
CREATE TABLE users (id INT PRIMARY KEY, name STRING);
INSERT INTO users (id, name) VALUES (1, 'Mey Shela');
SELECT * FROM users;
These commands will create a new table named users, insert a row into it, and retrieve the data.
Step 7. Configure Firewall.
To allow CockroachDB to communicate with other nodes and clients, you need to configure the firewall to permit the necessary traffic. Run the following commands to open the required ports:
sudo firewall-cmd --permanent --add-port=26257/tcp
sudo firewall-cmd --permanent --add-port=8080/tcp
sudo firewall-cmd --reload
These commands will open port 26257 for inter-node communication and port 8080 for the CockroachDB web interface.
Step 8. Check the CockroachDB Web Interface.
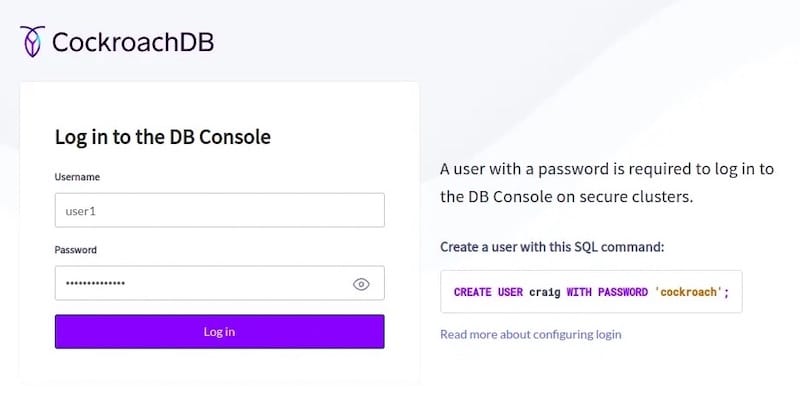
CockroachDB provides a web-based interface for monitoring and managing the cluster. Open a web browser and navigate to http://localhost:8080. You should see the CockroachDB web interface displaying the cluster overview and metrics.

Congratulations! You have successfully installed CockroachDB. Thanks for using this tutorial for installing the CockroachDB on your AlmaLinux 9 system. For additional help or useful information, we recommend you check the official CockroachDB website.