How To Install CodeIgniter on Ubuntu 24.04 LTS

In this tutorial, we will show you how to install CodeIgniter on Ubuntu 24.04 LTS. CodeIgniter has long been a favorite among PHP developers for its ease of use, excellent performance, and minimal configuration requirements. As web technologies evolve, CodeIgniter continues to adapt, offering a reliable platform for building modern web applications. This tutorial focuses on installing CodeIgniter 4, the latest major version, which brings significant improvements and new features to the framework.
This article assumes you have at least basic knowledge of Linux, know how to use the shell, and most importantly, you host your site on your own VPS. The installation is quite simple and assumes you are running in the root account, if not you may need to add ‘sudo‘ to the commands to get root privileges. I will show you the step-by-step installation of the CodeIgniter on Ubuntu 24.04 (Noble Numbat). You can follow the same instructions for Ubuntu 22.04 and any other Debian-based distribution like Linux Mint, Elementary OS, Pop!_OS, and more as well.
Prerequisites
- A server running one of the following operating systems: Ubuntu and any other Debian-based distribution like Linux Mint.
- It’s recommended that you use a fresh OS install to prevent any potential issues.
- Basic familiarity with the terminal and command-line interface.
- SSH access to the server (or just open Terminal if you’re on a desktop).
- An active internet connection. You’ll need an internet connection to download the necessary packages and dependencies.
- An Ubuntu 24.04 system with root access or a user with sudo privileges.
Install CodeIgniter on Ubuntu 24.04
Step 1. Updating the Package Repository.
Keeping your system up-to-date is crucial for security and performance. Start by updating your package lists and upgrading installed packages:
sudo apt update
sudo apt upgrade
These commands will fetch the latest package information and upgrade any outdated packages to their latest versions.
Step 2. Installing Apache Web Server.
Apache is a popular web server that works seamlessly with CodeIgniter. To install Apache:
sudo apt install apache2
After installation, start and enable Apache to run on system boot:
sudo systemctl start apache2
sudo systemctl enable apache2
Verify the installation by opening your server’s IP address in a web browser. You should see the default Apache welcome page.
Step 3. Installing PHP and Required Extensions.
CodeIgniter 4 requires PHP 7.4 or later. Ubuntu 24.04 comes with PHP 8.3 by default, which is compatible with CodeIgniter 4. Install PHP and necessary extensions:
sudo apt install php libapache2-mod-php php-mysql php-curl php-json php-cgi php-xsl php-intl php-mbstring php-zip php-xml -y
This command installs PHP along with extensions commonly used in web development. After installation, restart Apache to apply changes:
sudo systemctl restart apache2
To verify PHP installation, create a PHP info file:
echo "<?php phpinfo(); ?>" | sudo tee /var/www/html/phpinfo.php
Access this file through your web browser (http://your_server_ip/phpinfo.php) to see PHP configuration details.
Step 4. Installing MySQL Database Server.
While CodeIgniter supports various databases, MySQL is a popular choice. Install MySQL server:
sudo apt install mysql-server
Secure your MySQL installation by running the security script:
sudo mysql_secure_installation
Follow the prompts to set a root password and remove insecure default settings.
Step 5. Installing Composer.
Composer is a dependency management tool for PHP that simplifies the process of installing and updating CodeIgniter. Install Composer with these commands:
curl -sS https://getcomposer.org/installer | php
sudo mv composer.phar /usr/local/bin/composer
sudo chmod +x /usr/local/bin/composer
Verify the installation:
composer --version
Step 6. Installing CodeIgniter via Composer.
With Composer installed you can now easily set up CodeIgniter. Navigate to your web root directory:
cd /var/www/html
Create a new CodeIgniter project:
sudo composer create-project codeigniter4/appstarter ci4-project
This command creates a new directory called ci4-project containing a fresh CodeIgniter 4 installation.
Step 7. Configure Apache for CodeIgniter.
Create a new Apache virtual host configuration for your CodeIgniter application:
sudo nano /etc/apache2/sites-available/codeigniter.conf
Add the following configuration, replacing your_domain.com with your actual domain:
<VirtualHost *:80>
ServerAdmin webmaster@your_domain.com
ServerName your_domain.com
DocumentRoot /var/www/html/ci4-project/public

<Directory /var/www/html/ci4-project/public>
Options Indexes FollowSymLinks
AllowOverride All
Require all granted
</Directory>

ErrorLog ${APACHE_LOG_DIR}/error.log
CustomLog ${APACHE_LOG_DIR}/access.log combined
</VirtualHost>
Save and close the file. Enable the new configuration and disable the default site:
sudo a2ensite codeigniter.conf
sudo a2dissite 000-default.conf
Enable the rewrite module and restart Apache:
sudo a2enmod rewrite
sudo systemctl restart apache2
Ensure Apache can read and write to the necessary directories:
sudo chown -R www-data:www-data /var/www/html/ci4-project
sudo chmod -R 755 /var/www/html/ci4-project
Step 8. Configure Database Connection.
Edit the database configuration file:
sudo nano /var/www/html/ci4-project/app/Config/Database.php
Update the default database settings:
public $default = [
'DSN' => '',
'hostname' => 'localhost',
'username' => 'your_mysql_username',
'password' => 'your_mysql_password',
'database' => 'your_database_name',
'DBDriver' => 'MySQLi',
'DBPrefix' => '',
'pConnect' => false,
'DBDebug' => (ENVIRONMENT !== 'production'),
'charset' => 'utf8',
'DBCollat' => 'utf8_general_ci',
'swapPre' => '',
'encrypt' => false,
'compress' => false,
'strictOn' => false,
'failover' => [],
'port' => 3306,
];
Replace your_mysql_username, your_mysql_password, and your_database_name with your actual MySQL credentials and database name.
Step 9. Test CodeIgniter Installation.
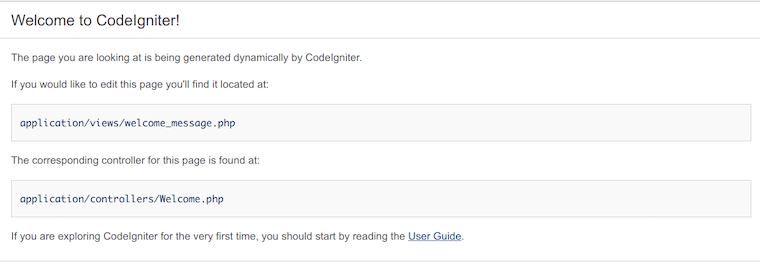
Access your CodeIgniter application through a web browser: http://your_domain.com. You should see the CodeIgniter welcome page, indicating a successful installation.

If you encounter issues, check Apache error logs:
sudo tail -f /var/www/log/error.log
Congratulations! You have successfully installed CodeIgniter. Thanks for using this tutorial for installing CodeIgniter on the Ubuntu 24.04 LTS system. For additional help or useful information, we recommend you check the official CodeIgniter website.