How To Install Craft CMS on Ubuntu 24.04 LTS

Craft CMS is a powerful content management system renowned for its flexibility and user-friendly interface. Whether you’re a developer or a content creator, Craft CMS offers robust features that cater to diverse website needs. Installing Craft CMS on Ubuntu 24.04 LTS ensures you leverage the latest stability and security updates of this long-term support release.
Prerequisites
System Requirements
- Operating System: Ubuntu 24.04 LTS
- CPU: Minimum 1 GHz
- RAM: At least 1 GB (2 GB recommended)
- Storage: Minimum 10 GB free space
- PHP: Version 8.2 or higher
- Database: MySQL 8.0.17+, MariaDB 10.4.6+, or PostgreSQL 13+
Server Requirements
- Ubuntu 24.04 LTS installed and updated
- A domain name pointing to your server’s IP address
- Root or non-root user with sudo privileges
Network Requirements
- Stable internet connection for downloading dependencies
Step 1: Update the System
Keeping your system updated is crucial for security and performance. Execute the following commands to update and upgrade your Ubuntu system:
sudo apt update && sudo apt upgrade -yThis command updates the package list and upgrades installed packages to their latest versions. After completion, verify that your system is fully updated:
sudo apt update && sudo apt upgrade -yStep 2: Install LAMP Stack
The LAMP stack (Linux, Apache, MySQL/MariaDB, PHP) is essential for running Craft CMS. Follow these steps to install each component:
Installing Apache
sudo apt install apache2 -yAfter installation, verify that Apache is running:
sudo systemctl status apache2Installing MariaDB
sudo apt install mariadb-server -ySecure your MariaDB installation:
sudo mysql_secure_installationCreate a database and user for Craft CMS:
sudo mysql -u root -p

CREATE DATABASE craftcms;
CREATE USER 'craftuser'@'localhost' IDENTIFIED BY 'your_password';
GRANT ALL PRIVILEGES ON craftcms.* TO 'craftuser'@'localhost';
FLUSH PRIVILEGES;
EXIT;
Installing PHP and Required Extensions
sudo apt install php php-cli libapache2-mod-php php-common php-json php-curl php-gd php-imagick php-mbstring php-mysql php-pgsql php-zip php-intl php-xml -yModify PHP settings for Craft CMS compatibility:
sudo nano /etc/php/8.2/apache2/php.iniUpdate the following parameters:
- memory_limit = 512M
- post_max_size = 32M
- upload_max_filesize = 32M
- max_execution_time = 360
Save and exit the editor, then restart Apache:
sudo systemctl restart apache2Step 3: Install Composer
Composer is a dependency manager for PHP, essential for installing Craft CMS. Install Composer globally using the following command:
curl -sS https://getcomposer.org/installer | sudo php -- --install-dir=/usr/local/bin --filename=composerVerify the installation:
composer --versionYou should see an output similar to:
Composer version 2.x.x
Step 4: Download and Install Craft CMS
Navigate to Apache’s web root directory and create a new folder for Craft CMS:
cd /var/www/html
sudo mkdir craftcms
sudo chown -R www-data:www-data /var/www/html/craftcms
sudo chmod -R 755 /var/www/html/craftcms
Change to the Craft CMS directory and use Composer to create a new Craft CMS project:
cd /var/www/html/craftcms
sudo -u www-data composer create-project craftcms/craft .
The Craft installation wizard will prompt you for database credentials and admin account details. Provide the information for the database and create an admin account as follows:
Welcome to Craft CMS!
Are you ready to begin the setup? (yes|no) [no]: yes

Which database driver are you using? (mysql or pgsql) [mysql]: mysql
Database server name or IP address: [127.0.0.1]: 127.0.0.1
Database port: [3306]: 3306
Database username: [root]: craftuser
Database password: ********
Database name: craftcms
Database table prefix: craft_

Install Craft now? (yes|no) [yes]: yes

Username: admin
Email: superadmin@example.com
Password: ********
Confirm: ********
Site name: My Craft CMS
Site URL: craftcms.example.com
Site language: [en-US]: en-US

*** installed Craft successfully (time: X.XXXs)
Upon successful installation, Craft CMS credentials are saved to the .env file.
Step 5: Configure Apache for Craft CMS
Create a new Apache virtual host file for Craft CMS:
sudo nano /etc/apache2/sites-available/craftcms.confInsert the following configuration, replacing yourdomain.com with your actual domain:
<VirtualHost *:80> ServerName yourdomain.com ServerAlias www.yourdomain.com DocumentRoot /var/www/html/craftcms/web <Directory /var/www/html/craftcms/web> Options Indexes FollowSymLinks MultiViews AllowOverride All Require all granted </Directory> ErrorLog ${APACHE_LOG_DIR}/error.log CustomLog ${APACHE_LOG_DIR}/access.log combined </VirtualHost>
Enable the new site and the rewrite module:
sudo a2ensite craftcms.conf
sudo a2enmod rewrite
sudo systemctl restart apache2
Step 6: Secure Craft CMS with Let’s Encrypt SSL
Securing your website with SSL is essential for protecting data and enhancing SEO. Install Certbot and obtain an SSL certificate:
sudo apt install certbot python3-certbot-apache -y
sudo certbot --apache -d yourdomain.com -d www.yourdomain.com
Follow the interactive prompts to configure your SSL certificate. After successful installation, test the SSL renewal process:
sudo certbot renew --dry-runThis ensures that your SSL certificates renew automatically before expiration.
Step 7: Finalize Installation via Web Interface
Access the Craft CMS setup wizard by navigating to http://yourdomain.com in your web browser. Complete the installation by providing the necessary details:
- Database credentials
- Admin username and password
- Site details including name and URL
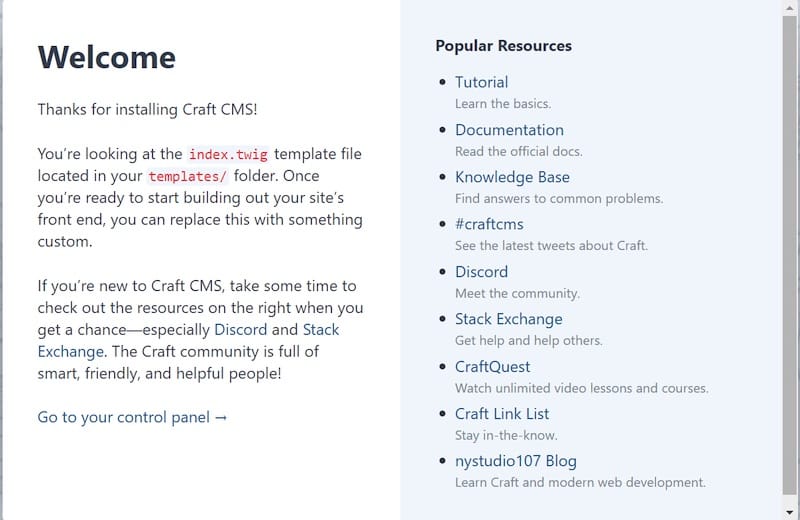
Upon completion, you will be redirected to the Craft CMS dashboard, confirming a successful installation.

Troubleshooting Common Issues
During installation, you might encounter several common issues. Here are solutions to address them:
Permission Issues
If you receive permission denied errors, ensure that the Craft CMS directory has the correct ownership and permissions:
sudo chown -R www-data:www-data /var/www/html/craftcms/
sudo chmod -R 755 /var/www/html/craftcms/
Database Connection Errors
Ensure that your database credentials in the .env file are correct and that the MariaDB/MySQL service is running:
sudo systemctl status mariadbIf the service is not active, start it:
sudo systemctl start mariadbPHP Version Mismatches
Craft CMS requires PHP 8.2 or higher. Verify your PHP version:
php -vIf the version is outdated, consider upgrading PHP:
sudo add-apt-repository ppa:ondrej/php
sudo apt update
sudo apt install php8.2
Congratulations! You have successfully installed Craft CMS. Thanks for using this tutorial for installing Craft CMS on Ubuntu 24.04 LTS Focal Fossa system. For additional help or useful information, we recommend you check the official Craft CMS website.