How To Install Darktable on Linux Mint 22

In this tutorial, we will show you how to install Darktable on Linux Mint 22. In the realm of digital photography, image editing stands as a crucial step in transforming raw captures into stunning visual masterpieces. For Linux enthusiasts and professionals seeking a robust, open-source alternative to proprietary software like Adobe Lightroom, Darktable emerges as a powerful contender. This article will guide you through installing Darktable on Linux Mint 22, ensuring you can unleash your creative potential without constraints. Darktable is a powerful tool. Let’s delve into the installation process.
What is Darktable?
Darktable is an open-source photography workflow application and raw developer. It offers a comprehensive suite of tools for managing, processing, and enhancing digital images. Unlike simple image editors, Darktable is designed explicitly for photographers who work with raw image formats, providing non-destructive editing capabilities. This means your original image remains untouched, preserving its integrity while allowing you to experiment freely.
When comparing Darktable vs Adobe Lightroom, several key differences emerge. Lightroom, while industry-standard, comes with a subscription fee. Darktable, being open source, is completely free to use, making it an attractive option for budget-conscious users. Furthermore, Darktable prides itself on its modular structure and extensive customization options, allowing users to tailor the software to their specific needs and workflows. It’s a great option for those seeking alternatives.
Key features of Darktable include raw image format support, non-destructive editing, powerful color management, and a wide array of image processing modules. From basic adjustments like exposure and contrast to advanced techniques such as tone mapping and noise reduction, Darktable provides the tools necessary to achieve professional-quality results. Darktable’s functionalities are vast.
System Requirements
Before proceeding with the installation, it’s essential to ensure your system meets the necessary requirements for Darktable to run smoothly. These requirements include hardware specifications, such as processor speed, RAM, and storage space, and supported file formats.
The minimum hardware specifications for running Darktable are a multi-core processor, at least 4GB of RAM, and a graphics card with OpenCL support. However, for optimal performance, recommended specifications include a more powerful multi-core processor (e.g., Intel Core i5 or AMD Ryzen 5), 8GB or more of RAM, and a dedicated graphics card with ample video memory. A solid-state drive (SSD) is also recommended for faster loading times and overall responsiveness.
Darktable supports a wide range of file formats, including popular raw formats from various camera manufacturers (e.g., CR2, NEF, ARW), as well as standard image formats like JPEG, TIFF, and PNG. Check the Darktable documentation for a full list of supported file formats to ensure compatibility with your camera and workflow.
Preparing Your System
Prior to installing Darktable, preparing your Linux Mint 22 system will help ensure a smooth and trouble-free installation process. This involves updating your system, installing necessary dependencies, and ensuring a stable internet connection.
Start by updating your system’s package lists to the latest versions. Open a terminal and run the following command:
sudo apt updateThis command synchronizes your system with the software repositories, ensuring you have access to the latest packages and updates. Next, upgrade your installed packages to their newest versions by running:
sudo apt upgradeThis command upgrades all outdated packages on your system, including dependencies required by Darktable. This is essential for resolving potential compatibility issues.
Darktable relies on several dependencies to function correctly. While most of these dependencies should be installed automatically during the installation process, it’s a good practice to ensure they are present on your system. Run the following command to install any missing dependencies:
sudo apt install darktableThis command attempts to install Darktable and its dependencies. If any dependencies are missing, APT (Advanced Package Tool) will automatically download and install them. You can check for Lua, OpenCL, OpenMP and Colord support too.
Installation Methods
There are multiple methods to install Darktable on Linux Mint 22, each with its own advantages and disadvantages. We will explore five common methods: using APT Package Manager, installing via Flatpak, using AppImage, compiling from source, and installing via Snap. Choose the method that best suits your needs and technical expertise.
Method 1: Using APT Package Manager
The APT (Advanced Package Tool) package manager is the standard way to install software on Debian-based systems like Linux Mint. It provides a convenient way to download and install pre-built packages from software repositories.
To install Darktable using APT, open a terminal and run the following commands:
echo 'deb http://download.opensuse.org/repositories/graphics:/darktable:/stable/xUbuntu_22.04/ /' | sudo tee /etc/apt/sources.list.d/graphics:darktable:stable.list
curl -fsSL https://download.opensuse.org/repositories/graphics:darktable:stable/xUbuntu_22.04/Release.key | gpg --dearmor | sudo tee /etc/apt/trusted.gpg.d/graphics_darktable_stable.gpg > /dev/null
sudo apt update
sudo apt install darktable
The first two commands add the Darktable repository to your system’s list of software sources and import the repository’s GPG key for verifying package authenticity. The sudo apt update command refreshes the package lists, and the sudo apt install darktable command downloads and installs Darktable along with its dependencies. Using these commands is often the easiest way to install.
Alternatively, you can download the binary package and unpack it. First, download the Deb file:
wget https://download.opensuse.org/repositories/graphics:/darktable:/stable/xUbuntu_23.04/amd64/darktable_4.2.0~git4.64041571-1+77.1_amd64.debNow, use DPKG to install the file:
sudo dpkg -i ~/Downloads/darktable_4.2.0~git4.64041571-1+77.1_amd64.debThen, install the missing dependencies:
sudo apt-get install -fMethod 2: Installing via Flatpak
Flatpak is a universal package manager that allows you to install applications from a centralized repository, regardless of your Linux distribution. It provides a sandboxed environment for applications, enhancing security and isolating them from the rest of your system. This also takes up more disk space .
To install Darktable via Flatpak, you first need to install Flatpak itself. Open a terminal and run:
sudo apt install flatpakNext, add the Flathub repository, which hosts a wide variety of Flatpak applications:
flatpak remote-add --if-not-exists flathub https://flathub.org/repo/flathub.flatpakrepoFinally, install Darktable using Flatpak:
flatpak install flathub org.darktable.DarktableFlatpak isolates applications in a sandbox. This enhances security, but may also limit access to certain system resources.
Method 3: Using AppImage
AppImage is a portable package format that bundles an application and its dependencies into a single, self-contained file. AppImages are easy to use and don’t require installation, making them a convenient option for trying out software or running applications without modifying your system.
To install Darktable using AppImage, download the latest AppImage file from the official Darktable website. Once the download is complete, make the AppImage executable by running:
chmod +x darktable-<version>.AppImageReplace <version> with the actual version number of the AppImage file. Finally, run the AppImage by double-clicking it or executing it from the terminal:
./darktable-<version>.AppImageUsing AppImage is simple. The file contains everything needed to run.
Method 4: Compiling from Source
Compiling from source involves downloading the source code of Darktable and building the application yourself. This method provides the most control over the installation process, allowing you to customize build options and optimize the application for your specific hardware. However, it requires technical expertise and can be time-consuming.
Before compiling Darktable from source, you need to install the necessary build dependencies. The exact dependencies may vary depending on your system configuration, but the following command should install the most common ones:
sudo apt-get build-dep darktableThis command installs the build dependencies required for Darktable. Next, clone the Darktable repository from GitHub:
git clone --recurse-submodules --depth 1 https://github.com/darktable-org/darktable.gitThis command downloads the Darktable source code to your local machine. Navigate to the Darktable directory:
cd darktableCreate a build directory:
mkdir build
 cd build
Run CMake to configure the build:
cmake -DCMAKE_INSTALL_PREFIX=/opt/darktable/ ..Build Darktable:
cmake --build .Install Darktable:
sudo cmake --install .Compiling from source can offer performance benefits. It allows customization, but requires more effort.
Method 5: Installing via Snap
Snap is another universal package manager that provides a convenient way to install applications on various Linux distributions. Similar to Flatpak, Snap packages are sandboxed, enhancing security and isolating them from the rest of your system.
To install Darktable via Snap, you first need to install Snap itself. Open a terminal and run:
sudo apt install snapdOnce Snap is installed, install Darktable using the following command:
sudo snap install darktable --stableThis command downloads and installs the stable version of Darktable from the Snap Store. Snap packages are easy to install. They provide automatic updates.
Post Installation Steps
After successfully installing Darktable, there are a few post-installation steps to ensure the application is configured correctly and ready for use.
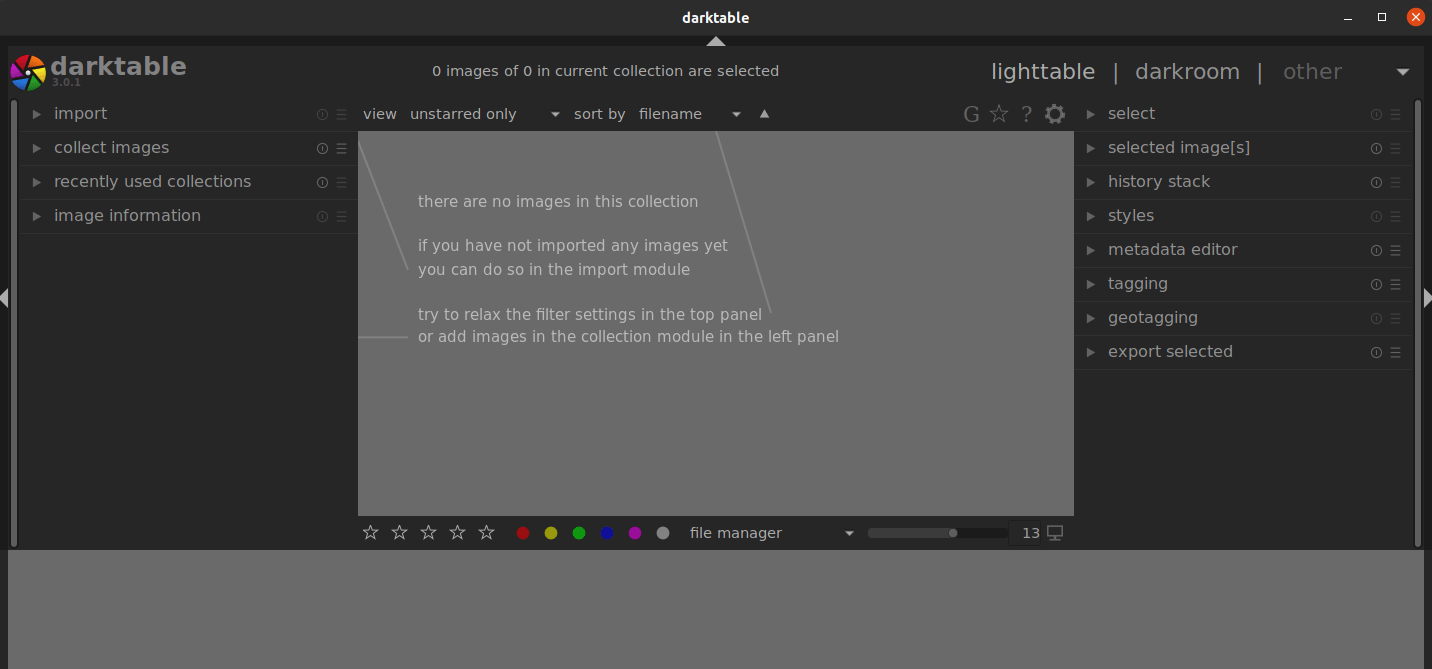
Launch Darktable from the applications menu or by typing darktable in the terminal. The first time you launch Darktable, it may take a few moments to initialize its database and generate thumbnails. The application window should then appear, displaying the lighttable view.

Take some time to explore the Darktable interface and familiarize yourself with its various modules and settings. The preferences dialog allows you to customize various aspects of Darktable, such as the user interface language, memory settings, and OpenCL configuration.
Darktable automatically detects and utilizes OpenCL-enabled graphics cards for faster image processing. To ensure OpenCL is enabled, go to Preferences > Processing and verify that the “OpenCL support” option is checked. If OpenCL is not detected, make sure you have the appropriate drivers installed for your graphics card.
Troubleshooting Common Issues
While the installation process is generally straightforward, you may encounter some common issues. Here are a few troubleshooting tips to help you resolve them.
If you encounter errors during the installation process, such as “package not found” or “dependency not satisfied,” it’s likely due to outdated package lists or missing dependencies. Run the following commands to update your package lists and install any missing dependencies:
sudo apt update
 sudo apt --fix-broken install
These commands synchronize your system with the software repositories and attempt to resolve any dependency issues.
If Darktable fails to launch after installation, it could be due to a corrupted configuration file or a conflict with another application. Try resetting Darktable’s configuration by deleting the ~/.config/darktable directory. This will restore Darktable to its default settings. If Darktable can not be started from terminal, make sure that the path is correct.
If you encounter performance issues, such as slow image processing or sluggish responsiveness, try optimizing Darktable’s memory settings. Go to Preferences > Core options and increase the “maximum memory to use for processing” value. However, be careful not to allocate too much memory, as this could lead to system instability. Darktable performance can be optimized.
Congratulations! You have successfully installed Darktable. Thanks for using this tutorial install the latest version of the Darktable on the Linux Mint 22 system. For additional help or useful information, we recommend you check the official Darktable website.