How To Install Fish Shell on Rocky Linux 9

Rocky Linux 9 is a robust and reliable Linux distribution, offering users a stable platform for various computing needs. One way to enhance your command-line experience on Rocky Linux is by installing the Fish Shell, known for its user-friendly features like syntax highlighting and autosuggestions.
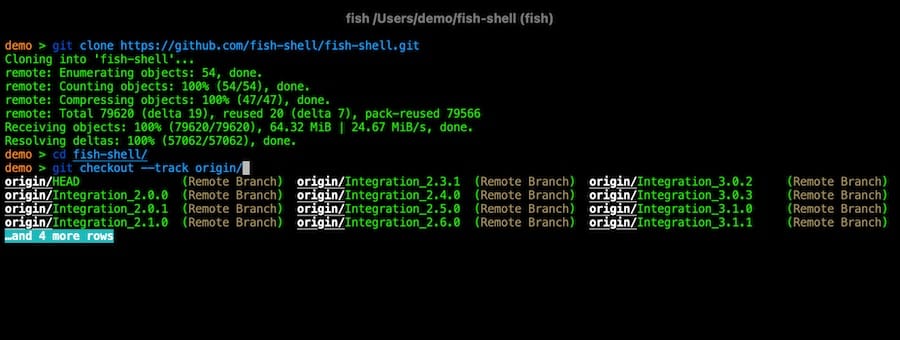
Fish Shell, also known as the Friendly Interactive Shell, is designed to make the command-line interface more accessible and intuitive. It offers several features that improve user experience, including:
- Syntax Highlighting: Fish Shell highlights commands as you type them, making it easier to identify syntax errors.
- Autosuggestions: It provides suggestions based on your command history and common commands, which can be selected using the Tab key.
- Web-Based Configuration: Fish Shell allows users to configure settings through a web interface, making customization more accessible.
Benefits of Using Fish Shell
Using Fish Shell can significantly enhance your productivity and command-line experience:
- Improved User Experience: The interactive features of Fish Shell make it easier for beginners to learn and use the command line.
- Efficiency: Autosuggestions and syntax highlighting help reduce errors and speed up command execution.
- Customization: Fish Shell is highly customizable, allowing users to personalize their command-line environment.
Preparing Rocky Linux 9 for Installation
Before installing Fish Shell, ensure your Rocky Linux 9 system is up to date:
- Update the System: Open a terminal and run the following command to update your system:
sudo dnf update - Check for Existing Installation: Verify if Fish Shell is already installed by running:
fish --versionIf Fish Shell is installed, you will see the version number; otherwise, proceed with the installation.
Installing Fish Shell on Rocky Linux 9
Installing Fish Shell on Rocky Linux 9 is straightforward using the DNF package manager:
- Install Fish Shell: Execute the following command in your terminal:
sudo dnf install fish - Verify Installation: After installation, confirm that Fish Shell is installed by running:
fish --version
Setting Fish Shell as the Default Shell
To make Fish Shell your default shell, follow these steps:
- Install util-linux-user: This package is necessary for changing the default shell. Install it using:
sudo dnf install util-linux-user - Change Default Shell: Run the following command to set Fish Shell as default:
chsh -s /usr/bin/fishYou will be prompted to enter your password.
- Log Out and Log In: For the changes to take effect, log out of your current session and log back in.

Configuring Fish Shell
Fish Shell offers extensive customization options:
Configuration Files
Fish Shell stores its configuration in `~/.config/fish/config.fish`. You can edit this file to add custom settings, such as environment variables or aliases.
Customizing the Prompt
To enhance your prompt, you can use Oh My Fish, a framework for managing Fish Shell themes and plugins:
- Install Git: Ensure Git is installed to clone Oh My Fish:
sudo dnf install git - Install Oh My Fish: Run the following command to install Oh My Fish:
curl https://raw.githubusercontent.com/oh-my-fish/oh-my-fish/master/bin/install | fish - Install Themes: Oh My Fish allows you to install various themes. For example, to install the `
bobthefish` theme, use:omf install bobthefish
Setting Environment Variables
You can add directories to the PATH or set environment variables in your `~/.config/fish/config.fish` file. For example, to add a directory to the PATH:
set -x PATH $PATH /path/to/directoryCreating Aliases
Aliases can simplify common commands. To create an alias, add the following line to your `config.fish` file:
alias ll='ls -l'Advanced Customization with Starship
Starship is a popular prompt for Fish Shell that offers customizable status lines:
- Install Starship: Download and install Starship using the following command:
curl -sS https://starship.rs/install.sh | sh - Configure Starship in Fish: Add the following line to your `
~/.config/fish/config.fish` to enable Starship:source ~/.local/share/starship/init.fish
Troubleshooting Common Issues
- Installation Errors: Ensure your system is updated and that the Fish Shell package is available in your repositories.
- POSIX Compatibility: Fish Shell is not POSIX compliant, which might cause issues with scripts. Use a shebang (`
#!/bin/bash`) to specify the shell for scripts. - SSH Remote Commands: When using SSH with Fish Shell, ensure commands are properly quoted to avoid syntax errors.
Congratulations! You have successfully installed Fish Shell. Thanks for using this tutorial for installing the Fish Shell on your Rocky Linux 9 system. For additional or useful information, we recommend you check the official Fish Shell website.