How To Install Gitea on Debian 12

In this tutorial, we will show you how to install Gitea on Debian 12. Gitea, an open-source Git service, provides a robust and versatile solution for managing repositories and collaborative software development. Its lightweight design, combined with a user-friendly web interface, makes it an excellent choice for individuals and small teams seeking to exercise complete control over their code.
This article assumes you have at least basic knowledge of Linux, know how to use the shell, and most importantly, you host your site on your own VPS. The installation is quite simple and assumes you are running in the root account, if not you may need to add ‘sudo‘ to the commands to get root privileges. I will show you the step-by-step installation of the Gitea on a Debian 12 (Bookworm).
Prerequisites
- A server running one of the following operating systems: Debian 12 (Bookworm).
- It’s recommended that you use a fresh OS install to prevent any potential issues.
- SSH access to the server (or just open Terminal if you’re on a desktop).
- Make sure your Debian 12 system is connected to the internet. An active connection is essential for downloading the required packages and updates during the installation.
- A
non-root sudo useror access to theroot user. We recommend acting as anon-root sudo user, however, as you can harm your system if you’re not careful when acting as the root.
Install Gitea on Debian 12 Bookworm
Step 1. Before we install any software, it’s important to make sure your system is up to date by running the following apt commands in the terminal:
sudo apt update
sudo apt upgrade
This command updates the package list and upgrades the installed packages to their latest versions.
Step 2. Installing Necessary Dependencies.
To build the foundation for Gitea, you need a few essential packages. These include Git, MariaDB, and Go.
- Git
Install Git by executing:
sudo apt install git
- MariaDB
MariaDB serves as the database backend for Gitea. Install it and take the extra step to secure your database:
sudo apt install mariadb-server
sudo mysql_secure_installation
- Go
The Go programming language is needed for building Gitea. Install it like so:
sudo apt install golang-go
Step 3. Creating a Dedicated System User for Gitea.
For security reasons, it’s wise to create a dedicated system user for Gitea. This isolates its operation from the rest of your system:
sudo adduser --system --group --disabled-password --shell /bin/bash git
Step 4. Setting Up the MySQL Database for Gitea.
Now, let’s prepare MariaDB to host the database for Gitea. First, log in as the root user:
sudo mysql -u root -p
Create a database and user for Gitea by executing the following SQL commands. Replace 'your_strong_password' with a strong password of your choice:
CREATE DATABASE gitea;
CREATE USER 'gitea'@'localhost' IDENTIFIED BY 'your_strong_password';
GRANT ALL PRIVILEGES ON gitea.* TO 'gitea'@'localhost';
FLUSH PRIVILEGES;
EXIT;
Step 5. Installing Gitea on Debian 12.
First, clone the Gitea repository using the following command below:
git clone https://github.com/go-gitea/gitea
Build Gitea:
cd gitea
make build
This will compile Gitea from the source code. The resulting binary will be in the gitea directory.
Step 6. Running Gitea as a Service
To run Gitea as a service, you can use systemd. Create a systemd service unit file for Gitea by running:
sudo nano /etc/systemd/system/gitea.service
Paste the following into the file, modifying the paths accordingly:
[Unit]
Description=Gitea (Git with a cup of tea)

[Service]
ExecStart=/path/to/your/gitea executable web
Restart=always
User=git
Group=git
WorkingDirectory=/path/to/your/gitea directory

[Install]
WantedBy=multi-user.target
After creating the systemd service unit, enable and start the Gitea service:
sudo systemctl enable gitea
sudo systemctl start gitea
Step 7. Configuring Gitea as a Reverse Proxy with Nginx.
If you don’t have Nginx installed, you can do so with:
sudo apt install nginx
Next, you’ll create an Nginx configuration file to act as a reverse proxy for Gitea. Create a new Nginx site configuration file for Gitea at /etc/nginx/sites-available/gitea.
sudo nano /etc/nginx/sites-available/gitea
Inside this file, you will define your server block for Gitea. Be sure to replace your_domain.com with your actual domain or IP address. Also, adjust the proxy_pass directive if you configured Gitea to run on a different port.
server {
    listen 80;
    server_name your_domain.com;

    location / {
        proxy_pass http://127.0.0.1:3000; # Assuming Gitea runs on port 3000
        proxy_set_header Host $host;
        proxy_set_header X-Real-IP $remote_addr;
    }
}
After creating the Nginx configuration, create a symbolic link to enable the site:
sudo ln -s /etc/nginx/sites-available/gitea /etc/nginx/sites-enabled/
Test the Nginx configuration for syntax errors:
nginx -t
If no errors are reported, reload Nginx to apply the new configuration:
sudo systemctl reload nginx
Step 8. Configure Firewall.
Allow incoming traffic on port 80, which is the default port used by Nginx for HTTP traffic:
sudo ufw allow 80/tcp
If you are using SSL/TLS with Nginx, allow incoming traffic on port 443, which is the default port used by Nginx for HTTPS traffic:
sudo ufw allow 443/tcp
Enable the firewall:
sudo ufw enable
Step 9. Accessing Gitea Web Interface.
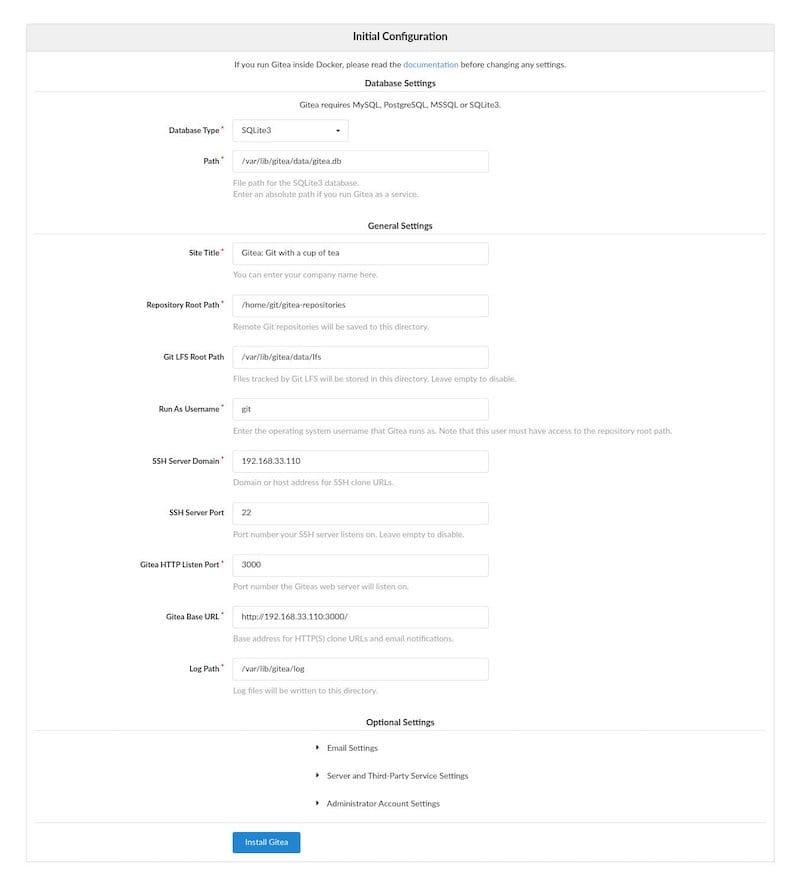
Open your web browser and navigate to http://your_domain.com (replace your_domain.com with your actual domain or IP address) to access your Gitea instance. You should see the Gitea web interface.

Step 10. Securing Gitea with Let’s Encrypt SSL (Optional)
To enhance security, you can secure your Gitea instance with Let’s Encrypt SSL. This step is optional but highly recommended for encrypting data in transit. Here’s a brief overview:
sudo apt install certbot python3-certbot-nginx
Request a Let’s Encrypt certificate:
sudo certbot --nginx
Congratulations! You have successfully installed Gitea. Thanks for using this tutorial to install the latest version of Gitea on Debian 12 Bookworm. For additional help or useful information, we recommend you check the official Gitea website.