How To Install GitLab on Fedora 37

In this tutorial, we will show you how to install GitLab on Fedora 37. For those of you who didn’t know, GitLab provides a comprehensive, all-in-one solution for managing Git repositories and collaborating on software projects, with robust tools for testing, deployment, and project management.
This article assumes you have at least basic knowledge of Linux, know how to use the shell, and most importantly, you host your site on your own VPS. The installation is quite simple and assumes you are running in the root account, if not you may need to add ‘sudo‘ to the commands to get root privileges. I will show you the step-by-step installation of GitLab Community Edition (CE) on a Fedora 37.
Prerequisites
- A server running one of the following operating systems: Fedora 37.
- It’s recommended that you use a fresh OS install to prevent any potential issues.
- SSH access to the server (or just open Terminal if you’re on a desktop).
- An active internet connection. You’ll need an internet connection to download the necessary packages and dependencies for GitLab.
- A
non-root sudo useror access to theroot user. We recommend acting as anon-root sudo user, however, as you can harm your system if you’re not careful when acting as the root.
Install GitLab on Fedora 37
Step 1. Before proceeding, update your Fedora operating system to make sure all existing packages are up to date. Use this command to update the server packages:
sudo dnf upgrade
sudo dnf update
sudo dnf install curl policycoreutils openssh-server
Step 2. Installing GitLab on Fedora 37.
By default, the GitLab package doesn’t come in the default repository of Fedora 37. Now run the following command below to add the GitLab Repository to your Fedora system:
sudo curl https://packages.gitlab.com/install/repositories/gitlab/gitlab-ee/script.rpm.sh | sudo bash
After the repository was added, now update the system and install GitLab Community Edition (CE) package using the following command below:
sudo dnf install gitlab-ce
Output:
       *.                  *.
      ***                 ***
     *****               *****
    .******             *******
    ********            ********
   ,,,,,,,,,***********,,,,,,,,,
  ,,,,,,,,,,,*********,,,,,,,,,,,
  .,,,,,,,,,,,*******,,,,,,,,,,,,
      ,,,,,,,,,*****,,,,,,,,,.
         ,,,,,,,****,,,,,,
            .,,,***,,,,
                ,*,.

     _______ __  __          __
    / ____(_) /_/ /   ____ _/ /_
   / / __/ / __/ /   / __ `/ __ \
  / /_/ / / /_/ /___/ /_/ / /_/ /
  \____/_/\__/_____/\__,_/_.___/

Thank you for installing GitLab!
Step 3. Configure GitLab.
Open the GitLab configuration file by running the following command:
nano /etc/gitlab/gitlab.rb
Find the following line and edit it to match your domain name or public IP address:
external_url 'http://gitlab.your-domain.com'
Save and exit the configuration file, then reconfigure GitLab by running the following command:
gitlab-ctl reconfigure
Step 4. Set Up the Firewall.
By default, GitLab uses port 80 for HTTP and port 443 for HTTPS. It’s essential to configure your firewall to allow traffic on these ports to ensure that your GitLab instance is accessible:
sudo firewall-cmd --permanent --add-service=http
sudo firewall-cmd --permanent --add-service=https
sudo firewall-cmd --reload
Step 5. Accessing Gitlab Web Interface.
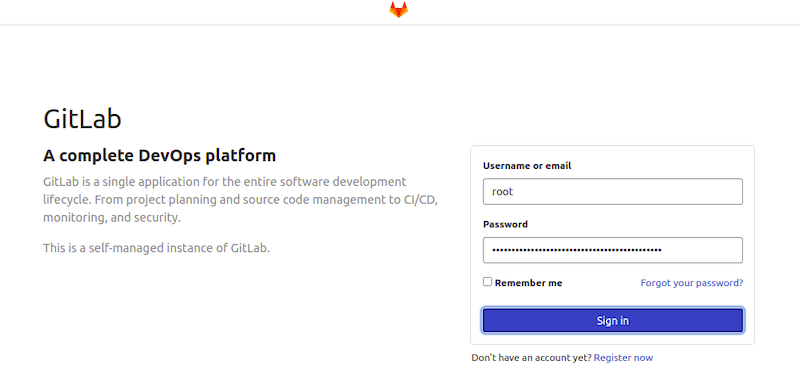
Once successfully installed, you can access GitLab CE web UI by visiting the URL http://gitlab.your-domian.com. You will see the following page:

A password for root user is randomly generated and stored for 24 hours in /etc/gitlab/initial_root_password. You can check the password with the commands below:
cat /etc/gitlab/initial_root_password
Congratulations! You have successfully installed GitLab. Thanks for using this tutorial for installing GitLab on your Fedora 37 system. For additional help or useful information, we recommend you check the official GitLab website.