How To Install GitLab on Manjaro

In this tutorial, we will show you how to install GitLab on Manjaro. GitLab is a powerful open-source DevOps platform that combines Git repository management, issue tracking, continuous integration/continuous deployment (CI/CD), and more. Installing GitLab on Manjaro Linux allows developers and teams to leverage its robust features while benefiting from Manjaro’s user-friendly and rolling-release nature.
This article assumes you have at least basic knowledge of Linux, know how to use the shell, and most importantly, you host your site on your own VPS. The installation is quite simple and assumes you are running in the root account, if not you may need to add ‘sudo‘ to the commands to get root privileges. I will show you the step-by-step installation of the GitLab on a Manjaro Linux.
Prerequisites
- A server or desktop running one of the following operating systems: Manjaro, and other Arch-based distributions.
- It’s recommended that you use a fresh OS install to prevent any potential issues.
- SSH access to the server (or just open Terminal if you’re on a desktop).
- A stable internet connection is crucial for downloading and installing packages. Verify your connection before proceeding.
- Access to a Manjaro Linux system with a non-root sudo user or root user.
Install GitLab on Manjaro
Step 1. Before installing any new software, it’s a good practice to update your package database. This ensures that you’re installing the latest version of the software and that all dependencies are up to date. To update the package database, run the following command in the terminal:
sudo pacman -Syu
Step 2. Installing Required Dependencies.
GitLab relies on several dependencies, including PostgreSQL (database), Redis (caching), and others. Let’s install these dependencies using Manjaro’s package manager:
sudo pacman -Syu --needed postgresql redis
This command updates the package lists, upgrades installed packages, and installs PostgreSQL and Redis if they’re not already present.
Next, initialize and start the PostgreSQL and Redis services:
sudo systemctl enable --now postgresql.service
sudo systemctl enable --now redis.service
PostgreSQL requires additional configuration to set up the database for GitLab. Run the following commands to create a PostgreSQL user and database for GitLab:
sudo -iu postgres
createuser --pwprompt gitlab
createdb -O gitlab gitlabhq_production
exit
This creates a PostgreSQL user named gitlab with a password prompt and a database named gitlabhq_production owned by the gitlab user.
Step 3. Installing GitLab on Manjaro.
To ensure you install the latest stable version of GitLab, it’s recommended to add the official GitLab repository to your Manjaro system’s package sources.
First, install the required package for managing Manjaro’s package repositories:
sudo pacman -S manjaro-keyring
Next, add the GitLab repository by creating a new file in the /etc/pacman.conf directory:
sudo nano /etc/pacman.conf
At the end of the file, add the following line:
[gitlab]
Server = https://gitlab.com/manjaro/gitlab-manjaro/$repo/$arch
With the GitLab repository added, you can proceed with installing the GitLab package using Manjaro’s package manager:
sudo pacman -Syyu
sudo pacman -S gitlab-ce
During the installation process, you may be prompted to specify additional configuration options, such as the external URL for accessing GitLab and the initial root password for the GitLab instance.
If you choose to set the external URL during installation, make sure to use the fully qualified domain name (FQDN) or the IP address of your Manjaro system. For example:
External URL: https://gitlab.idroot.us
Once the installation is complete, you can check the status of the GitLab services:
sudo gitlab-ctl status
In case you encounter any issues during the installation process, you can check the GitLab installation logs for more information:
sudo gitlab-ctl tail
Step 4. Configure GitLab.
GitLab’s configuration file, /etc/gitlab/gitlab.rb, allows you to customize various settings, such as the external URL, SMTP settings for email notifications, and more.
To edit the configuration file, use your preferred text editor:
sudo nano /etc/gitlab/gitlab.rb
If you didn’t set the external URL during installation, you can configure it here:
external_url 'https://gitlab.idroot.us'
To enable email notifications and password reset functionality, you’ll need to configure SMTP settings:
gitlab_rails['smtp_enable'] = true
gitlab_rails['smtp_address'] = "smtp.example.com"
gitlab_rails['smtp_port'] = 587
gitlab_rails['smtp_user_name'] = "your_email@example.com"
gitlab_rails['smtp_password'] = "your_smtp_password"
gitlab_rails['smtp_authentication'] = "login"
gitlab_rails['smtp_enable_starttls_auto'] = true
To prevent unauthorized users from creating projects, you can enable project creation protection:
gitlab_rails['gitlab_default_projects_features_container_registry'] = false
Next, apply the new configuration by running the following command:
sudo gitlab-ctl reconfigure
Once the reconfiguration is complete, you can check the status of the GitLab services again:
sudo gitlab-ctl status
Step 5. Access GitLab Web Interface.
To access the GitLab web interface, open your web browser and navigate to the external URL you configured earlier (e.g., https://gitlab.idroot.us).

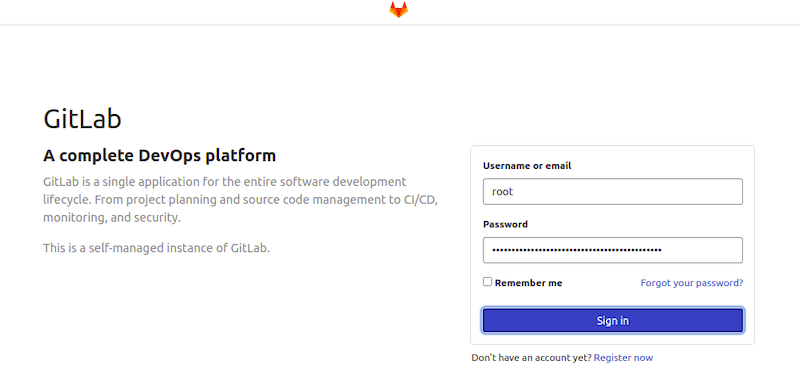
You should see the GitLab login page. Use the default administrator credentials to log in:
- Username:
root - Password: The initial root password is stored in the
/etc/gitlab/initial_root_passwordfile. You can view it with the following command:
sudo cat /etc/gitlab/initial_root_password
Congratulations! You have successfully installed GitLab. Thanks for using this tutorial to install the latest version of GitLab on the Manjaro system. For additional help or useful information, we recommend you check the official GitLab website.