How To Install GitLab on Ubuntu 24.04 LTS

In this tutorial, we will show you how to install GitLab on Ubuntu 24.04 LTS. In the world of DevOps, GitLab has emerged as a powerful and versatile tool for managing software development projects. As an all-in-one platform, GitLab offers a wide range of features, including version control, issue tracking, continuous integration and deployment (CI/CD), and more. With its open-source nature and extensive community support, GitLab has become a popular choice for developers and organizations alike.
This article assumes you have at least basic knowledge of Linux, know how to use the shell, and most importantly, you host your site on your own VPS. The installation is quite simple and assumes you are running in the root account, if not you may need to add ‘sudo‘ to the commands to get root privileges. I will show you the step-by-step installation of the GitLab on Ubuntu 24.04 (Noble Numbat). You can follow the same instructions for Ubuntu 22.04 and any other Debian-based distribution like Linux Mint, Elementary OS, Pop!_OS, and more as well.
Prerequisites
- A server running one of the following operating systems: Ubuntu and any other Debian-based distribution like Linux Mint.
- It’s recommended that you use a fresh OS install to prevent any potential issues.
- SSH access to the server (or just open Terminal if you’re on a desktop).
- An active internet connection. You’ll need an internet connection to download the necessary packages and dependencies.
- GitLab requires a static IP address and reliable internet connectivity to function properly. If you plan to access GitLab from remote locations, make sure your server has a public IP address and the necessary firewall rules are configured to allow incoming traffic on the required ports.
- An Ubuntu 24.04 system with root access or a user with sudo privileges.
Install GitLab on Ubuntu 24.04 LTS
Step 1. Updating the Package Repository.
Before installing GitLab, it’s crucial to ensure that your Ubuntu system is up to date with the latest security patches and software updates. Updating the system packages helps prevent potential compatibility issues and ensures a stable environment for GitLab. To update your system, open a terminal and run the following commands:
sudo apt update
sudo apt upgrade
The apt update command refreshes the package list, while apt upgrade installs the available updates. This step helps resolve any dependency issues and provides access to the latest security patches and bug fixes.
Step 2. Installing Dependencies.
GitLab requires several software dependencies to function properly. These dependencies include tools for downloading and installing packages, secure communication, time zone management, and email delivery. To install the required dependencies, run the following command:
sudo apt install curl openssh-server ca-certificates tzdata perl postfix
During the installation process, you will be prompted to configure Postfix, which is an email server that GitLab uses for sending notifications. When prompted, select “Internet Site” as the mail configuration option and enter your server’s hostname or domain name.
Step 3. Installing GitLab on Ubuntu 24.04.
To install GitLab, we need to add the official GitLab package repository to our Ubuntu system. This repository contains the necessary packages and ensures that we have access to the latest stable version of GitLab. To add the repository, execute the following command:
curl -sS https://packages.gitlab.com/install/repositories/gitlab/gitlab-ce/script.deb.sh | sudo bash
With the GitLab repository added, we can now proceed with the actual installation of GitLab. To install GitLab Community Edition (CE), run the following command:
sudo EXTERNAL_URL="http://your_domain" apt install gitlab-ce
Replace your_domain with the actual domain name or IP address you want to use to access your GitLab instance. The EXTERNAL_URL parameter sets the URL at which GitLab will be accessible.
Step 4. Configure GitLab.
After the installation, GitLab is configured with default settings. However, you may want to customize certain aspects of your GitLab instance to suit your specific needs. To modify the GitLab configuration, open the configuration file using a text editor:
sudo nano /etc/gitlab/gitlab.rb
In this file, you can adjust various settings such as the external URL, email configuration, authentication methods, and more. One important setting to consider is the external_url, which should match the URL you specified during the installation. If you need to change it, locate the following line in the configuration file:
external_url 'http://your_domain'
Replace your_domain with the desired domain name or IP address. Save the changes and exit the text editor.
After modifying the configuration file, you need to reconfigure GitLab for the changes to take effect. Run the following command:
sudo gitlab-ctl reconfigure
This command applies the new configuration settings and restarts the necessary GitLab services.
Step 5. Adjust Firewall Settings.
To ensure that GitLab is accessible from remote locations, you need to configure your firewall to allow incoming traffic on the necessary ports. By default, GitLab uses HTTP (port 80) and HTTPS (port 443) for web access, and SSH (port 22) for secure communication.
If you have UFW (Uncomplicated Firewall) enabled on your Ubuntu server, you can allow the required traffic by running the following commands:
sudo ufw allow http
sudo ufw allow https
sudo ufw allow OpenSSH
Step 6. Access GitLab Web Interface
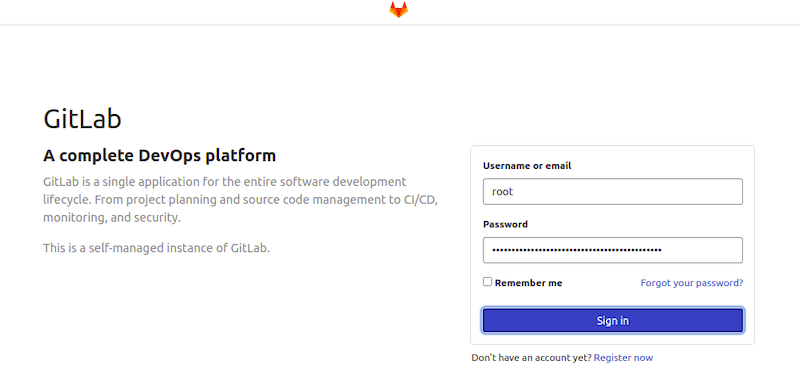
With GitLab installed and configured, you can now access the web interface to start using the platform. Open a web browser and enter the URL you specified during the installation (e.g., http://your_domain).

On your first visit, you will be prompted to set a password for the default administrator account. The default username is root. GitLab generates a random password for the root account, which you can find in the /etc/gitlab/initial_root_password file. Use the following command to retrieve the password:
Congratulations! You have successfully installed GitLab. Thanks for using this tutorial for installing GitLab on the Ubuntu 24.04 LTS system. For additional help or useful information, we recommend you check the GitLab website.