How To Install Glances on Debian 12

In the world of system administration, monitoring system performance is crucial for maintaining optimal operations. One powerful tool that stands out for its versatility and user-friendly interface is Glances. This article provides a comprehensive guide on how to install and use Glances on Debian 12, ensuring you can effectively monitor your system’s performance in real-time.
What is Glances?
Glances is a cross-platform monitoring tool that provides a comprehensive overview of system performance. It displays various metrics such as CPU usage, memory consumption, disk I/O, network activity, and more, all in a single interface. This tool is designed to be lightweight and efficient, making it suitable for both local and remote monitoring.
Some key features of Glances include:
- Real-time Monitoring: Glances updates its metrics in real-time, allowing administrators to quickly identify performance issues.
- Cross-Platform Compatibility: It works seamlessly across different operating systems, including Linux, Windows, and macOS.
- Multiple Modes of Operation: Users can run Glances in standalone mode, as a web server, or in client-server mode for remote monitoring.
Compared to other monitoring tools like top or htop, Glances offers a more visually appealing interface with more detailed information presented at a glance. This makes it an excellent choice for system administrators looking for an efficient way to monitor their systems.
System Requirements
Before installing Glances on Debian 12, ensure that your system meets the following minimum requirements:
- Operating System: Debian 12 (Bookworm)
- RAM: At least 512 MB (1 GB recommended)
- Disk Space: A few megabytes for installation
- Dependencies: Python 3.7 or higher and Pip (Python package installer)
Installing Glances on Debian 12
The installation process for Glances on Debian 12 is straightforward. Follow these steps to get started:
Step 1: Update the Package List
Before installing any new software, it’s essential to update your package list to ensure you have the latest information about available packages. Open your terminal and run the following command:
sudo apt update -yStep 2: Install Glances
Once the package list is updated, you can install Glances using the following command:
sudo apt install glances -yThis command will download and install Glances along with any necessary dependencies. The “-y” flag automatically confirms any prompts during installation.
Step 3: Verify the Installation
After installation, it’s good practice to verify that Glances was installed correctly. You can check the installed version by running:
glances -VIf installed successfully, this command will display the version number of Glances.
Running Glances
You can run Glances in different modes depending on your needs. Here’s how to use each mode effectively:
Standalone Mode
The simplest way to run Glances is in standalone mode. To start it, use the following command:
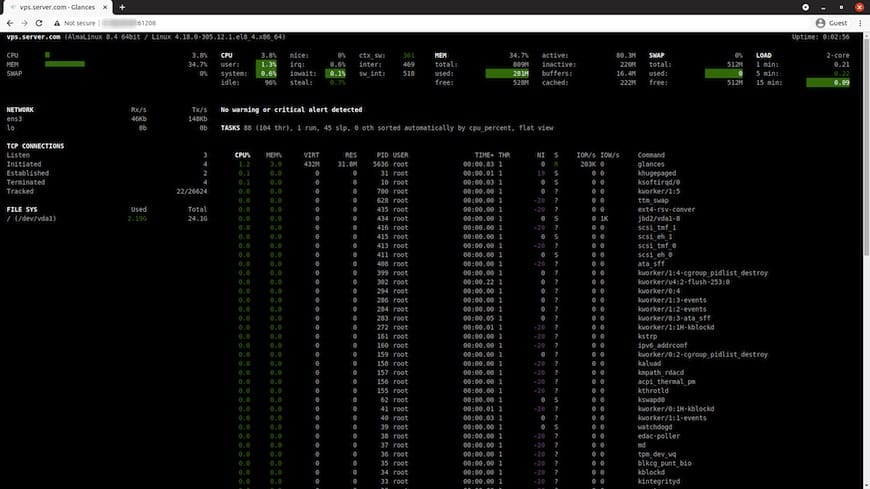
glancesThis command launches the Glances interface directly in your terminal. You will see various metrics displayed in real-time, including CPU load, memory usage, disk I/O statistics, and network activity. Each metric is color-coded for easy interpretation: green indicates healthy performance, while yellow and red signal potential issues.
Web Server Mode
If you prefer to monitor your system via a web browser, you can run Glances as a web server. Start it with this command:
glances -wYou can then access the web interface by navigating to `http://SERVER_IP:61208` in your preferred web browser (replace `SERVER_IP` with the actual IP address of your server). This mode provides a more user-friendly interface for monitoring multiple metrics simultaneously.

Client-Server Mode
The client-server mode allows you to monitor multiple systems from one central location. To set this up:
-
- On the server side:
glances -s-
- On the client side:
glances -c SERVER_IPThis setup enables real-time monitoring of remote systems from your client machine.
Configuring Glances
The default configuration of Glances may not suit all users’ needs. You can customize various settings by editing its configuration file located at `/etc/glances/glances.conf`. Here are some common settings you might want to modify:
- Refresh Intervals: Adjust how frequently metrics are updated (default is usually set to 1 second).
- Selecting Modules: Enable or disable specific monitoring modules based on what you need (e.g., disk I/O monitoring).
- User Interface Settings: Customize colors and display options for better readability.
Edit the configuration file using a text editor like nano or vim:
sudo nano /etc/glances/glances.confUsing Advanced Features
Glances offers several advanced features that enhance its functionality beyond basic monitoring. Here are some notable ones:
Exporting Data
If you need to analyze performance data further or keep records, you can export data from Glances in various formats such as CSV. Use the following command to export data to a CSV file:
glances --export csv --export-csv-file /path/to/file.csvMonitoring Remote Systems
The client-server mode mentioned earlier allows for effective remote monitoring of multiple systems. Ensure that firewalls allow traffic on the specified port (default is 61208) so that clients can connect without issues.
Customizing the Dashboard
You can tailor what metrics are displayed on your dashboard according to your preferences. This customization helps focus on critical areas relevant to your system’s performance needs.
Troubleshooting Common Issues
- Error During Installation:
If you encounter errors while installing Glances, ensure that all dependencies are met and that you have an active internet connection. - No Data Displayed:
If running `glances` shows no data or metrics are missing, check if necessary permissions are granted and if any modules have been disabled in the configuration file. - Trouble Connecting in Client-Server Mode:
Ensure that both server and client machines are connected over the network and that firewalls allow traffic through port 61208. - Pip Installation Issues:
If installing via Pip fails due to Python version incompatibility or missing dependencies, consider updating Python or installing required packages manually.
Congratulations! You have successfully installed Glances. Thanks for using this tutorial for installing the latest version of the Glances on Debian 12 Bookworm. For additional help or useful information, we recommend you check the official Glances website.