In this tutorial, we will show you how to install GlassFish on Debian 10. For those of you who didn’t know, GlassFish is an open-source application server and the reference implementation of Java EE. GlassFish 5 release supports the latest Java Platform: Enterprise Edition 8. It supports Enterprise JavaBeans, JPA, JavaServer Faces, JMS, RMI, JavaServer Pages, servlets, etc.
This article assumes you have at least basic knowledge of Linux, know how to use the shell, and most importantly, you host your site on your own VPS. The installation is quite simple and assumes you are running in the root account, if not you may need to add ‘sudo‘ to the commands to get root privileges. I will show you the step-by-step installation of the GlassFish on a Debian 10 (Buster).
Prerequisites
- A server running one of the following operating systems: Debian 10 (Buster).
- It’s recommended that you use a fresh OS install to prevent any potential issues.
- SSH access to the server (or just open Terminal if you’re on a desktop).
- A
non-root sudo useror access to theroot user. We recommend acting as anon-root sudo user, however, as you can harm your system if you’re not careful when acting as the root.
Install GlassFish on Debian 10 Buster
Step 1. Before running the tutorial below, it’s important to make sure your system is up to date by running the following apt commands in the terminal:
sudo apt update
Step 2. Installing Java.
GlassFish requires Java to be installed on your server. Now run the following command below to install it:
sudo apt install default-jdk
Once the installation is complete, you can verify it by checking the Java version:
java -version
Step 2. Installing GlassFish on Debian 10.
Now we download the latest version of GlassFish from the official website using the following command:
wget http://download.oracle.com/glassfish/5.0.1/nightly/latest-glassfish.zip
unzip latest-glassfish.zip -d /opt/
Step 3. Create a GlassFish Service.
Now create a systemd service file to manage the GlassFish service:
nano /etc/systemd/system/glassfish.service
Add the following file:
[Unit]
Description = GlassFish Server v5.0
After = syslog.target network.target

[Service]
ExecStart=/opt/glassfish5/bin/asadmin start-domain
ExecReload=/opt/glassfish5/bin/asadmin restart-domain
ExecStop=/opt/glassfish5/bin/asadmin stop-domain
Type = forking

[Install]
WantedBy = multi-user.target
Save and close the file. Then, reload the systemd daemon with the following command:
sudo systemctl daemon-reload
sudo systemctl start glassfish
sudo systemctl enable glassfish
Step 4. Configure GlassFish Admin Console.
By default, the GlassFish admin console password is not set. So, you will need to update the admin password:
/opt/glassfish5/bin/asadmin change-admin-password
Output:
Enter admin user name [default: admin]>admin
Enter the admin password>
Enter the new admin password>
Enter the new admin password again>
Command change-admin-password executed successfully.
Next, you will need to enable the secure admin feature using the following command:
/opt/glassfish5/bin/asadmin enable-secure-admin
Then, restart the GlassFish service to apply the configuration changes:
sudo systemctl restart glassfish
Step 5. Accessing GlassFish Web Interface.
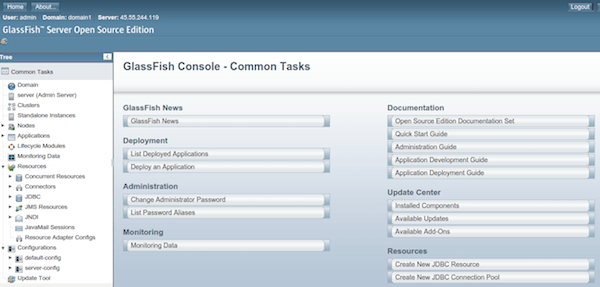
The default GlassFish Server’s port is 8080, You can access it by visiting the URL http://your-ip-address:8080. You should see the following page:

Congratulations! You have successfully installed GlassFish. Thanks for using this tutorial for installing the latest version of the GlassFish on the Debian system. For additional help or useful information, we recommend you check the official GlassFish website.