How To Install HandBrake on AlmaLinux 9

In this tutorial, we will show you how to install HandBrake on AlmaLinux 9. Video content has become an integral part of our digital lives, from entertainment to educational materials. However, working with video files often requires converting them to different formats. HandBrake, a versatile and open-source video transcoder, simplifies this process.
This article assumes you have at least basic knowledge of Linux, know how to use the shell, and most importantly, you host your site on your own VPS. The installation is quite simple and assumes you are running in the root account, if not you may need to add ‘sudo‘ to the commands to get root privileges. I will show you the step-by-step installation of HandBrake on AlmaLinux 9. You can follow the same instructions for CentOS and Rocky Linux or RHEL-based.
Prerequisites
- A server running one of the following operating systems: AlmaLinux 9.
- It’s recommended that you use a fresh OS install to prevent any potential issues.
- SSH access to the server (or just open Terminal if you’re on a desktop).
- An active internet connection. You’ll need an internet connection to download the necessary packages and dependencies for HandBrake.
- A
non-root sudo useror access to theroot user. We recommend acting as anon-root sudo user, however, as you can harm your system if you’re not careful when acting as the root.
Install HandBrake on AlmaLinux 9
Step 1. Before diving into the installation process, ensure your AlmaLinux 9 system is up-to-date. Run the following commands in your terminal:
sudo dnf clean all
sudo dnf update
The first command cleans up the package cache, and the second command performs the system update.
After updating your system, it’s a good practice to verify that the process was completed successfully. You can do this by running:
sudo dnf list updates
Step 2. Enable the EPEL Repository.
The Extra Packages for Enterprise Linux (EPEL) repository provides additional packages not included in the default AlmaLinux repositories. You can enable it with this command:
sudo dnf install epel-release
Step 3. Installing HandBrake on AlmaLinux 9.
- Method 1: Installing from the Official Repository
Now that we have the EPEL repository enabled, we can install HandBrake. Begin by searching for available HandBrake packages:
sudo dnf search HandBrake
This command will display a list of available HandBrake packages. Choose the one that matches your system’s architecture, and install it using dnf:
sudo dnf install HandBrake
The package manager will resolve dependencies and prompt you for confirmation. Simply type ‘y‘ and press Enter to proceed with the installation.
It’s essential to confirm that HandBrake has been successfully installed. You can do this by running:
HandBrake --version
- Method 2: Building from Source
First, install the required dependencies by running the following command:
sudo dnf install gcc make cmake automake autoconf libtool intltool zlib-devel libxml2-devel libogg-devel libvorbis-devel libsamplerate-devel libtheora-devel libass-devel libmodplug-devel libmpcdec-devel flac-devel libdvdread-devel libdvdnav-devel
Download the HandBrake source code from the official website by running the following command:
wget https://github.com/HandBrake/HandBrake/releases/download/1.6.1/HandBrake-1.6.1-source.tar.bz2
Extract the source code by running the following command:
tar -xvf HandBrake-1.6.1-source.tar.bz2
Navigate to the extracted directory by running the following command:
cd HandBrake-1.6.1
Configure the build by running the following command:
./configure --launch-jobs=$(nproc)
Build and install HandBrake by running the following command:
sudo make install
Wait for the installation process to complete. Once it’s done, you can launch HandBrake by running the following command:
handbrake

Step 4. Basic Usage of HandBrake.
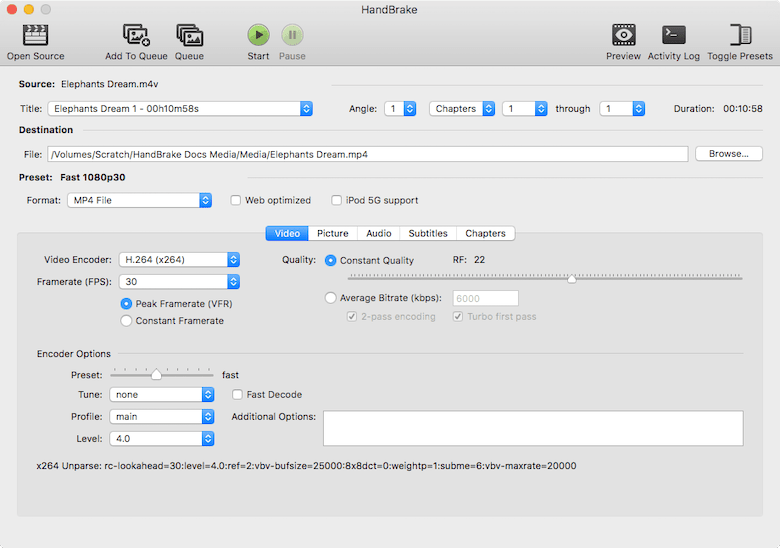
HandBrake is now installed on your AlmaLinux 9 system. Let’s briefly explore how to use it for video conversion. Suppose you have a video file named input.mp4 that you want to convert to the MP4 format. Use the following command:
HandBrakeCLI -i input.mp4 -o output.mp4 --preset="Fast 1080p30"
This command will transcode the input.mp4 file to output.mp4 using the “Fast 1080p30” preset. You can customize the preset and output files as needed.
Step 5. Troubleshooting
- Issue 1: HandBrake not found
If you encounter a ‘Command not found’ error when trying to run HandBrake, ensure that you’ve correctly installed the package and that it’s in your system’s PATH.
- Issue 2: Dependency Errors
During the installation, you might encounter dependency-related errors. Ensure that you’ve enabled the EPEL repository and try running sudo dnf install HandBrake again to resolve dependencies automatically.
- Issue 3: Permission Denied
If you receive a ‘Permission denied’ error while trying to execute HandBrake, ensure you have the necessary permissions. Use sudo or make sure your user has access to the HandBrake executable.
Congratulations! You have successfully installed HandBrake. Thanks for using this tutorial for installing HandBrake on your AlmaLinux 9 system. For additional help or useful information, we recommend you check the official HandBrake website.