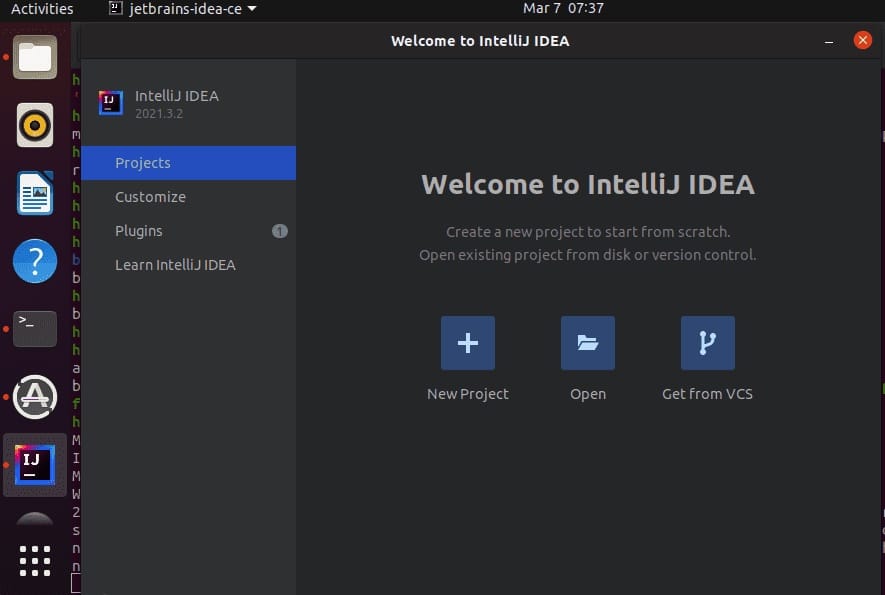
How To Install IntelliJ IDEA on Ubuntu 24.04 LTS

IntelliJ IDEA is a powerful Integrated Development Environment (IDE) favored by developers for its robust feature set and excellent support for various programming languages, especially Java. Whether you are a seasoned professional or just starting your coding journey, IntelliJ IDEA offers the tools and capabilities to enhance your productivity. This comprehensive guide focuses on how to install IntelliJ IDEA on Ubuntu 24.04, the latest Long Term Support (LTS) version of Ubuntu. By following the step-by-step instructions provided, you’ll be able to set up IntelliJ IDEA efficiently and start coding in no time.
This article will cover everything from system requirements to different installation methods, ensuring a smooth installation process. We’ll explore installing IntelliJ IDEA via the Snap Store and the binary executable from the JetBrains website. Furthermore, we will touch on an optional installation via Flatpak. We will also address common issues and how to resolve them, so you can enjoy a hassle-free development experience. Let’s dive in!
System Requirements
Before you begin the installation process, it’s crucial to ensure your system meets the necessary requirements. Meeting these prerequisites will help avoid potential performance issues and ensure IntelliJ IDEA runs smoothly on your Ubuntu 24.04 system.
Minimum Requirements
These are the bare minimum specifications needed to run IntelliJ IDEA. While the IDE might function, you may experience slower performance, especially with larger projects.
- RAM: 2 GB free, 8 GB total system RAM minimum.
- Disk Space: 3.5 GB hard disk space, SSD recommended.
- Screen Resolution: 1024×768 minimum.
Recommended Requirements
For a more fluid and efficient development experience, it’s highly recommended that your system exceeds the minimum requirements. These recommendations will ensure optimal performance, especially when working on resource-intensive projects.
- RAM: 4 GB or more
- Disk Space: 5 GB SSD.
- CPU: Multi-core processor for enhanced multi-processing functionality.
Operating System Compatibility
IntelliJ IDEA is fully compatible with Ubuntu 24.04 LTS, which has a 64-bit architecture. This compatibility ensures that you can proceed with the installation without worrying about architectural issues.
Variants of IntelliJ IDEA
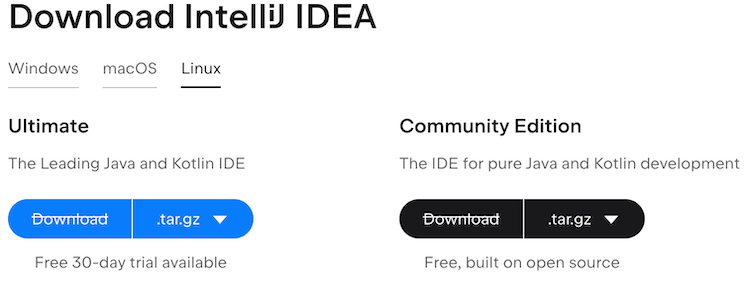
IntelliJ IDEA comes in different editions, each tailored to specific development needs. Understanding the features and capabilities of each edition will help you choose the one that best suits your projects and skill level. Let’s explore the Community, Ultimate, and Educational Editions.
Community Edition
The Community Edition is a free and open-source version of IntelliJ IDEA, perfect for beginners and developers working on open-source projects. It supports Java, Kotlin, Groovy, Scala, and Android development, providing a solid foundation for various coding tasks.
The Community Edition is designed to meet the basic coding needs of the majority of open-source developers. It offers essential features for code editing, debugging, and version control, making it an excellent choice for those who don’t require advanced enterprise-level functionalities.
Ultimate Edition
The Ultimate Edition is the commercial version of IntelliJ IDEA, offering a comprehensive suite of tools and features for enterprise development. It supports a wider range of languages, including JavaScript, TypeScript, Python, PHP, and more.
This edition is designed for professional developers who need advanced capabilities such as profiling tools, database support, and web development frameworks. The Ultimate Edition enhances productivity and streamlines complex development workflows.
Educational Edition
The Educational Edition of IntelliJ IDEA provides tools specifically designed for learning and teaching programming languages. It is tailored to assist students and educators alike, providing a conducive environment for understanding complex coding concepts.
Installation Methods Overview
There are several ways to install IntelliJ IDEA on Ubuntu 24.04, each with its own advantages. This section provides an overview of the methods we will cover in this guide, including installation via the Snap Store, binary executable from the JetBrains website, and Flatpak.
- Snap Store: A convenient method for installing and managing applications on Ubuntu. It provides automatic updates and simplifies the installation process.
- Binary Executable: Downloading and installing IntelliJ IDEA directly from the JetBrains website. This method offers more control over the installation directory and configurations.
- Flatpak (optional): An alternative package management system that allows you to install applications in a sandboxed environment, ensuring compatibility and security.
Method 1: Installing via Snap Store
The Snap Store provides a straightforward way to install IntelliJ IDEA on Ubuntu 24.04. Snaps are containerized software packages that include all the necessary dependencies, making the installation process simple and reliable. Follow the steps below to install IntelliJ IDEA using Snap.
Step-by-Step Instructions
- Open Terminal:Open your terminal by pressing
Ctrl + Alt + Tor searching for “Terminal” in the applications menu. - Ensure Snap is Installed:Ubuntu usually comes with Snap pre-installed. However, to ensure it is installed, run the following command:
sudo apt update sudo apt install snapd - Install IntelliJ IDEA Community Edition:To install the Community Edition, use the following command:
sudo snap install intellij-idea-community --classic - Install IntelliJ IDEA Ultimate Edition:If you prefer the Ultimate Edition, use this command:
sudo snap install intellij-idea-ultimate --classic - Verify the Installation:Once the installation is complete, verify it by checking the installed version:
snap list intellij-idea-communityOr for the Ultimate Edition:
snap list intellij-idea-ultimate
Launching IntelliJ IDEA
After installation, you can launch IntelliJ IDEA in several ways:
- From Terminal:Type
intellij-idea-communityfor the Community Edition orintellij-idea-ultimatefor the Ultimate Edition in the terminal. - From Applications Menu:Search for IntelliJ IDEA in the applications menu and click on the icon to launch it.

Method 2: Installing via Binary Executable
Installing IntelliJ IDEA via the binary executable from the JetBrains website provides more control over the installation process. This method involves downloading the .tar.gz file, extracting it, and running the executable. Follow the steps below to install IntelliJ IDEA using this method.
Step-by-Step Instructions
- Download the
.tar.gzFile:Navigate to the IntelliJ IDEA download page in your web browser and download the Linux version of either the Community or Ultimate edition. Alternatively, usewgetin the terminal:wget https://download.jetbrains.com/idea/ideaIC-2024.1.tar.gzReplace
ideaIC-2024.1.tar.gzwith the appropriate filename for the version you are downloading.
- Extract the Downloaded File:Extract the
.tar.gzfile to your desired installation directory. The/optdirectory is commonly used for such installations:sudo tar -xvf ideaIC-2024.1.tar.gz -C /optThis command extracts the contents of the archive to the
/optdirectory. Ensure you have the necessary permissions to write to this directory. - Navigate to the
binDirectory:Open the extracted directory and navigate to thebinsubdirectory:cd /opt/idea-IC-2024.1/binReplace
idea-IC-2024.1with the actual directory name. - Run
idea.sh:Execute theidea.shscript to start IntelliJ IDEA:./idea.shThis will launch the IntelliJ IDEA setup wizard.
- Complete the Setup Wizard:Follow the on-screen instructions to complete the setup wizard. You may be prompted to import settings from a previous installation or configure new settings.
Creating a Desktop Entry
To make it easier to launch IntelliJ IDEA, create a desktop entry:
- Create a
.desktopFile:Create a.desktopfile in~/.local/share/applications:nano ~/.local/share/applications/intellij-idea.desktop - Add the Following Content:Add the following content to the file, adjusting the paths as necessary:
[Desktop Entry]
 Name=IntelliJ IDEA Community Edition
 Comment=The Drive to Develop
 Exec=/opt/idea-IC-2024.1/bin/idea.sh
 Icon=/opt/idea-IC-2024.1/bin/idea.png
 Terminal=false
 Type=Application
 Categories=Development;IDE;
Save the file and exit the editor.
- Make the File Executable:Ensure the file is executable:
chmod +x ~/.local/share/applications/intellij-idea.desktop
You should now be able to find IntelliJ IDEA in your applications menu and launch it with a single click.
Optional Method: Installing via Flatpak
Flatpak is a universal package manager that allows you to install applications in a sandboxed environment. This can be useful for maintaining compatibility and security. Here’s how to install IntelliJ IDEA using Flatpak.
Step-by-Step Instructions
- Install Flatpak:If Flatpak is not already installed, you can install it using the following command:
sudo apt update sudo apt install flatpak sudo flatpak remote-add --if-not-exists flathub https://flathub.org/repo/flathub.flatpakrepo - Install IntelliJ IDEA:Use the following command to install IntelliJ IDEA Community Edition:
flatpak install flathub com.jetbrains.IntelliJ-IDEA-CommunityFor the Ultimate Edition, use:
flatpak install flathub com.jetbrains.IntelliJ-IDEA-Ultimate - Run IntelliJ IDEA:After installation, you can run IntelliJ IDEA with:
flatpak run com.jetbrains.IntelliJ-IDEA-CommunityOr for the Ultimate Edition:
flatpak run com.jetbrains.IntelliJ-IDEA-Ultimate
Flatpak installations are sandboxed, providing an additional layer of security and ensuring that the application does not interfere with other system components.
How to Uninstall IntelliJ IDEA
If you need to remove IntelliJ IDEA from your system, the uninstallation process varies depending on the installation method used. Follow the appropriate steps below to uninstall IntelliJ IDEA.
Uninstalling Snap Version
To uninstall IntelliJ IDEA installed via Snap, use the following command:
sudo snap remove intellij-idea-communityOr, for the Ultimate Edition:
sudo snap remove intellij-idea-ultimateThis command removes the IntelliJ IDEA package and associated data from your system.
Uninstalling Binary Version
To uninstall IntelliJ IDEA installed via the binary executable, follow these steps:
- Remove the Installation Directory:Delete the directory where you extracted the IntelliJ IDEA files. For example, if you extracted the files to
/opt/idea-IC-2024.1, use the following command:sudo rm -rf /opt/idea-IC-2024.1 - Remove the Desktop Entry:If you created a desktop entry, remove the
.desktopfile from~/.local/share/applications:rm ~/.local/share/applications/intellij-idea.desktop
Uninstalling Flatpak Version
To uninstall IntelliJ IDEA installed via Flatpak, use the following command:
flatpak uninstall com.jetbrains.IntelliJ-IDEA-CommunityOr, for the Ultimate Edition:
flatpak uninstall com.jetbrains.IntelliJ-IDEA-UltimateThis command removes the Flatpak package and associated data from your system.
Troubleshooting Common Issues
During the installation or usage of IntelliJ IDEA, you may encounter some common issues. This section provides troubleshooting tips to help you resolve these problems and ensure a smooth development experience.
- Freezing Issues:Some users have reported freezing issues with IntelliJ IDEA on Ubuntu. This can often be resolved by adjusting the JVM options. Open the
idea.vmoptionsfile in thebindirectory and try increasing the memory allocation:nano /opt/idea-IC-2024.1/bin/idea.vmoptionsModify the
-Xmsand-Xmxvalues to allocate more memory to IntelliJ IDEA. For example:-Xms2048m -Xmx4096mThis allocates 2GB of initial memory and 4GB of maximum memory.
- Compatibility Issues:Ensure your system meets the minimum requirements for IntelliJ IDEA. Incompatible hardware or outdated drivers can cause performance issues.
- Dependency Issues:If you encounter dependency issues during installation, update your system and install any missing dependencies:
sudo apt update sudo apt --fix-broken install - Crashes After Update:If IntelliJ IDEA crashes after an update, try reverting to a previous version or running the IDE as root as a temporary workaround. Check system logs for error messages related to Xwayland.
Congratulations! You have successfully installed IntelliJ IDEA. Thanks for using this tutorial for installing the IntelliJ IDEA Java IDE on Ubuntu 24.04 LTS system. For additional help or useful information, we recommend you check the official Jetbrains website.