How To Install ISPConfig on Debian 12

In this tutorial, we will show you how to install ISPConfig on Debian 12. ISPConfig is a popular open-source web hosting control panel that allows administrators to manage servers, websites, email addresses, and more through a web-based interface. It supports a variety of services including Apache, Nginx, MySQL, and Postfix.
This article assumes you have at least basic knowledge of Linux, know how to use the shell, and most importantly, you host your site on your own VPS. The installation is quite simple and assumes you are running in the root account, if not you may need to add ‘sudo‘ to the commands to get root privileges. I will show you the step-by-step installation of the ISPConfig on a Debian 12 (Bookworm).
Prerequisites
- A server running one of the following operating systems: Debian 12 (Bookworm).
- It’s recommended that you use a fresh OS install to prevent any potential issues.
- Accessing the terminal is as simple as opening your terminal emulator. You can usually find it in your application menu or by using a keyboard shortcut, such as
Ctrl + Alt + T. - Make sure your Debian 12 system is connected to the internet. An active connection is essential for downloading the required packages and updates during the installation.
- You can either log in as a superuser (root) or use the
sudocommand before running any administrative tasks. This ensures you have the necessary permissions.
Install ISPConfig on Debian 12 Bookworm
Step 1. Update your Debian 12 system to guarantee that you have the latest security patches and software updates. Execute the following commands:
sudo apt update
sudo apt upgrade
Step 2. Set Up Hostname.
Now ensure that the hostname is set:
sudo hostnamectl set-hostname ispconfig.idroot.us
Before going further, we will check if the hostname is correct:
hostname -f
Output:
root@idroot:~$ hostname -f
Before going further, we will check if the hostname is correct:
hostname -f
Output:
root@idroot:~$ hostname -f
idroot.example.com
Step 3. Installing Necessary Dependencies.
Now update Debian 12 repositories to include non-free packages:
sudo tee /etc/apt/sources.list<<EOF
deb http://deb.debian.org/debian bookworm main contrib non-free non-free-firmware
deb http://deb.debian.org/debian bookworm-updates main non-free contrib non-free-firmware
deb http://security.debian.org/debian-security bookworm-security main contrib non-free non-free-firmware
EOF
At present, ISPConfig is not compatible with Debian 12. Consequently, we will make adjustments to our /etc/os-release to enable our installer to utilize Debian 11 packages:
sudo sed -i 's/12/11/g' /etc/os-release
Source file:
source /etc/os-release
Remember to revert the changes after the installation is complete.
Step 4. Installing ISPConfig on Debian 12.
The official ISPConfig script installer streamlines the installation process and ensures compatibility with the latest features and security updates. Obtain the script from the official ISPConfig website using the following commands:
wget -O - https://get.ispconfig.org | sudo sh -s -- --help
Output:
ISPConfig 3 Autoinstaller
**********************************************************************************************************************************************************************************************

Usage: ispc3-ai.sh [<argument>] [...]

This script automatically installs all needed packages for an ISPConfig 3 setup using the guidelines from the "Perfect Server Setup" howtos on www.howtoforge.com.

Possible arguments are:
    --help          Show this help page
    --debug         Enable verbose logging (logs each command with the exit code)
    --channel       Choose the channel to use for ISPConfig. --channel=<stable|dev>
                    "stable" is the latest ISPConfig release available on www.ispconfig.org
                    "dev" is the latest dev-branch from the ISPConfig git repository: https://git.ispconfig.org/ispconfig/ispconfig3/tree/develop
                    -> The dev channel might contain bugs and less-tested features and should only be used in production by very experienced users.
    --lang          Use language for ISPConfig installation. Specify with --lang=en|de (only en (English) and de (German) supported currently).
    --interactive   Don't install ISPConfig in non-interactive mode. This is needed if you want to use expert mode, e. g. to install a slave server that shall be integrated into an existing
                    multiserver setup.
    --use-nginx     Use nginx webserver instead of apache2
    --use-amavis    Use amavis instead of rspamd for mail filtering
    --use-unbound   Use unbound instead of bind9 for local resolving. Only allowed if --no-dns is set.
    --use-php       Use specific PHP versions, comma separated, instead of installing multiple PHP, e.g. --use-php=7.4,8.0 (5.6, 7.0, 7.1, 7.2, 7.3, 7.4, 8.0 and 8.1 available).
                    --use-php=system disables the sury repository and just installs the system's default PHP version.
                    ommiting the argument (use all versions)
    --use-ftp-ports This option sets the passive port range for pure-ftpd. You have to specify the port range separated by hyphen, e. g. --use-ftp-ports=40110-40210.
                    If not provided the passive port range will not be configured.
    --use-certbot   Use Certbot instead of acme.sh for issuing Let's Encrypt certificates. Not adviced unless you are migrating from a old server that uses Certbot.
    --no-web        Do not use ISPConfig on this server to manage webserver setting and don't install nginx/apache or pureftpd. This will also prevent installing an ISPConfig UI and implies
                    --no-roundcube as well as --no-pma
    --no-mail       Do not use ISPConfig on this server to manage mailserver settings. This will install postfix for sending system mails, but not dovecot and not configure any settings for
                    ISPConfig mail. It implies --no-mailman.
......
When executing the installer, multiple configuration options become available. In this context, we will opt for Apache, PHP 8, MariaDB, Postfix, Dovecot, Rspamd, BIND, Jailkit, Roundcube, PHPMyAdmin, Mailman, Webalizer, AWStats, and GoAccess.
wget -O - https://get.ispconfig.org | sudo sh -s -- --use-php=8.0 --use-ftp-ports=40110-40210 --lang=en --unattended-upgrades
Output:
WARNING! This script will reconfigure your complete server!
It should be run on a freshly installed server and all current configuration that you have done will most likely be lost!
Type 'yes' if you really want to continue: yes
Remember to modify the below file after the installation is complete:
sudo sed -i 's/11/12/g' /etc/os-release
Step 5. Configure Firewall.
Configuring the firewall for ISPConfig on Debian is crucial to ensure that only necessary ports are open, enhancing the security of your server. ISPConfig uses port 8080 for its web interface. Allow traffic on this port:
sudo ufw allow 8080/tcp
Enable UFW to apply the changes:
sudo ufw enable
Verify that UFW is now active and configured correctly:
sudo ufw status
Step 6. Accessing ISPConfig Web Interface.
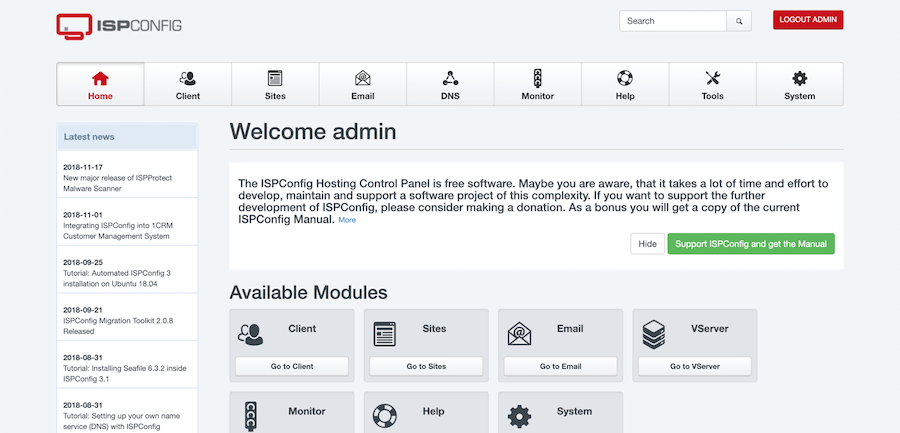
Access the ISPConfig web interface at https://ispconfig.idroot.us:8080. You will be redirected to the ISPConfig login page:

Congratulations! You have successfully installed ISPConfig. Thanks for using this tutorial to install the latest version of ISPConfig on Debian 12 Bookworm. For additional help or useful information, we recommend you check the official ISPConfig website.