How To Install Jellyfin Media Server on Fedora 38

In this tutorial, we will show you how to install Jellyfin Media Server on Fedora 38. In today’s digital age, managing and streaming media content has become an integral part of our lives. Whether you have a vast collection of movies, TV shows, or music, having a reliable media server can make a world of difference. One such open-source solution is Jellyfin Media Server, a robust platform that allows you to organize and enjoy your media collection seamlessly.
This article assumes you have at least basic knowledge of Linux, know how to use the shell, and most importantly, you host your site on your own VPS. The installation is quite simple and assumes you are running in the root account, if not you may need to add ‘sudo‘ to the commands to get root privileges. I will show you the step-by-step installation of Jellyfin Media Server on a Fedora 38.
Prerequisites
- A server running one of the following operating systems: Fedora 38.
- It’s recommended that you use a fresh OS install to prevent any potential issues.
- SSH access to the server (or just open Terminal if you’re on a desktop).
- A stable internet connection is crucial as we’ll be downloading and installing various packages and dependencies from remote repositories.
- A
non-root sudo useror access to theroot user. We recommend acting as anon-root sudo user, however, as you can harm your system if you’re not careful when acting as the root.
Install Jellyfin Media Server on Fedora 38
Step 1. Before we can install Jellyfin on Fedora 38, it’s important to ensure that our system is up-to-date with the latest packages. This will ensure that we have access to the latest features and bug fixes and that we can install Jellyfin without any issues:
sudo dnf update
Step 2. Installing RPM Fusion Repository.
To enable the Free repository, run the following command:
sudo dnf install https://mirrors.rpmfusion.org/free/fedora/rpmfusion-free-release-38.noarch.rpm
For the Non-Free repository, use this command:
sudo dnf install https://mirrors.rpmfusion.org/nonfree/fedora/rpmfusion-nonfree-release-38.noarch.rpm
To confirm that RPM Fusion is successfully enabled, run the following command:
sudo dnf repolist | grep rpmfusion
Step 3. Installing Dependencies.
Now that we have RPM Fusion set up, it’s time to install the dependencies required for Jellyfin to run smoothly:
sudo dnf install ffmpeg mediainfo libva-utils
Step 2. Installing Jellyfin Media Server on Fedora 38.
With the RPM package in hand, it’s time to install Jellyfin on your Fedora 38 system:
wget https://repo.jellyfin.org/releases/server/fedora/stable/server/jellyfin-server-10.8.11-1.fc36.x86_64.rpm
wget https://repo.jellyfin.org/releases/server/fedora/stable/web/jellyfin-web-10.8.11-1.fc36.noarch.rpm
Now Install the Jellyfin server and web client using the commands below:
sudo dnf localinstall jellyfin-server-10.8.11-1.fc36.x86_64.rpm
sudo dnf localinstall jellyfin-web-10.8.11-1.fc36.noarch.rpm
To ensure that Jellyfin is installed correctly, check its version by running:
jellyfin --version
Run the following commands to enable and start Jellyfin service on every reboot:
sudo systemctl start jellyfin
sudo systemctl enable jellyfin
Step 3. Firewall Configuration
To make Jellyfin accessible from other devices on your network, you need to configure your firewall:
sudo firewall-cmd --zone=public --add-port=8096/tcp --permanent
sudo firewall-cmd --reload
Step 4. Accessing Jellyfin Web Interface.
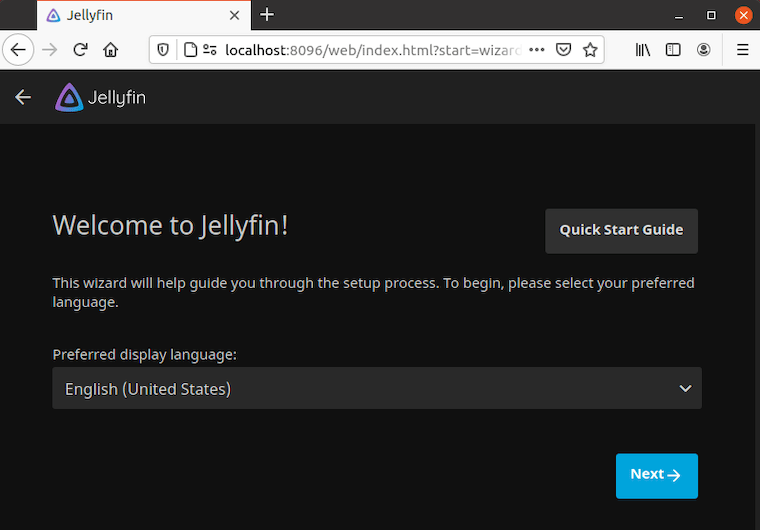
Open your web browser and navigate to http://localhost:8096 to access the Jellyfin web interface. You’ll be greeted with the initial setup wizard.

If you’re accessing Jellyfin from a different device on your network, replace ‘localhost‘ with the IP address or hostname of your Fedora 38 machine.
Congratulations! You have successfully installed Jellyfin. Thanks for using this tutorial for installing Jellyfin Media Server on your Fedora 38 system. For additional help or useful information, we recommend you check the official Jellyfin website.