How To Install Jellyfin on Ubuntu 22.04 LTS

In this tutorial, we will show you how to install Jellyfin on Ubuntu 22.04 LTS. Are you ready to take control of your media library and enjoy seamless streaming across all your devices? Look no further than Jellyfin, the open-source media server that puts you in the driver’s seat. With its powerful features, customizable interface, and commitment to privacy, Jellyfin is the perfect solution for organizing and accessing your movies, TV shows, music, and more.
This article assumes you have at least basic knowledge of Linux, know how to use the shell, and most importantly, you host your site on your own VPS. The installation is quite simple and assumes you are running in the root account, if not you may need to add ‘sudo‘ to the commands to get root privileges. I will show you the step-by-step installation of the Jellyfin open-source media server on Ubuntu 22.04. You can follow the same instructions for Ubuntu 22.04 and any other Debian-based distribution like Linux Mint, Elementary OS, Pop!_OS, and more as well.
Prerequisites
- A server running one of the following operating systems: Ubuntu 22.04, 20.04, and any other Debian-based distribution like Linux Mint.
- It’s recommended that you use a fresh OS install to prevent any potential issues.
- SSH access to the server (or just open Terminal if you’re on a desktop).
- An active internet connection. You’ll need an internet connection to download the necessary packages and dependencies for Jellyfin.
- A non-root sudo user or access to the root user. We recommend acting as a non-root sudo user, however, as you can harm your system if you’re not careful when acting as the root.
Install Jellyfin on Ubuntu 22.04 LTS Jammy Jellyfish
Step 1. First, make sure that all your system packages are up-to-date by running the following apt commands in the terminal.
sudo apt update
sudo apt upgrade
Step 2. Installing Jellyfin software media on Ubuntu 22.04.
Now add the Jellyfin package repository to your Ubuntu 20.04 LTS system by running the following commands in the terminal:
wget -O - https://repo.jellyfin.org/ubuntu/jellyfin_team.gpg.key | sudo apt-key add -
echo "deb [arch=$( dpkg --print-architecture )] https://repo.jellyfin.org/ubuntu $( lsb_release -c -s ) main" | sudo tee /etc/apt/sources.list.d/jellyfin.list
Once the repository is added, you can install Jellyfin by running the following command:
sudo apt update
sudo apt install jellyfin
After the installation is complete, you can start the Jellyfin service by running the following command:
sudo systemctl start jellyfin
Step 3. Configuring Firewall
Ensure Jellyfin communicates smoothly through your firewall:
sudo ufw allow 8096/tcp
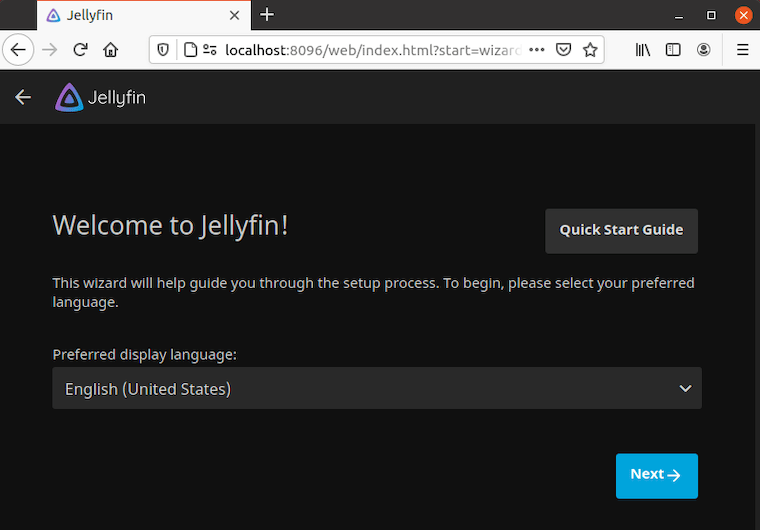
Step 4. Accessing Jellyfin Web Interface.
Open your preferred browser and head to http://localhost:8096. Behold, Jellyfin’s welcoming interface!

Step 5. Troubleshooting Common Issues.
Even on the smoothest roads, bumps can appear. Here are solutions to potential hiccups:
- Library Detection Issues: If Jellyfin doesn’t detect your media libraries, double-check the paths you specified during setup. Ensure they are accessible and correctly formatted.
- Playback Problems: For playback woes, ensure your media formats are supported by Jellyfin. Transcoding settings might need adjustment.
- Network Connectivity Glitches: If remote access fails, verify firewall rules and port forwarding settings.
Congratulations! You have successfully installed Jellyfin. Thanks for using this tutorial for installing the Jellyfin software media system on the Ubuntu system. For additional help or useful information, we recommend you check the official Jellyfin website.