
In this tutorial, we will show you how to install KVM on Ubuntu 20.04 LTS. For those of you who didn’t know, KVM (Kernel-based Virtual Machine) is the virtualization solution for Linux. It consists of a loadable kernel module that allows the Linux Kernel to work as a Hypervisor. KVM provides hardware-assisted virtualization for a wide variety of guest operating systems.
This article assumes you have at least basic knowledge of Linux, know how to use the shell, and most importantly, you host your site on your own VPS. The installation is quite simple and assumes you are running in the root account, if not you may need to add ‘sudo‘ to the commands to get root privileges. I will show you the step-by-step installation of the KVM virtualization on Ubuntu 20.04 (Focal Fossa). You can follow the same instructions for Ubuntu 18.04, 16.04, and any other Debian-based distribution like Linux Mint.
Prerequisites
- A server running one of the following operating systems: Ubuntu 20.04, 18.04, 16.04, and any other Debian-based distribution like Linux Mint.
- It’s recommended that you use a fresh OS install to prevent any potential issues.
- A
non-root sudo useror access to theroot user. We recommend acting as anon-root sudo user, however, as you can harm your system if you’re not careful when acting as the root.
Install KVM on Ubuntu 20.04 LTS Focal Fossa
Step 1. First, make sure that all your system packages are up-to-date by running the following apt commands in the terminal.
sudo apt update
sudo apt upgrade
Step 2. Installing KVM on Ubuntu 20.04.
Before you begin installing KVM, check if your CPU supports hardware virtualization:
egrep -c '(vmx|svm)' /proc/cpuinfo
The output of the above command is very important. An output of 1 or anything greater than that shows that your CPU can be set up for using the virtualization technology. An output of 0 indicates the inability of your system to run KVM.
If you wish to verify whether your server is capable of running KVM virtual machines then install “kvm-ok” utility using below apt command:
sudo apt install cpu-checker
Check if your system can run KVM:
sudo kvm-ok
Then, install essential KVM packages with the following command:
sudo apt install qemu-kvm libvirt-bin bridge-utils virtinst virt-manager
Verify the KVM Status:
sudo systemctl is-active libvirtd
Step 3. Create Virtual Machines.
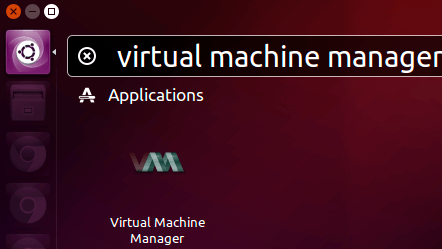
Now we open the Virtual Machine Manager by typing the same in Dash Home. Click the icon, it will open the application.
In the virtual machine manager window, click the first icon in the toolbar.

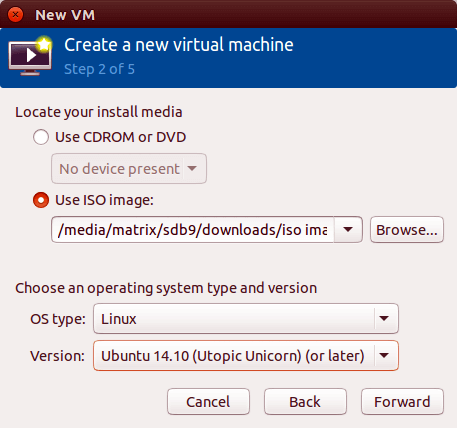
Next, choose the location of your installation media.
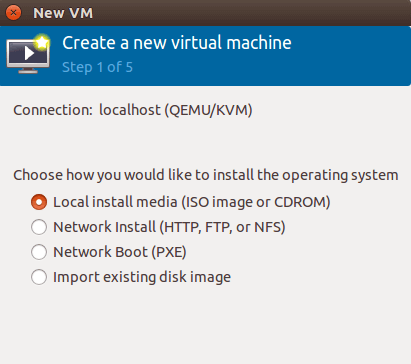
You can install it from a disc, ISO image, or even a network location.
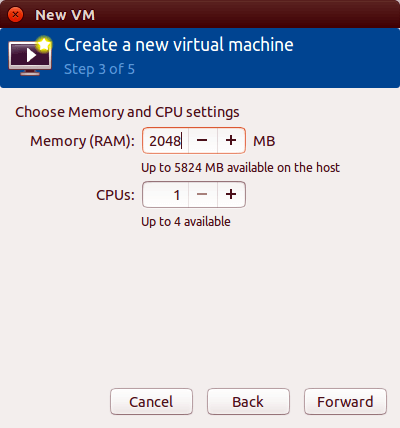
Next, allocate memory and CPU to your virtual machine.
After that, specify the size of your virtual disk. If you check the box before allocating the entire disk now, then the disk size is fixed.
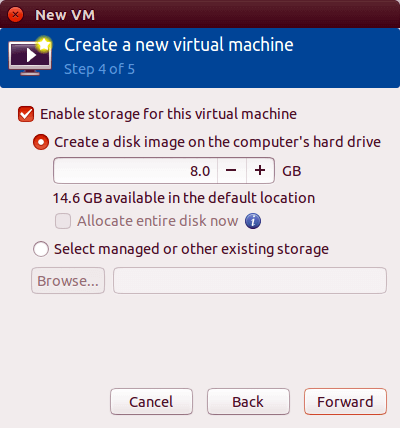
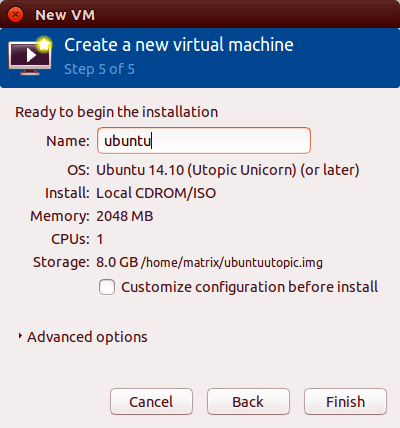
In the next window, you can give your virtual machine a name. Then click finish to begin installing OS to your virtual machine.
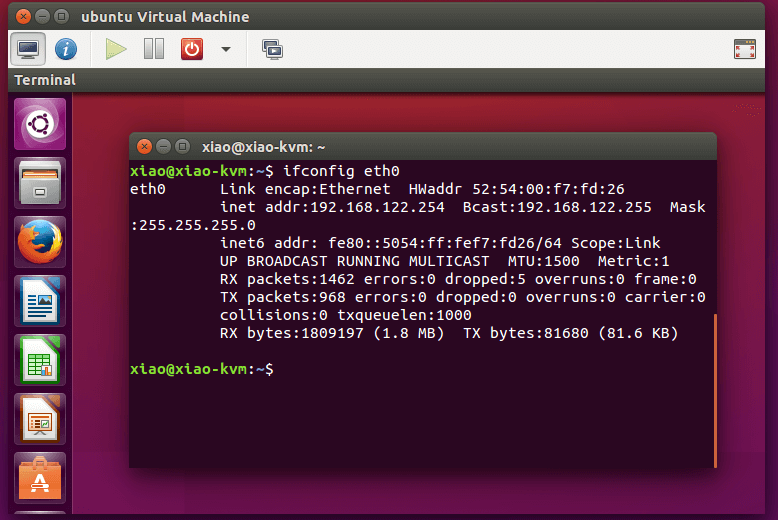
Here’s a screenshot of the Ubuntu virtual machine running in virt-manager window.
Congratulations! You have successfully installed KVM. Thanks for using this tutorial for installing the KVM virtualization on Ubuntu 20.04 LTS Focal Fossa system. For additional help or useful information, we recommend you check the official KVM website.