In this tutorial, we will show you how to install Laravel on CentOS 9 Stream. For those of you who didn’t know, Laravel is the most popular PHP framework which is free and open source. Laravel has been developed as a framework that is based on PHP integrating open-source that has multiple tools for creating web applications of all kinds of sizes and complexity.
This article assumes you have at least basic knowledge of Linux, know how to use the shell, and most importantly, you host your site on your own VPS. The installation is quite simple and assumes you are running in the root account, if not you may need to add ‘sudo‘ to the commands to get root privileges. I will show you the step-by-step installation of the Laravel PHP framework on CentOS 9 Stream.
Prerequisites
- A server running one of the following operating systems: CentOS 9 Stream.
- It’s recommended that you use a fresh OS install to prevent any potential issues
- A
non-root sudo useror access to theroot user. We recommend acting as anon-root sudo user, however, as you can harm your system if you’re not careful when acting as the root.
Install Laravel on CentOS Stream 9
Step 1. First, let’s start by ensuring your system is up-to-date.
sudo dnf update
Step 2. Installing Apache HTTP Server.
We will start by installing the Apache webserver. To complete the installation, use the following command:
sudo dnf install httpd httpd-tools
After installation is complete, enable Apache (to start automatically upon system boot), start the webserver, and verify the status using the commands below:
sudo systemctl enable httpd
sudo systemctl start httpd
sudo systemctl status httpd
Step 3. Installing PHP Composer.
Run the following command below to install PHP Composer:
curl -sS https://getcomposer.org/installer | php
mv composer.phar /usr/local/bin/composer
chmod +x /usr/local/bin/composer
Verify Composer installation:
composer -v
Step 4. Installing the Laravel on CentOS 9 Stream.
By default, Laravel is not available on the CentOS 9 Stream base repository. Let’s install and create a Laravel application using the composer package manager:
cd /var/www
composer create-project laravel/laravel Idroot-Laravel-App
Now we access the folder of the created project and execute the following below:
cd /var/www/Idroot-Laravel-App
php artisan key:generate
Step 5. Configure Apache vHost.
Now we create a new Apache vHost configuration file laravel.conf:
sudo nano /etc/httpd/conf.d/laravel.conf
Add the following file:
<VirtualHost *:80>
   ServerName your-domian.com
   DocumentRoot /var/www/Idroot-Laravel-App/public
   <Directory /var/www/Idroot-Laravel-App>
          AllowOverride All
   </Directory>
</VirtualHost>
Save and close the file. Restart the Apache service for the changes to take effect:
sudo systemctl restart httpd
We will need to change some folders permissions:
chown -R apache.apache /var/www/Idroot-Laravel-App
chmod -R 755 /var/www/Idroot-Laravel-App
chmod -R 755 /var/www/Idroot-Laravel-App/storage
chcon -R -t httpd_sys_rw_content_t /var/www/Idroot-Laravel-App/storage
Step 6. Configure Firewall.
CentOS Stream comes with firewalld enabled by default, and it will block other connections from other computers that are trying to access our Laravel service. We must open the appropriate ports so that the samba-shared resources can be accessed from other machines:
sudo firewall-cmd --permanent --zone=public --add-service=http
sudo firewall-cmd --permanent --zone=public --add-service=https
sudo firewall-cmd --reload
Step 7. Accessing Laravel Web Interface.
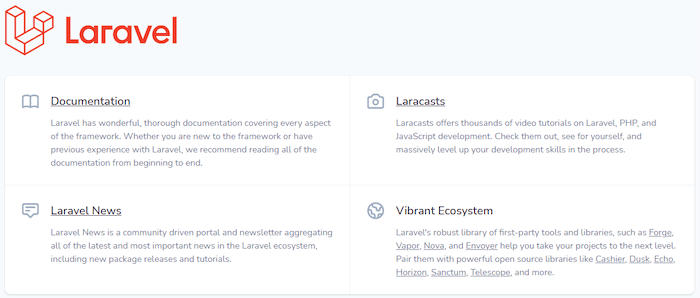
Once successfully installed, open your web browser and access the Laravel Web UI using the URL http://your-domain.com. You will be redirected to the following page:

Congratulations! You have successfully installed Laravel. Thanks for using this tutorial to install the Laravel PHP framework on CentOS 9 Stream. For additional help or useful information, we recommend you check the official Laravel website.