How To Install Laravel on Fedora 40

In this tutorial, we will show you how to install Laravel on Fedora 40. Laravel is a popular PHP framework known for its elegant syntax and robust features, making it a preferred choice for web developers. Fedora 40, with its cutting-edge features and stability, provides an excellent environment for developing Laravel applications.
This article assumes you have at least basic knowledge of Linux, know how to use the shell, and most importantly, you host your site on your own VPS. The installation is quite simple and assumes you are running in the root account, if not you may need to add ‘sudo‘ to the commands to get root privileges. I will show you the step-by-step installation of the Laravel on Fedora 40.
Prerequisites
Before we dive into the installation process, ensure that you have the following prerequisites in place:
- A server running one of the following operating systems: Fedora 40.
- It’s recommended that you use a fresh OS install to prevent any potential issues.
- You will need access to the terminal to execute commands. Fedora provides the Terminal application for this purpose. It can be found in your Applications menu.
- A stable internet connection to download the necessary packages.
- A non-root sudo user or access to the root user. We recommend acting as a non-root sudo user, however, as you can harm your system if you’re not careful when acting as the root.
Install Laravel on Fedora 40
Step 1. Update the System.
To begin, it’s crucial to update your Fedora system to ensure you have the latest packages and security patches. Open a terminal and run the following commands:
sudo dnf clean all
sudo dnf update
This process may take a few minutes, depending on the number of available updates.
Step 2. Installing Apache Web Server.
Laravel requires a web server to run, and Apache is a popular choice. Install Apache on Fedora 40 by executing the following command:
sudo dnf install httpd
Once the installation is complete, start the Apache service and enable it to start automatically on system boot:
sudo systemctl start httpd
sudo systemctl enable httpd
You can verify that Apache is running by accessing http://localhost in your web browser. You should see the default Apache welcome page.
Step 3. Installing PHP and Required Extensions.
Laravel is built on PHP, so we need to install PHP and its necessary extensions. Run the following command to install PHP and the required packages:
sudo dnf install php php-cli php-common php-json php-mbstring php-mysqlnd php-xml php-zip
This command installs PHP along with the essential extensions required by Laravel, such as JSON, MBString, MySQL, XML, and ZIP.
Step 4. Installing Composer.
Composer is a dependency manager for PHP that allows you to easily install and manage Laravel and its dependencies. To install Composer, run the following commands:
curl -sS https://getcomposer.org/installer | php
sudo mv composer.phar /usr/local/bin/composer
These commands download the Composer installer and move it to the /usr/local/bin directory, making it globally accessible.
Step 5. Installing Laravel.
With PHP and Composer installed, we can now proceed to install Laravel. Navigate to the web server’s document root directory:
cd /var/www/html/
Then, use Composer to create a new Laravel project:
sudo composer create-project laravel/laravel myapp
This command creates a new Laravel project named myapp in the current directory. Composer will download and install all the necessary dependencies.
Step 6. Configure Laravel Permissions.
To ensure that Laravel can write to the necessary directories, we need to set the appropriate permissions. Run the following commands:
sudo chown -R apache:apache /var/www/html/myapp/storage
sudo chown -R apache:apache /var/www/html/myapp/bootstrap/cache
These commands change the ownership of the storage and bootstrap/cache directories to the Apache user.
Step 7. Configure Apache for Laravel.
To serve your Laravel application, you need to configure Apache. Create a new Apache configuration file for your Laravel site:
sudo nano /etc/httpd/conf.d/myapp.conf
Add the following configuration to the file:
<VirtualHost *:80>
ServerName myapp.local
DocumentRoot /var/www/html/myapp/public

<Directory /var/www/html/myapp/public>
AllowOverride All
Require all granted
</Directory>
</VirtualHost>
Save the file and exit the editor. This configuration sets up a virtual host for your Laravel application, pointing to the public directory as the document root.
Next, restart Apache for the changes to take effect:
sudo systemctl restart httpd
Step 8: Configure Firewall.
If you have a firewall enabled on your Fedora 40 system, you need to allow HTTP traffic. Run the following commands to open port 80:
sudo firewall-cmd --permanent --add-port=80/tcp
sudo firewall-cmd --reload
These commands permanently add port 80 to the firewall rules and reload the firewall configuration.
Step 9. Test Laravel Installation.
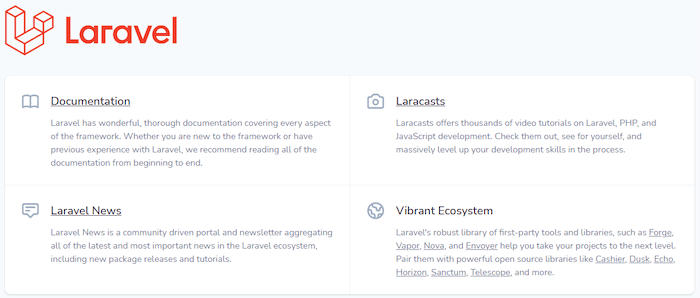
To verify that your Laravel installation is working correctly, open a web browser and visit http://myapp.local. You should see the default Laravel welcome page.

If you encounter any issues, make sure to check the Laravel log files located in the storage/logs directory for any error messages. Common issues include incorrect file permissions, missing extensions, or misconfigured Apache settings.
Congratulations! You have successfully installed Laravel. Thanks for using this tutorial for installing Laravel on Fedora 40 system. For additional help or useful information, we recommend you check the Laravel website.