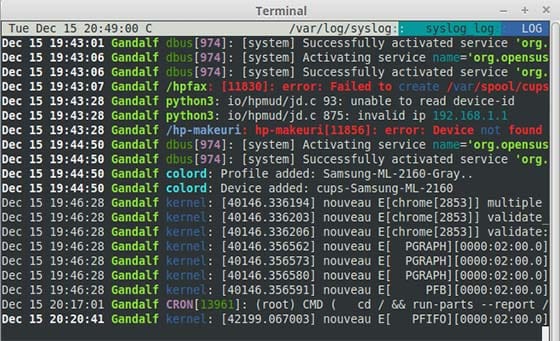
In this tutorial, we will show you how to install and configure lnav on CentOS 7 server. For those of you who didn’t know, The Log File Navigator (lnav) is an enhanced log file viewer that takes advantage of any semantic information that can be gleaned from the files being viewed, such as timestamps and log levels. Using this extra semantic information, lnav can do things like interleaving messages from different files, generating histograms of messages over time, and providing hotkeys for navigating through the file. It is hoped that these features will allow the user to quickly and efficiently zero in on problems.
This article assumes you have at least basic knowledge of Linux, know how to use the shell, and most importantly, you host your site on your own VPS. The installation is quite simple and assumes you are running in the root account, if not you may need to add ‘sudo‘ to the commands to get root privileges. I will show you through the step-by-step installation lnav log file navigator on a CentOS 7 server.
Prerequisites
- A server running one of the following operating systems: CentOS 7.
- It’s recommended that you use a fresh OS install to prevent any potential issues.
- SSH access to the server (or just open Terminal if you’re on a desktop).
- A
non-root sudo useror access to theroot user. We recommend acting as anon-root sudo user, however, as you can harm your system if you’re not careful when acting as the root.
lnav Features
- Single log view: all log file contents are merged into a single view based on message timestamps. No need to manually correlate timestamps across multiple windows or figure out the order in which to view rotated log files.
- Automatic format detection for several common log files. It also detects gzip/bzi2 files and decompresses them automatically on the fly.
- Filters: display only lines that match or do not match a set of regular expressions. Filter by error level.
- Timeline view: shows a histogram of messages over time. The number of warnings and errors are highlighted in the display so that you can easily see where problems have occurred.
- Query logs using SQL: log files are directly used as the backing for SQLite virtual tables.
- Automatic data extraction: built-in log message parser can automatically discover and extract interesting data from plainly formatted log messages.
- Live operation: Search as you type. New log lines are automatically loaded and searched as they are added; filters apply to lines as they are loaded; and, SQL queries are checked for correctness as you type.
- Syntax highlighting with configurable colorizing
- Tab completion
- Sessions
- Supports Linux and Mac
Install lnav on CentOS 7
Step 1. First, let’s start by ensuring your system is up-to-date.
yum clean all
yum -y update
Step 2. Installing lnav.
For CentOS 7 or older versions, you need to include EPEL Repository to your YUM first:
yum install epel-release -y
Now, install lnav using yum command:
yum install lnav -y
How to Use lnav
First look at all the options taken by lnav:
usage: lnav [options] [logfile1 logfile2 ...]

A curses-based log file viewer that indexes log messages by type
and time to make it easier to navigate through files quickly.

Key bindings:
  ?     View/leave the online help text.
  q     Quit the program.

Options:
  -h         Print this message, then exit.
  -H         Display the internal help text.
  -I path    An additional configuration directory.
  -i         Install the given format files and exit.
  -C         Check configuration and then exit.
  -d file    Write debug messages to the given file.
  -V         Print version information.

  -a         Load all of the most recent log file types.
  -r         Load older rotated log files as well.
  -t         Prepend timestamps to the lines of data being read in
             on the standard input.
  -w file    Write the contents of the standard input to this file.

  -c cmd     Execute a command after the files have been loaded.
  -f path    Execute the commands in the given file.
  -n         Run without the curses UI. (headless mode)
  -q         Do not print the log messages after executing all
             of the commands or when lnav is reading from stdin.

Optional arguments:
  logfile1          The log files or directories to view.  If a
                    directory is given, all of the files in the
                    directory will be loaded.

Examples:
  To load and follow the syslog file:
    $ lnav

  To load all of the files in /var/log:
    $ lnav /var/log

  To watch the output of make with timestamps prepended:
    $ make 2>&1 | lnav -t
Let’s use some examples to demonstrate the working of this tool, run lnav command and it will start displaying the real-time information on the basis of the most recent timestamps from all log files:
lnav

Congratulations! You have successfully installed Seafile. Thanks for using this tutorial for installing lnav log file navigator on CentOS 7 system. For additional help or useful information, we recommend you to check the official lnav website.