In this tutorial, we will show you how to install Nagios on Debian 11. For those of you who didn’t know, Nagios is an open-source tool that provides an enterprise-class central monitoring engine for IT monitoring, network monitoring, server, and applications monitoring. It monitors your entire IT infrastructure to ensure systems, applications, services, and business processes are functioning properly. In the event of a failure, Nagios can alert the technical staff of the problem, allowing them to begin remediation processes before outages affect business processes, end-users, or customers.
This article assumes you have at least basic knowledge of Linux, know how to use the shell, and most importantly, you host your site on your own VPS. The installation is quite simple and assumes you are running in the root account, if not you may need to add ‘sudo‘ to the commands to get root privileges. I will show you the step-by-step installation of the Nagios monitoring tool on a Debian 11 (Bullseye).
Prerequisites
- A server running one of the following operating systems: Debian 11 (Bullseye).
- It’s recommended that you use a fresh OS install to prevent any potential issues.
- SSH access to the server (or just open Terminal if you’re on a desktop).
- A
non-root sudo useror access to theroot user. We recommend acting as anon-root sudo user, however, as you can harm your system if you’re not careful when acting as the root.
Install Nagios on Debian 11 Bullseye
Step 1. Before we install any software, it’s important to make sure your system is up to date by running the following apt commands in the terminal:
sudo apt update
sudo apt upgrade
sudo apt install nano wget curl build-essential unzip openssl libssl-dev apache2 php libapache2-mod-php php-gd libgd-dev
Step 2. Create User and Group for Nagios.
Run the following command below to create a user and group Nagios:
sudo make install-groups-users
sudo usermod -a -G nagios www-data
Step 3. Installing Nagios on Debian 11.
Now we download the latest version of Nagios from the official page:
wget https://github.com/NagiosEnterprises/nagioscore/releases/download/nagios-4.4.6/nagios-4.4.6.tar.gz
Next, extract the downloaded file using the below command:
tar xvzf nagios-4.4.6.tar.gz
After Nagios successfully extracted, navigate into the new directory holding the files and begin the compilation:
cd nagios-4.4.6
./configure --with-httpd-conf=/etc/apache2/sites-enabled
sudo make all
sudo make install
sudo make install-daemoninit
sudo make install-commandmode
sudo make install-config
Next steps, we setup the Apache Webserver configuration:
sudo make install-webconf
sudo a2enmod rewrite cgi
Then, create a web user for authentication for the Nagios web interface:
sudo htpasswd -c /usr/local/nagios/etc/htpasswd.users nagiosadmin
We will need to change some folder permissions:
sudo chown www-data:www-data /usr/local/nagios/etc/htpasswd.users
sudo chmod 640 /usr/local/nagios/etc/htpasswd.users
Step 4. Installing Nagios Plugins.
Run the following command below to download the latest stable release of plugins Nagios:
wget https://github.com/nagios-plugins/nagios-plugins/releases/download/release-2.3.3/nagios-plugins-2.3.3.tar.gz
Next, extract the downloaded file:
tar xvzf nagios-plugins-2.3.3.tar.gz
After that, change the directory plugins folder then compile and install:
cd nagios-plugins-2.3.3.tar.gz
./configure --with-nagios-user=nagios --with-nagios-group=nagios
sudo make
sudo make install
Finally, Once you are done with the configuration, start Apache and Nagios services:
sudo systemctl restart apache2
sudo systemctl start nagios.service
Step 5. Configure Firewall.
If any firewall is running on your system, be sure to enable the necessary ports:
sudo ufw allow 80
sudo ufw reload
sudo ufw enable
Step 6. Accessing Nagios Web Interface.
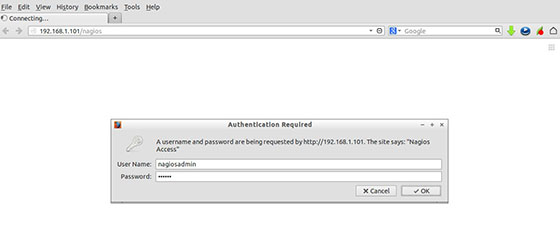
Once successfully installed, open a web browser and go to http://your-server-ip-address/nagios and you will see the following screen. You will be prompted for a username and password. The username as you may remember is the one we set in Step 3, that is “nagiosadmin“

Congratulations! You have successfully installed Nagios. Thanks for using this tutorial for installing the latest version of the Nagios monitoring on Debian 11 Bullseye. For additional help or useful information, we recommend you check the official Nagios website.