How To Install Nagios on Ubuntu 22.04 LTS

In this tutorial, we will show you how to install Nagios on Ubuntu 22.04 LTS. For those of you who didn’t know, Nagios a.k.a Nagios Core is an enterprise-class Open Source IT monitoring, network monitoring, server, and applications monitoring solution. Nagios provides monitoring of all mission-critical infrastructure components including applications, services, operating systems, network protocols, systems metrics, and much more.
This article assumes you have at least basic knowledge of Linux, know how to use the shell, and most importantly, you host your site on your own VPS. The installation is quite simple and assumes you are running in the root account, if not you may need to add ‘sudo‘ to the commands to get root privileges. I will show you the step-by-step installation of Nagios core on Ubuntu 22.04 (Jammy Jellyfish). You can follow the same instructions for Ubuntu 22.04 and any other Debian-based distribution like Linux Mint.
Prerequisites
- A server running one of the following operating systems: Ubuntu 22.04, 20.04, and any other Debian-based distribution like Linux Mint.
- It’s recommended that you use a fresh OS install to prevent any potential issues.
- SSH access to the server (or just open Terminal if you’re on a desktop).
- A
non-root sudo useror access to theroot user. We recommend acting as anon-root sudo user, however, as you can harm your system if you’re not careful when acting as the root.
Install Nagios on Ubuntu 22.04 LTS Jammy Jellyfish
Step 1. First, make sure that all your system packages are up-to-date by running the following apt commands in the terminal.
sudo apt update
sudo apt upgrade
sudo apt install build-essential apache2 php openssl perl make php-gd libgd-dev libapache2-mod-php libperl-dev libssl-dev daemon wget apache2-utils unzip
Step 2. Create User and Group for Nagios.
Now we run the following command to create a user and group Nagios:
sudo useradd nagios
sudo groupadd nagcmd
sudo usermod -a -G nagcmd nagios
sudo usermod -a -G nagcmd www-data
Step 3. Installing Nagios on Ubuntu 22.04.
By default, Nagios is available on Ubuntu 22.04 base repository. Now run the following command below to download the latest version of Nagios core from the official page:
wget https://assets.nagios.com/downloads/nagioscore/releases/nagios-4.4.6.tar.gz
Next, extract the Nagios core compressed file:
tar -zxvf nagios-4.4.6.tar.gz
cd nagios-4.4.6/
Then, execute the below commands to compile the Nagios from the source code:
sudo ./configure --with-nagios-group=nagios --with-command-group=nagcmd --with-httpd_conf=/etc/apache2/sites-enabled/
sudo make all
sudo make install
sudo make install-init
sudo make install-config
sudo make install-commandmode
Step 4. Configure Web Interface for Nagios.
Now we install the Nagios web interface using the below command:
sudo make install-webconf
Next, set up Nagios core web interface basic authentication:
sudo htpasswd -c /usr/local/nagios/etc/htpasswd.users nagiosadmin
Finally, restart the Apache webserver to take effect configuration:
sudo a2enmod cgi
sudo systemctl restart apache2
Step 5. Configure Nagios Core.
By default, Nagios places configuration files under the /usr/local/nagios/ directory. To get Nagios alerts, edit /usr/local/nagios/etc/objects/contacts.cfg file and change the email address associated with the nagiosadmin:
sudo nano /usr/local/nagios/etc/objects/contacts.cfg
Add the following lines:
define contact{
        contact_name            nagiosadmin             ; Short name of user
        use                     generic-contact         ; Inherit default values from generic-contact template (defined above)
        alia                    Nagios Admin            ; Full name of user

        email                   godet@idroot.us      ; <<***** CHANGE THIS TO YOUR EMAIL ADDRESS ******

             }
Step 6. Installing Nagios Plugins.
Now we compile and install Nagios Plugin libraries using the following command below:
wget https://nagios-plugins.org/download/nagios-plugins-2.3.3.tar.gz
Next, extract the source archive:
tar -zxvf nagios-plugins-2.3.3.tar.gz
cd nagios-plugins-2.3.3/
Then, compile and install the Nagios plugins:
sudo ./configure --with-nagios-user=nagios --with-nagios-group=nagios
sudo make
sudo make install
Verifying Nagios configuration:
sudo /usr/local/nagios/bin/nagios -v /usr/local/nagios/etc/nagios.cfg
Output:
Nagios Core 4.4.6
Copyright (c) 2009-present Nagios Core Development Team and Community Contributors
Copyright (c) 1999-2009 Ethan Galstad
Last Modified: 2020-04-24
License: GPL

Website: https://www.nagios.org
Reading configuration data...
   Read main config file okay...
   Read object config files okay...

Running pre-flight check on configuration data...

Checking objects...
        Checked 8 services.
        Checked 1 hosts.
        Checked 1 host groups.
        Checked 0 service groups.
        Checked 1 contacts.
        Checked 1 contact groups.
        Checked 24 commands.
        Checked 5 time periods.
        Checked 0 host escalations.
        Checked 0 service escalations.
Now, it’s time to start the Nagios service:
sudo systemctl enable --now nagios
Step 7. Accessing Nagios Monitoring Tool.
Once successfully installed, open your web browser and access the Nagios Core using the URL http://your-IP-address/nagios. You will need to use the username (nagiosadmin) and the password you specified earlier to access the Nagios web interface:

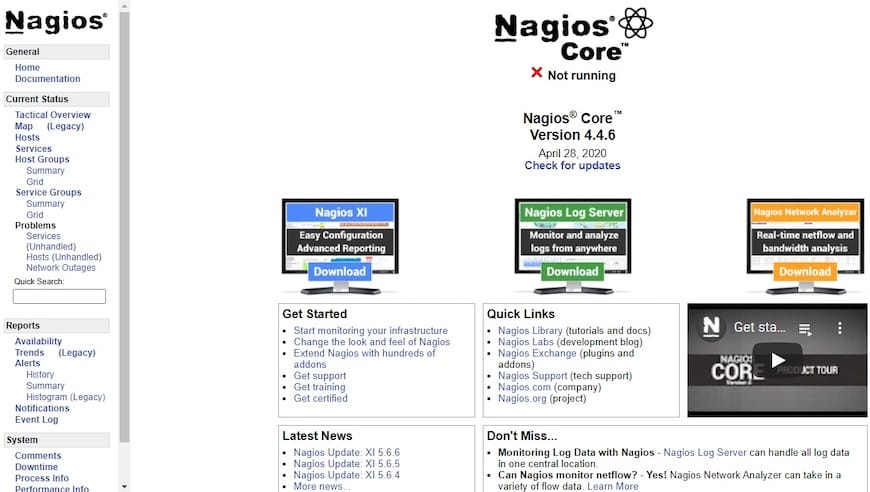
Upon successful login, you will get Nagios homepage:

Congratulations! You have successfully installed Nagios. Thanks for using this tutorial for installing the Nagios monitoring tool on Ubuntu 22.04 LTS Jammy Jellyfish system. For additional help or useful information, we recommend you check the official Nagios website.