How To Install Neos CMS on Ubuntu 24.04 LTS

In this tutorial, we will show you how to install Neos CMS on Ubuntu 24.04 LTS. Neos CMS (Content Management System) excels at delivering a user-friendly editing experience with real-time preview features, robust multi-language support, and powerful SEO optimization out of the box. By leveraging flexible “content dimensions,” this platform offers localized content and agile workflow for developers. Ubuntu 24.04 LTS, meanwhile, provides a stable and long-term supported environment that aligns perfectly with Neos CMS’s requirements.
This guide highlights the end-to-end process of installing Neos CMS on Ubuntu 24.04 LTS, from server preparation to database configuration and fine-tuning your environment. It incorporates best practices to ensure a smooth and secure setup, including tips on installing either the LAMP or Nginx stack, using Composer, employing the Flow utility to manage the CMS, and setting up SSL.
Prerequisites
- An Ubuntu 24.04 LTS server with a non-root user configured for sudo privileges.
- Appropriate system resources (at least 2 GB RAM suggested for development or small production, though more is recommended for heavier traffic).
- A registered domain name (e.g., example.com) pointed to the server’s public IP address.
- Basic command-line knowledge in Linux for installing and configuring packages.
- SSH access to the server.
Meeting these prerequisites ensures a stable environment for setting up Neos CMS effectively.
Step 1: Update System Packages
Before any major software installation, it’s important to update and upgrade the existing package repositories to get the latest security patches and improvements. This helps maintain a robust and compatible system foundation. Run the following commands:
sudo apt update
sudo apt upgrade -y
Once the process completes, consider rebooting your server if the kernel or other critical packages were updated:
sudo reboot
Keeping your system current reduces potential conflicts and ensures better security overall.
Step 2: Install LAMP Stack or Nginx
Option A: Installing LAMP Stack
A LAMP stack provides a robust foundation for hosting Neos CMS. It includes Apache (web server), MariaDB (relational database), and PHP (server-side scripting language).
sudo apt install apache2 mariadb-server php php-cli php-mbstring php-intl php-curl \
php-gd php-mysql php-xml php-zip php-soap php-imagick -y
Apache 2 is installed to serve web pages, while MariaDB acts as the backend database solution. The PHP modules, including php-mbstring, php-intl, and others, are essential for Neos CMS functionalities such as image handling, localization, and improved text processing.
Securing MariaDB
After installing MariaDB, harden your database server:
sudo mysql_secure_installation
Answer the prompts to remove anonymous users, restrict remote root login, remove the test database, and reload privileges for enhanced database security.
Option B: Installing Nginx
For users who prefer Nginx, install it alongside PHP-FPM:
sudo apt install nginx php-fpm php-cli php-mysql php-mbstring php-intl php-curl \
php-gd php-xml php-zip php-soap php-imagick -y
Nginx typically offers superior performance for high-traffic sites. However, both Apache and Nginx are widely compatible with Neos CMS. Choose your preferred web server based on your specific requirements.
Step 3: Install Composer and Git
Composer is critical for managing dependencies in the PHP ecosystem. Git is also important for cloning the Neos CMS source code.
sudo apt install composer git -y
If you don’t already have Composer installed, or your distribution doesn’t include a recent version, you can use the official script:
curl -sS https://getcomposer.org/installer | php
sudo mv composer.phar /usr/local/bin/composer
Once installed, verify Composer:
composer --version
Ensure it reports a valid version without errors. This helps you confirm a proper installation.
Step 4: Download and Configure Neos CMS Source Code
This step involves obtaining the Neos CMS files directly from its official GitHub repository or using the composer create-project command. Cloning the repository grants you access to the latest stable release and allows for straightforward updates.
sudo git clone https://github.com/neos/neos-base-distribution.git /var/www/neos
Navigate to the Neos directory and install the necessary dependencies via Composer:
cd /var/www/neos
composer install
During the composer install process, you might be asked to provide configurations or confirmations—proceed with the defaults if you’re unsure.
Set Proper Ownership and Permissions
For seamless web server operation, set the directory ownership to the www-data user and group (or apache if you use Fedora), and adjust the permissions accordingly:
sudo chown -R www-data:www-data /var/www/neos
sudo chmod -R 755 /var/www/neos
These commands ensure Neos CMS can read and write data as needed, especially for caching, logs, and file uploads.
Step 5: Configure the Web Server
Configuring the web server to serve Neos CMS involves creating a Virtual Host (for Apache) or a Server Block (for Nginx). This setup ensures traffic is routed to the correct document root.
Apache Configuration
Create a new Apache configuration file, for instance /etc/apache2/sites-available/neos.conf:
sudo nano /etc/apache2/sites-available/neos.conf
Populate it with the following (adjust the ServerName and paths accordingly):
<VirtualHost *:80>
    ServerName yourdomain.com
    DocumentRoot /var/www/neos/Web

 <Directory /var/www/neos/Web>
        AllowOverride All
        Require all granted
 </Directory>

    ErrorLog ${APACHE_LOG_DIR}/neos-error.log
    CustomLog ${APACHE_LOG_DIR}/neos-access.log combined
</VirtualHost>
Enable the site and mod_rewrite for clean URLs:
sudo a2ensite neos.conf
sudo a2enmod rewrite
sudo systemctl restart apache2
Nginx Configuration
For Nginx, create a server block in /etc/nginx/sites-available/neos:
server {
    listen 80;
    server_name yourdomain.com;

    root /var/www/neos/Web;
    index index.php;

    location / {
        try_files $uri /index.php$is_args$args;
    }

    location ~ \.php$ {
        include snippets/fastcgi-php.conf;
        fastcgi_pass unix:/run/php/php-fpm.sock;
        fastcgi_param SCRIPT_FILENAME $document_root$fastcgi_script_name;
        include fastcgi_params;
    }
}
Then link it to Nginx’s sites-enabled directory:
sudo ln -s /etc/nginx/sites-available/neos /etc/nginx/sites-enabled/
sudo nginx -t
sudo systemctl restart nginx
A successful configuration means you can now proceed with the database setup and additional Neos CMS configurations.
Step 6: Set Up Database and Configure Neos CMS
Neos CMS uses a relational database to store page content, settings, and user data. This section details creating a dedicated database and user, then linking Neos to them using the Flow utility.
Create Database and User
Access the MariaDB or MySQL console:
sudo mysql -u root -p
Then, execute the following commands to set up the Neos database. Replace neosuser and password with your preferred credentials:
CREATE DATABASE neosdb;
CREATE USER 'neosuser'@'localhost' IDENTIFIED BY 'password';
GRANT ALL PRIVILEGES ON neosdb.* TO 'neosuser'@'localhost';
FLUSH PRIVILEGES;
EXIT;
Configure Neos CMS to Use the Database
With the Neos directory as your working directory, run:
cd /var/www/neos
./flow setup:database --driver mysqli --host localhost --dbname neosdb --user neosuser --password password
This command configures your database connection automatically. Next, migrate the database schema:
./flow doctrine:migrate
A successful migration indicates that the tables required by Neos are properly created and ready for use.
Step 7: Finalize Installation and Create Admin User
The Flow utility streamlines many tasks, including image handler setup, user creation, and optional demo site import.
Image Handler Configuration
Neos CMS can employ ImageMagick or GD Library to handle images. For best results and advanced features, ImageMagick is recommended:
sudo apt install imagemagick -y
./flow setup:imagehandler --handler Imagick
This ensures high-quality image processing for your media assets.
Create an Administrator Account
You can add an initial admin account with:
./flow user:create --roles Administrator \
    --username admin \
    --password securepassword \
    --firstname John \
    --lastname Doe \
    --email admin@example.com
Choose a strong, secure password. This account provides full administrative privileges in Neos CMS.
Optional: Import Demo Content
If you’d like a demo site to explore Neos CMS features, import the official Neos.Demo package:
./flow site:import --package-key Neos.Demo
You’ll have sample pages and content to familiarize you with the CMS interface.
Step 8: Secure Installation with HTTPS
Securing your site with SSL/TLS is essential for protecting data in transit and improving your search engine ranking. Let’s Encrypt provides free SSL certificates suitable for most applications.
Apache Users
sudo apt install certbot python3-certbot-apache -y
sudo certbot --apache -d yourdomain.com -d www.yourdomain.com
Follow the prompts to obtain and install your certificates. Certbot will automatically configure Apache for secure HTTPS if everything goes well.
Nginx Users
sudo apt install certbot python3-certbot-nginx -y
sudo certbot --nginx -d yourdomain.com -d www.yourdomain.com
After successful configuration, visiting https://yourdomain.com will load your secure Neos CMS.
Testing and Accessing Neos CMS
To verify that Neos CMS is running properly, open a web browser and navigate to:
http://yourdomain.comfor HTTPhttps://yourdomain.comfor HTTPS
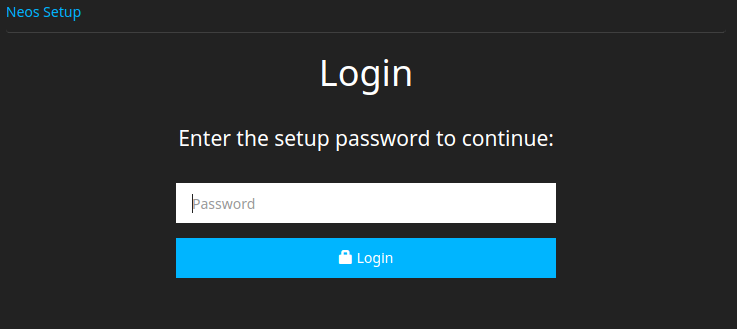
The Neos homepage or setup prompt should appear. If you imported demo content, you’ll see a sample site. Administrators can log in by visiting https://yourdomain.com/login and entering the credentials created in the previous step. Once logged in, explore the intuitive content editing interface, add pages, and customize your website.

Troubleshooting Common Issues
1. Permission Errors
If you experience 403 or 404 errors, verify that www-data owns the /var/www/neos directory and that the permissions are set correctly:
sudo chown -R www-data:www-data /var/www/neos
sudo chmod -R 755 /var/www/neos
2. Database Connection Failures
Encountering “Unable to connect to database” often indicates incorrect credentials in your Neos CMS configuration or that MySQL/MariaDB isn’t running. Confirm settings:
sudo systemctl status mariadb
If required, re-run the Flow database setup:
./flow setup:database
3. Missing PHP Extensions
If Neos flags certain missing PHP extensions during setup, install them using apt, for instance:
sudo apt install php-xml php-mbstring php-curl php-intl
Then restart Apache or Nginx:
sudo systemctl restart apache2
4. URL Rewriting Issues
Neos CMS relies on URL rewriting to handle routing. If you see “404 Not Found” errors, ensure Apache’s mod_rewrite is enabled (for Apache) or your try_files directive is correct (for Nginx).
5. SSL Certificate Not Working
If you run into certificate verification problems, ensure DNS settings are correct and point to the correct server. Then rerun Certbot or adjust firewall settings to allow HTTP (TCP 80) and HTTPS (TCP 443) traffic.
Congratulations! You have successfully installed Neos. Thanks for using this tutorial for installing the Neos Content Management System (CMS) on Ubuntu 24.04 LTS system. For additional help or useful information, we recommend you check the official Neos website.