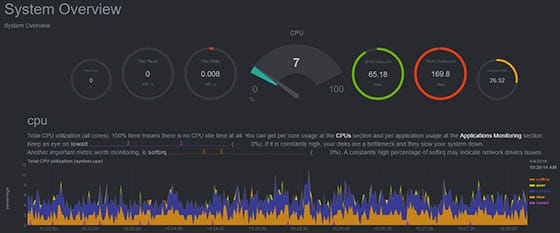
In this tutorial, we will show you how to install Netdata Monitoring on CentOS 8. For those of you who didn’t know, Netdata is real-time performance, troubleshooting, and health Monitoring tool for Applications and Systems. Netdata is a free and open-source tool that supports Linux, FreeBSD, and macOS systems which is helpful for SysAdmins, DevOps, and Developers for troubleshooting real-time issues. With Netdata, you can monitor CPU, RAM usage, disk I/O, network traffic, Postfix, among many others.
This article assumes you have at least basic knowledge of Linux, know how to use the shell, and most importantly, you host your site on your own VPS. The installation is quite simple and assumes you are running in the root account, if not you may need to add ‘sudo‘ to the commands to get root privileges. I will show you through the step-by-step installation of Netdata real-time monitoring tools on a CentOS 8.
Prerequisites
- A server running one of the following operating systems: CentOS 8.
- It’s recommended that you use a fresh OS install to prevent any potential issues
- A
non-root sudo useror access to theroot user. We recommend acting as anon-root sudo user, however, as you can harm your system if you’re not careful when acting as the root.
Install Netdata Monitoring on CentOS 8
Step 1. First, let’s start by ensuring your system is up-to-date.
sudo dnf clean all
sudo dnf update
sudo dnf install git zlib-devel libuuid-devel libmnl gcc make git autoconf automake pkgconfig curl findutils
Step 2. Installing Netdata Monitoring on CentOS 8.
Now we clone Netdata code from Github:
git clone https://github.com/netdata/netdata.git --depth=100
Once done, start the build and installation using the following command:
cd netdata/
sudo ./netdata-installer.sh
You should get output like below if the installation was successful:
--- Check KSM (kernel memory deduper) ---

Memory de-duplication instructions

You have kernel memory de-duper (called Kernel Same-page Merging,
or KSM) available, but it is not currently enabled.

To enable it run:

    echo 1 >/sys/kernel/mm/ksm/run
    echo 1000 >/sys/kernel/mm/ksm/sleep_millisecs

If you enable it, you will save 40-60% of netdata memory.

 --- Check version.txt ---
 --- Check apps.plugin ---
 --- Basic netdata instructions ---

netdata by default listens on all IPs on port 19999,
so you can access it with:

  http://your-ip-address:19999/

To stop netdata run:

  systemctl stop netdata

To start netdata run:

  systemctl start netdata

 --- We are done! ---
After installation, Netdata service should be started automatically:
sudo systemctl status netdata
Step 3. Configure Firewall for Netdata.
Before you can access Netdata’s web interface, you need to modify firewall rules to allow traffic on port 19999, the default communication port of Netdata:
sudo firewall-cmd --permanent --zone=public --add-port=19999/tcp
sudo firewall-cmd --reload
Step 4. Accessing Netdata Web Interface.
Netdata will be available on HTTP port 19999 by default. Open your favorite browser and navigate to http://your-domain.com:19999 or http://server-ip-address:19999

Congratulations! You have successfully installed Netdata. Thanks for using this tutorial for installing Netdata’s real-time performance monitoring tool on the CentOS 8 system. For additional help or useful information, we recommend you to check the official Netdata website.