How To Install Ntopng on Ubuntu 24.04 LTS

Network monitoring is a crucial aspect of maintaining a secure and efficient IT infrastructure. Ntopng, a powerful open-source network traffic monitoring tool, provides real-time insights into network activity, enabling administrators to identify potential issues, optimize performance, and ensure the smooth operation of their networks. In this comprehensive guide, we will walk you through the step-by-step process of installing Ntopng on Ubuntu 24.04 LTS, the latest long-term support release of the popular Linux distribution.
What is Ntopng?
Ntopng is a feature-rich network traffic monitoring and analysis tool that offers a wide range of capabilities to help network administrators gain visibility into their network’s health and performance. It provides real-time monitoring of network traffic, flow collection, and reporting functionalities, allowing users to identify bandwidth hogs, detect security threats, and troubleshoot network issues efficiently. Ntopng is available in three editions: Community, Professional, and Enterprise, catering to different levels of requirements and scalability.
System Requirements
Before proceeding with the installation of Ntopng, ensure that your Ubuntu system meets the minimum hardware and software requirements. Ntopng can run on modest hardware, but for optimal performance, it is recommended to have at least 2 GB of RAM and a multi-core processor. Additionally, make sure that your Ubuntu 24.04 LTS system is up to date with the latest security patches and software updates.
Preparing Your Ubuntu System
To begin the installation process, you need to prepare your Ubuntu system by updating the package repository and installing the necessary dependencies. Follow these steps to get your system ready:
- Open a terminal window and update the package list by running the following command:
sudo apt update - Upgrade the installed packages to their latest versions:
sudo apt upgrade - Enable the Universe repository, which contains community-maintained free and open-source software:
sudo add-apt-repository universe - Install the required dependencies by executing the following command:
sudo apt install wget curl apt-transport-https software-properties-common
Installing Ntopng
With the system prepared, you can now proceed to install Ntopng. Follow these steps to download and install Ntopng from the official repository:
- Add the Ntopng repository to your system by running the following command:
curl -s https://packages.ntop.org/apt/24.04/all/apt.ntop.org.gpg.key | sudo apt-key add - - Add the repository URL to the APT sources list:
sudo add-apt-repository "deb https://packages.ntop.org/apt/24.04/all/ focal main" - Update the package list to include the newly added repository:
sudo apt update - Install Ntopng using the APT package manager:
sudo apt install ntopng
Setting Up Ntopng
After the successful installation of Ntopng, you need to start and enable the Ntopng service to ensure it runs automatically on system startup. Use the following commands to set up Ntopng:
- Start the Ntopng service:
sudo systemctl start ntopng - Enable the Ntopng service to start automatically on system boot:
sudo systemctl enable ntopng - Verify the status of the Ntopng service to ensure it is running correctly:
sudo systemctl status ntopng
Accessing the Ntopng Web Interface
Ntopng provides a user-friendly web interface for monitoring and analyzing network traffic. To access the web interface, follow these steps:
- Open a web browser and enter the following URL:
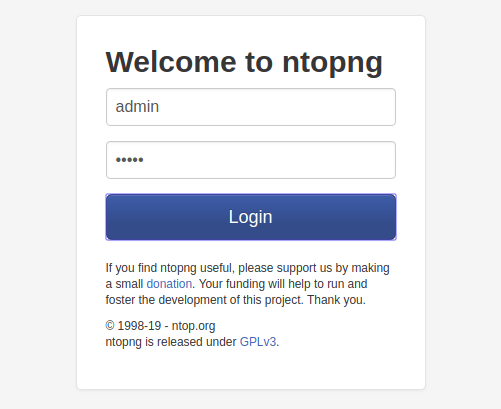
http://localhost:3000 - You will be prompted to log in. Use the default credentials:
- Username: admin
- Password: admin
- For security reasons, it is highly recommended to change the default password immediately after logging in.
- If you are accessing Ntopng from a remote system, ensure that the necessary firewall rules are configured to allow access to port 3000.

Configuring Ntopng
Ntopng provides various configuration options to customize its behavior and adapt to your specific network monitoring requirements. To modify the Ntopng configuration, follow these steps:
- Open the Ntopng configuration file using a text editor with sudo privileges:
sudo nano /etc/ntopng/ntopng.conf - Modify the desired settings, such as the network interface to monitor or the web interface port.
- Save the changes and exit the text editor.
- Restart the Ntopng service to apply the new configuration:
sudo systemctl restart ntopng
Using Ntopng for Traffic Analysis
Once Ntopng is up and running, you can leverage its powerful features to gain insights into your network traffic. The Ntopng dashboard provides an overview of network activity, including top talkers, protocol distribution, and bandwidth usage. You can drill down into specific hosts, flows, and protocols to identify potential issues and optimize network performance. Ntopng also offers extensive reporting capabilities, allowing you to generate detailed reports on network usage, security events, and more.
Common Issues and Troubleshooting
While installing and using Ntopng is generally straightforward, you may encounter some common issues. Here are a few troubleshooting tips:
- If the Ntopng service fails to start, check the system logs for any error messages and ensure that all dependencies are properly installed.
- If you cannot access the Ntopng web interface, verify that the service is running and that the firewall rules allow access to the specified port.
- If Ntopng is not capturing network traffic, ensure that the correct network interface is specified in the configuration file and that the necessary permissions are granted.
Congratulations! You have successfully installed Ntopng. Thanks for using this tutorial for installing the Ntopng network monitoring tool on Ubuntu 24.04 LTS system. For additional help or useful information, we recommend you check the official Ntopng website.