How To Install OnlyOffice on AlmaLinux 10

OnlyOffice stands as a robust alternative to traditional office suites, providing comprehensive tools for document creation, editing, and collaboration. For organizations running AlmaLinux 10, implementing OnlyOffice delivers a powerful solution for document management needs without the licensing costs of proprietary software. This guide walks you through the complete installation process, covering both Desktop Editors and Document Server options to fulfill various deployment scenarios.
Understanding OnlyOffice
OnlyOffice (formerly TeamLab) is an open-source office suite developed by Ascensio System SIA that offers a comprehensive set of tools for document management. What distinguishes OnlyOffice from other office suites is its exceptional compatibility with Microsoft Office formats and its robust collaboration features.
What is OnlyOffice?
OnlyOffice provides a complete environment for working with text documents, spreadsheets, and presentations. The suite is built using HTML5 technology and JavaScript, enabling cross-platform compatibility and seamless document sharing capabilities. It supports most popular document formats including DOCX, XLSX, PPTX, ODT, ODS, ODP, and PDF.
Different Editions of OnlyOffice
OnlyOffice comes in several editions to meet different requirements:
- Desktop Editors: A standalone application for creating and editing documents locally without requiring an internet connection.
- Document Server (Community Edition): A server-based solution enabling real-time collaboration through a web interface.
- Workspace: A complete office suite including document management, project management, CRM, and communication tools (not covered in this guide).
Features and Benefits
OnlyOffice provides several advantages for business environments:
- Excellent compatibility with Microsoft Office formats
- Real-time collaboration capabilities
- Advanced security features with document encryption
- Support for plugins and API integration
- Open-source availability under GNU AGPL v3 license
Why OnlyOffice on AlmaLinux?
The combination of OnlyOffice and AlmaLinux 10 offers distinct advantages:
- AlmaLinux provides enterprise-grade stability and long-term support
- Both technologies prioritize security features essential for business environments
- Cost-effective solution eliminating proprietary software licensing fees
- Extensive configuration options to meet specific organizational needs
- Instructions applicable to other RHEL derivatives like CentOS and Rocky Linux
System Requirements
Before proceeding with the installation, ensure your AlmaLinux 10 system meets these requirements:
Hardware Requirements
For optimal performance of OnlyOffice on AlmaLinux 10, your system should have:
- CPU: Dual-core 2 GHz or better
- RAM: At least 2 GB (4 GB recommended for Document Server)
- Storage: Minimum 2 GB free space
- Architecture: 64-bit system (OnlyOffice doesn’t support 32-bit systems)
Software Prerequisites
Your AlmaLinux 10 installation should include:
- Kernel: Version 3.8 or higher (AlmaLinux 10 uses a newer kernel by default)
- Updated packages: A fully updated system
- User permissions: Root or sudo access for installation
Preparation Steps
A proper preparation phase ensures a smooth installation process. Follow these steps to prepare your AlmaLinux 10 system:
Updating System Packages
Begin by updating your system to ensure all packages are current:
sudo dnf clean all
sudo dnf update
Installing Development Tools
Install the Development Tools package group, which provides necessary compilers and libraries:
sudo dnf groupinstall "Development Tools"This package group contains essential build tools that may be required during the installation process.
Setting Up Repositories
OnlyOffice is not available in the default AlmaLinux repositories. For Desktop Editors, you’ll download the RPM directly, while for Document Server, you may need additional repositories.
Installing OnlyOffice Desktop Editors
There are multiple methods to install OnlyOffice Desktop Editors on AlmaLinux 10. We’ll cover the two most straightforward approaches.
Method 1: Using RPM Package
This direct method involves downloading and installing the official RPM package:
1. Download the latest RPM package using wget:
wget https://download.onlyoffice.com/install/desktop/editors/linux/onlyoffice-desktopeditors.x86_64.rpm2. Install the downloaded package using dnf:
sudo dnf install onlyoffice-desktopeditors.x86_64.rpmThe package manager will automatically resolve and install any required dependencies.
Method 2: Using Package Repositories
For easier updates, you can add the OnlyOffice repository to your system:
1. Create a new repository file:
sudo nano /etc/yum.repos.d/onlyoffice.repo2. Add the following content to the file:
[onlyoffice]
name=OnlyOffice Repository
baseurl=https://download.onlyoffice.com/repo/centos/main/noarch/
gpgcheck=1
gpgkey=https://download.onlyoffice.com/repo/centos/RPM-GPG-KEY-ONLYOFFICE
enabled=1
3. Save and close the file.
4. Install OnlyOffice Desktop Editors from the repository:
sudo dnf install onlyoffice-desktopeditorsPost-Installation Verification
After installing OnlyOffice Desktop Editors, verify that it runs correctly:
1. Launch OnlyOffice from the application menu or run it from the terminal:
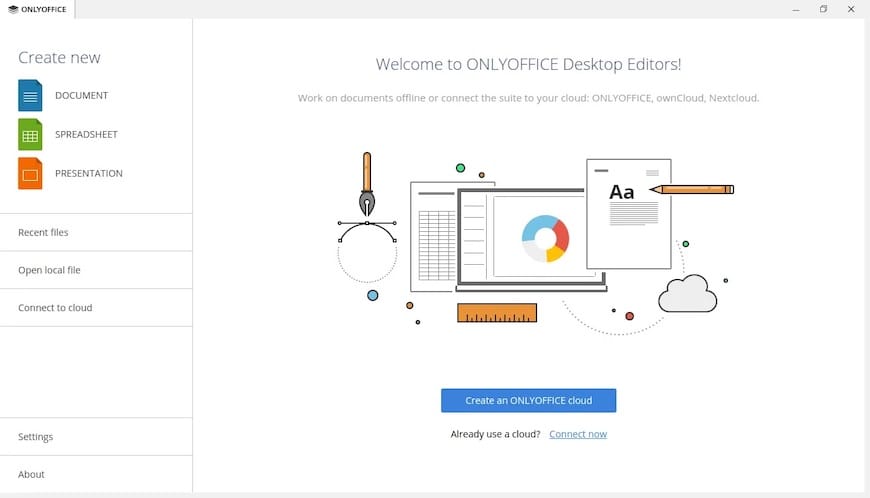
onlyofficeThe application should start and present you with the document selection screen.
Installing OnlyOffice Document Server
OnlyOffice Document Server provides collaborative editing capabilities through a web interface. Its installation requires more components than the Desktop Editors.
Installing Prerequisites
Before installing the Document Server, set up the required dependencies:
PostgreSQL Setup
1. Install PostgreSQL:
sudo dnf install postgresql-server postgresql-contrib2. Initialize the PostgreSQL database:
sudo postgresql-setup --initdb3. Enable and start PostgreSQL:
sudo systemctl enable postgresql
sudo systemctl start postgresql
4. Create a database and user for OnlyOffice:
sudo -u postgres psql -c "CREATE DATABASE onlyoffice;"
sudo -u postgres psql -c "CREATE USER onlyoffice WITH PASSWORD 'onlyoffice';"
sudo -u postgres psql -c "GRANT ALL PRIVILEGES ON DATABASE onlyoffice TO onlyoffice;"
RabbitMQ Installation
1. Install RabbitMQ:
sudo dnf install rabbitmq-server2. Enable and start RabbitMQ:
sudo systemctl enable rabbitmq-server
sudo systemctl start rabbitmq-server
NGINX Web Server Setup
1. Install NGINX:
sudo dnf install nginx2. Enable and start NGINX:
sudo systemctl enable nginx
sudo systemctl start nginx
Document Server Installation Process
Now, install OnlyOffice Document Server:
1. Download the Document Server installation script:
wget https://download.onlyoffice.com/install/documentserver/linux/onlyoffice-documentserver.sh2. Make the script executable:
chmod +x onlyoffice-documentserver.sh3. Run the installation script:
sudo ./onlyoffice-documentserver.sh4. Follow the on-screen prompts to complete the installation.
Database Configuration
During installation, you’ll need to configure the database connection parameters:
- For PostgreSQL:
- Host: localhost
- Database: onlyoffice
- User: onlyoffice
- Password: onlyoffice
- For RabbitMQ:
- Host: localhost
- User: guest
- Password: guest
You can set these parameters when running the configuration script:
bash documentserver-configure.shThis script will ask you to specify the PostgreSQL and RabbitMQ connection parameters.
Configuration and Optimization
After installing OnlyOffice, optimize it for your specific requirements.
Desktop Editors Configuration
Customize OnlyOffice Desktop Editors through:
1. Application Settings: Access via File > Options menu
- Configure default save locations
- Set language preferences
- Adjust autosave intervals
2. Integration with System:
- Set default applications for document types
- Configure file associations
Document Server Configuration
Fine-tune the Document Server for optimal performance:
1. Editing Configuration Files:
- Main configuration file:
/etc/onlyoffice/documentserver/local.json
2. Setting up SSL/TLS:
- Generate or obtain SSL certificates
- Configure NGINX for HTTPS
3. Performance Tuning Options:
- Adjust worker processes in NGINX configuration
- Optimize PostgreSQL for your hardware
Security Hardening
Implement additional security measures:
1. Update Regularly:
- Set up a maintenance schedule for security updates
2. Database Security:
- Change default passwords
- Restrict database access to local connections
3. File Permissions:
- Review and tighten permissions on configuration files
SELinux and Firewall Settings
AlmaLinux 10 uses SELinux and firewalld for security. Proper configuration is essential for OnlyOffice functionality.
Understanding SELinux Contexts
SELinux can prevent OnlyOffice from functioning correctly if not properly configured. Check SELinux status:
getenforceConfiguring SELinux for OnlyOffice
You can approach SELinux configuration several ways:
- Create Custom Policies (recommended for production)
- Set SELinux to Permissive Mode (for testing only)
- Disable SELinux (not recommended for production):
- Edit
/etc/selinux/config - Change
SELINUX=enforcingtoSELINUX=disabled - Reboot the system
- Edit
Firewall Configuration
Configure the firewall to allow necessary traffic:
sudo firewall-cmd --zone=public --add-port=80/tcp --permanent
sudo firewall-cmd --reload
This allows HTTP traffic through the firewall.
Launching and Using OnlyOffice
Now that OnlyOffice is installed and configured, learn how to use it effectively.
Starting Desktop Editors
Launch OnlyOffice Desktop Editors using one of these methods:
1. From Application Menu:
- Click on Activities
- Search for “OnlyOffice”
- Click on the OnlyOffice Desktop Editors icon
2. From Command Line:
onlyoffice
Accessing Document Server
Access the OnlyOffice Document Server through a web browser:
- Open your preferred browser
- Navigate to
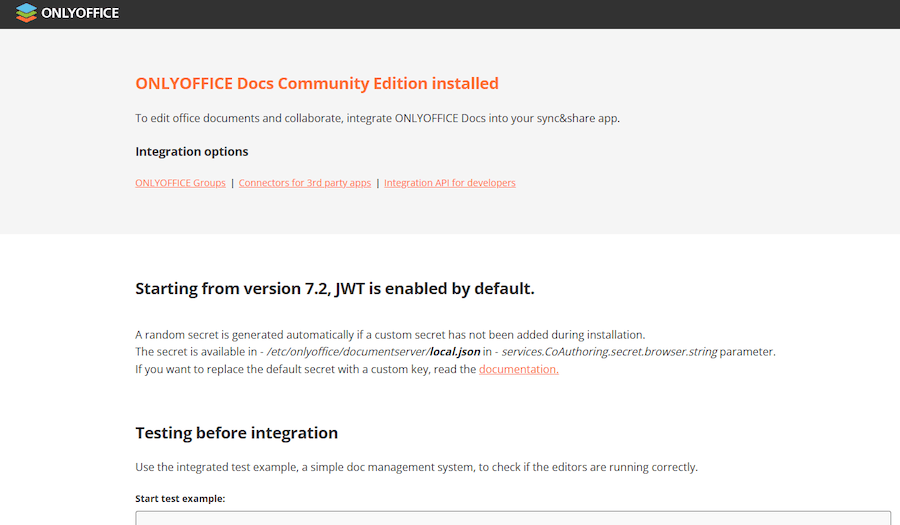
http://localhostor your server’s IP address - The welcome page provides links to example files, API documentation, and integration instructions
Once the configuration is finished, you can enter http://localhost in your browser to open the ONLYOFFICE Docs welcome page.

Integration with Other Applications
OnlyOffice becomes more powerful when integrated with other systems.
Connecting with File Storage Systems
Integrate OnlyOffice with popular file storage solutions:
1. Nextcloud/ownCloud:
- Install the OnlyOffice connector app
- Configure the connection to your Document Server
2. Local File Systems:
- Configure OnlyOffice Desktop Editors to work with local directories
API Integration Options
Use the OnlyOffice API for custom integrations:
1. Document Server API:
- REST API for document operations
- JavaScript API for embedded editors
- Callback URLs for tracking document changes
Using with Content Management Systems
Connect OnlyOffice to popular CMS platforms:
1. WordPress:
- Install OnlyOffice integration plugins
- Configure connection parameters
2. Joomla/Drupal:
- Use available extensions/modules
- Set up document editing workflows
Troubleshooting Common Issues
Even with careful installation, you may encounter issues. Here are solutions for common problems:
Installation Failures
1. Dependency Issues:
- Problem: Missing or conflicting dependencies
- Solution: Update repositories and try installation again
sudo dnf update2. Repository Access Problems:
- Problem: Unable to access package repositories
- Solution: Check network connectivity and repository configuration
Connection Issues
1. Web Server Not Responding:
- Problem: Unable to access Document Server web interface
- Solution: Check NGINX configuration and status
sudo systemctl status nginx2. Firewall Blocking Access:
- Problem: Cannot connect to Document Server from other machines
- Solution: Verify firewall rules
sudo firewall-cmd --list-allDatabase Problems
1. PostgreSQL Connection Failures:
- Problem: Document Server cannot connect to database
- Solution: Verify PostgreSQL configuration and credentials
Log File Analysis
Check these key log files when troubleshooting:
1. Document Server Logs:
sudo tail -f /var/log/onlyoffice/documentserver/converter/out.log2. Web Server Logs:
sudo tail -f /var/log/nginx/error.logUpdating and Maintenance
Keep your OnlyOffice installation updated for optimal performance and security.
Keeping OnlyOffice Updated
1. Desktop Editors Updates:
- If installed via RPM:
sudo dnf update onlyoffice-desktopeditors2. Document Server Updates:
- Apply updates and restart services:
sudo dnf update
sudo systemctl restart nginx
Backup Procedures
Implement regular backups to prevent data loss:
1. Document Server Database Backup:
sudo -u postgres pg_dump onlyoffice > onlyoffice_db_backup.sql2. Configuration Files Backup:
sudo cp -r /etc/onlyoffice /etc/onlyoffice.backupCongratulations! You have successfully installed OnlyOffice. Thanks for using this tutorial for installing the OnlyOffice on AlmaLinux OS 10 system. For additional help or useful information, we recommend you check the official OnlyOffice website.