How To Install OpenVAS on AlmaLinux 9

In this tutorial, we will show you how to install OpenVAS on AlmaLinux 9. OpenVAS is a robust vulnerability scanning and management solution that helps identify security weaknesses in systems, networks, and applications. Developed and maintained by Greenbone Networks, OpenVAS offers a wide range of features, including unauthenticated and authenticated testing, support for various protocols, and a user-friendly web interface. With its extensive database of Network Vulnerability Tests (NVTs) and regular updates, OpenVAS equips security professionals with the tools needed to proactively detect and mitigate vulnerabilities.
This article assumes you have at least basic knowledge of Linux, know how to use the shell, and most importantly, you host your site on your own VPS. The installation is quite simple and assumes you are running in the root account, if not you may need to add ‘sudo‘ to the commands to get root privileges. I will show you the step-by-step installation of the OpenVAS on AlmaLinux 9. You can follow the same instructions for CentOS and Rocky Linux or RHEL-based.
Prerequisites
- A server running one of the following operating systems: AlmaLinux 9.
- It’s recommended that you use a fresh OS install to prevent any potential issues.
- SSH access to the server (or just open Terminal if you’re on a desktop).
- Minimum 10 GB of disk space (20 GB recommended).
- At least 1.5 GB of RAM.
- An active internet connection. You’ll need an internet connection to download the necessary packages and dependencies.
- You’ll need root or sudo privileges to install OpenVAS and make system-wide changes. Make sure you have the necessary permissions before starting the installation process.
Install OpenVAS on AlmaLinux 9
Step 1. Update Your System.
To lay the groundwork for a smooth OpenVAS installation, begin by updating your AlmaLinux 9 system to the latest available packages. Open a terminal and execute the following command:
sudo dnf clean all
sudo dnf update
Next, enable the necessary repositories, including CodeReady Linux Builder (CRB) and Extra Packages for Enterprise Linux (EPEL). These repositories provide access to additional packages required by OpenVAS. Run the following commands to enable the repositories:
sudo dnf config-manager --set-enabled crb
sudo dnf install -y epel-release
If your system has SELinux enabled, it is recommended to temporarily disable it to avoid potential conflicts during the installation process. Use the following command to disable SELinux:
sudo setenforce 0
Remember to re-enable SELinux after completing the installation by running sudo setenforce 1.
Step 2. Installing OpenVAS Dependencies.
OpenVAS relies on several dependencies to function properly. Install the required libraries and tools by executing the following command:
sudo dnf install -y wget gcc cmake pkg-config libssh-devel gnutls-devel libpcap-devel gpgme-devel libgcrypt-devel libxml2-devel libxslt-devel sqlite-devel libksba-devel libical-devel libpq-devel libuuid-devel libnet-devel perl-ExtUtils-MakeMaker perl-DBD-SQLite perl-XML-Parser perl-XML-SAX perl-XML-SAX-Base perl-XML-SAX-Expat perl-XML-SAX-Writer perl-XML-Simple perl-XML-Twig perl-XML-XPath perl-XML-Dumper perl-XML-LibXML perl-XML-LibXSLT perl-XML-Bare perl-XML-Entities perl-XML-RSS perl-XML-Atom perl-XML-Compile perl-XML-Compile-Cache perl-XML-Compile-SOAP perl-XML-Compile-WSDL11 perl-XML-Compile-Transport-SOAPHTTP perl-XML-LibXML-Simple perl-XML-Parser-Lite perl-XML-RegExp perl-XML-DOM perl-XML-DOM-XPath perl-XML-Filter-BufferText perl-XML-Handler-YAWriter perl-XML-Tidy perl-XML-Writer perl-XML-XPathEngine perl-YAML-Tiny perl-YAML-Syck perl-YAML-LibYAML perl-JSON perl-JSON-PP perl-JSON-XS perl-JSON-MaybeXS perl-JSON-Any perl-JSON-Parse perl-JSON-Tiny perl-JSON-DWIW perl-JSON-Create perl-JSON-Validator perl-JSON-Hyper perl-JSON-Hyper-Backend-Pegex perl-JSON-Hyper-Backend-Tiny perl-JSON-Hyper-Backend-YAML perl-JSON-Hyper-Backend-JSON perl-JSON-Hyper-Backend-JSON-XS perl-JSON-Hyper-Backend-JSON-PP perl-JSON-Hyper-Backend-JSON-Tiny perl-JSON-Hyper-Backend-JSON-DWIW perl-JSON-Hyper-Backend-JSON-Create perl-JSON-Hyper-Backend-JSON-Validator perl-JSON-Hyper-Backend-JSON-MaybeXS perl-JSON-Hyper-Backend-JSON-Any perl-JSON-Hyper-Backend-JSON-Parse
This command installs a wide range of dependencies, including development libraries, Perl modules, and XML/JSON parsing tools. If you encounter any issues during the dependency installation, refer to the official OpenVAS documentation or seek assistance from the community forums.
Step 3. Installing OpenVAS.
With the dependencies in place, you can now proceed with installing OpenVAS itself. Follow these steps to download and configure OpenVAS:
wget https://github.com/greenbone/openvas-scanner/archive/refs/tags/v23.8.0.tar.gz
Extract the downloaded archive:
tar xvf v23.8.0.tar.gz
Navigate to the extracted directory:
cd openvas-23.8.0
Create a build directory and navigate into it:
mkdir build
cd build
Configure the build using CMake:
cmake ..
Compile the source code:
make
Install OpenVAS:
sudo make install
Run the OpenVAS setup script to perform the initial configuration:
sudo openvas-setup
The setup script will guide you through the process of setting up the database, creating an admin user, and configuring various OpenVAS components. Follow the prompts and provide the necessary information to complete the setup.
Step 4. Configuring OpenVAS.
After the installation, you need to perform some additional configuration steps to ensure OpenVAS functions optimally. Here are the key configuration tasks:
Update the Network Vulnerability Tests (NVTs) feed:
sudo nano /etc/gvm/gsad_log.conf
Modify the listen_address and port settings to match your desired configuration. For example, to make GSA accessible from any IP address on port 9392, set:
listen_address = 0.0.0.0
port = 9392
Save the changes and exit the editor, then start the OpenVAS services:
sudo systemctl start ospd-openvas
sudo systemctl start gvmd
sudo systemctl start gsad
These commands start the OpenVAS Scanner, Greenbone Vulnerability Manager, and Greenbone Security Assistant services, respectively.
Step 5. Updating OpenVAS Feed.
Keeping the OpenVAS feed up to date is essential for detecting the latest vulnerabilities. OpenVAS relies on three main feeds: Network Vulnerability Tests (NVTs), SCAP data, and CERT data. To update these feeds, use the following commands:
sudo greenbone-nvt-sync
sudo greenbone-scapdata-sync
sudo greenbone-certdata-sync
Step 6. Configuring Firewall for OpenVAS.
To allow remote access to the OpenVAS web interface, you need to configure your firewall to open the necessary ports. By default, OpenVAS uses port 9392 for the Greenbone Security Assistant (GSA) web interface. Run the following commands to open the required port:
sudo firewall-cmd --permanent --add-port=9392/tcp
sudo firewall-cmd --reload
These commands add a permanent firewall rule to allow incoming traffic on port 9392 and reload the firewall configuration to apply the changes.
Step7. Accessing the OpenVAS Web Interface.
With the installation and configuration complete, you can now access the OpenVAS web interface to start using the vulnerability scanner. Open a web browser and navigate to the following URL:
https://<your-server-ip>:9392
Replace <your-server-ip> with the IP address or hostname of your AlmaLinux 9 server running OpenVAS. You will be prompted with a login screen. Use the admin credentials you created during the OpenVAS setup process to log in.
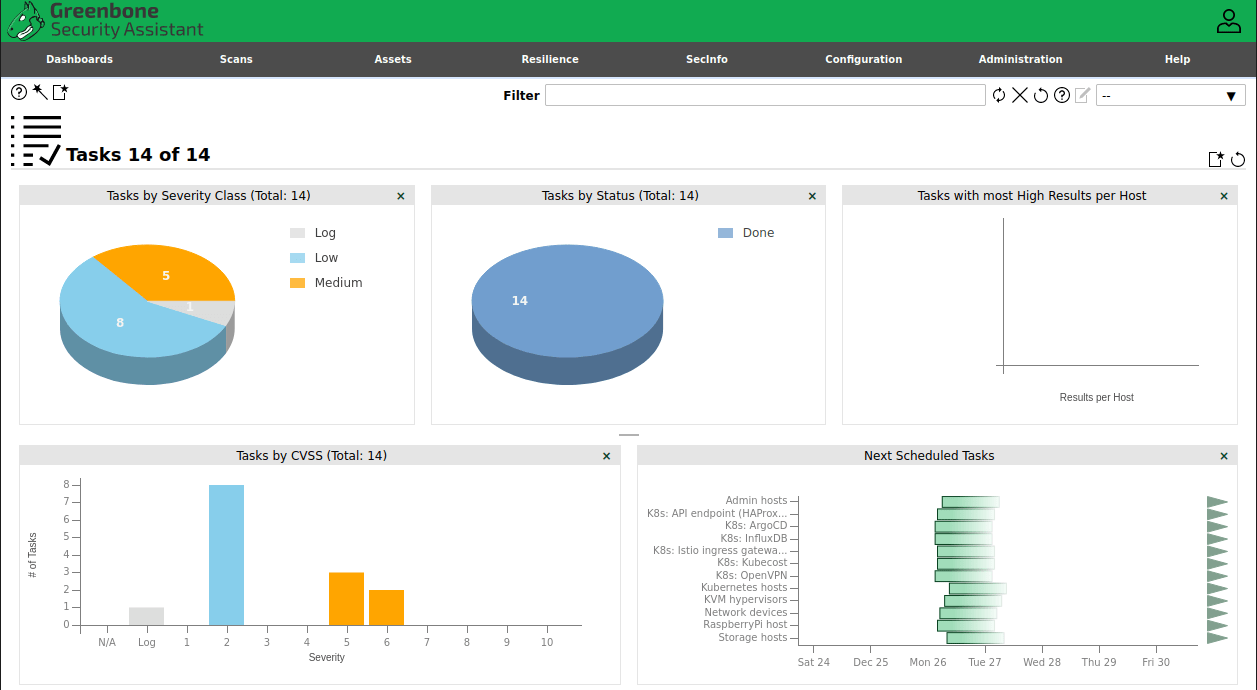
Once logged in, you will be greeted by the OpenVAS dashboard, which provides an overview of your vulnerability scanning activities, including scan results, task schedules, and system status. From here, you can navigate through the various sections of the web interface to configure targets, create scan tasks, generate reports, and manage user accounts.

Congratulations! You have successfully installed OpenVAS. Thanks for using this tutorial for installing the OpenVAS on your AlmaLinux 9 system. For additional help or useful information, we recommend you check the official OpenVAS website.