How To Install osTicket on Ubuntu 22.04 LTS

In this tutorial, we will show you how to install osTicket on Ubuntu 22.04 LTS. For those of you who didn’t know, osTicket is an open-source and one of the most widely used ticketing systems by small and medium-sized businesses. One of the main features of osTicket is its web-based interface, which allows users to create, track, and respond to customer support tickets. The interface is intuitive and easy to use, and it includes tools for managing and organizing tickets, such as the ability to assign tickets to specific users or teams, set priorities, and track the status of tickets.
This article assumes you have at least basic knowledge of Linux, know how to use the shell, and most importantly, you host your site on your own VPS. The installation is quite simple and assumes you are running in the root account, if not you may need to add ‘sudo‘ to the commands to get root privileges. I will show you the step-by-step installation of the osTicket customer support and ticketing system on Ubuntu 22.04 (Jammy Jellyfish). You can follow the same instructions for Ubuntu 22.04 and any other Debian-based distribution like Linux Mint, Elementary OS, Pop!_OS, and more as well.
Prerequisites
- A server running one of the following operating systems: Ubuntu 22.04, 20.04, and any other Debian-based distribution like Linux Mint.
- It’s recommended that you use a fresh OS install to prevent any potential issues.
- SSH access to the server (or just open Terminal if you’re on a desktop).
- An active internet connection. You’ll need an internet connection to download the necessary packages and dependencies for osTicket.
- A
non-root sudo useror access to theroot user. We recommend acting as anon-root sudo user, however, as you can harm your system if you’re not careful when acting as the root.
Install osTicket on Ubuntu 22.04 LTS Jammy Jellyfish
Step 1. First, make sure that all your system packages are up-to-date by running the following apt commands in the terminal.
sudo apt update
sudo apt upgrade
Step 2. Installing LEMP Stack on Ubuntu 22.04.
Before starting this tutorial, the LEMP server must be installed on your server. If you do not have LEMP Stack installed, you can follow our guide here.
Step 3. Installing osTicket on Ubuntu 22.04.
By default, osTicket is not available on Ubuntu 22.04 base repository. Now run the following command below to download the latest stable version of osTicket from the official page of your Ubuntu system:
wget https://github.com/osTicket/osTicket/releases/download/v1.17.2/osTicket-v1.17.2.zip
Next, create a directory of osTicket and extract the downloaded file inside that directory:
mkdir /var/www/html/osticket
unzip osTicket-v1.17.2.zip -d /var/www/html/osticket
We will need to change some folders permissions:
chown -R www-data:www-data /var/www/html/osticket
chmod -R 755 /var/www/html/osticket
Now we rename the osTicket sample configuration file:
mv /var/www/html/osticket/upload/include/ost-sampleconfig.php /var/www/html/osticket/upload/include/ost-config.php
Step 4. Configuring MariaDB.
By default, MariaDB is not hardened. You can secure MariaDB using the mysql_secure_installation script. you should read and below each step carefully which will set a root password, remove anonymous users, disallow remote root login, and remove the test database and access to secure MariaDB:
mysql_secure_installation
Configure it like this:
- Set root password? [Y/n] y
- Remove anonymous users? [Y/n] y
- Disallow root login remotely? [Y/n] y
- Remove test database and access to it? [Y/n] y
- Reload privilege tables now? [Y/n] y
Next, we will need to log in to the MariaDB console and create a database for osTicket. Run the following command:
mysql -u root -p
This will prompt you for a password, so enter your MariaDB root password and hit Enter. Once you are logged in to your database server you need to create a database for osTicket installation:
MariaDB [(none)]> CREATE DATABASE osticket;
MariaDB [(none)]> CREATE USER 'osticket'@'localhost' IDENTIFIED BY 'your-str0ng-passwd';
MariaDB [(none)]> GRANT ALL PRIVILEGES ON osticket.* TO osticket@localhost IDENTIFIED BY "securepassword";
MariaDB [(none)]> FLUSH PRIVILEGES;
MariaDB [(none)]> EXIT;
For additional resources on installing MariaDB, read the post below:
Step 5. Create Nginx Virtual Host.
Now we create an Nginx virtual host configuration file for osTicket:
nano /etc/nginx/conf.d/osticket.conf
Add the following lines:
server {
 listen      80;
 server_name your-domain.com;
 root        /var/www/html/osticket/upload;
 index       index.php;

 charset utf-8;
 gzip on;
 gzip_types text/css application/javascript text/javascript application/x-javascript image/svg+xml text/plain text/xsd text/xsl text/xml image/x-icon;
 location / {
  try_files $uri $uri/ /index.php?$query_string;
 }
 location /api/v0 {
  try_files $uri $uri/ /api_v0.php?$query_string;
 }
 location ~ \.php {
  include fastcgi.conf;
  fastcgi_split_path_info ^(.+\.php)(/.+)$;
  fastcgi_pass unix:/var/run/php/php8.1-fpm.sock;
 }
 location ~ /\.ht {
  deny all;
 }
}
Save and close the file then, restart the Nginx service with the following command:
nginx -t
sudo systemctl restart nginx
For additional resources on installing and managing Nginx, read the post below:
Step 6. Configure Firewall.
Now we set up an Uncomplicated Firewall (UFW) with osTicket to allow public access on default web ports 80:
sudo ufw allow OpenSSH
sudo ufw allow 'Nginx Full'
sudo ufw enable
Step 7. Accessing osTicket Web Interface.
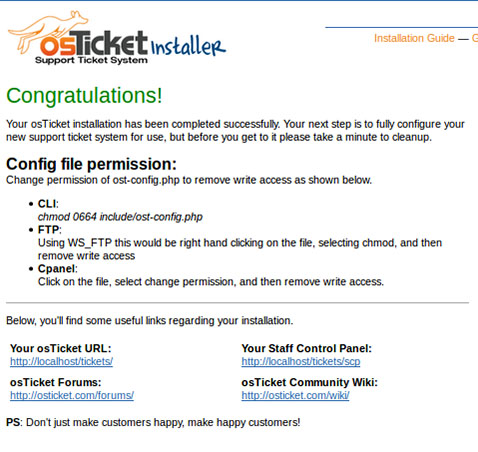
Once successfully installed, open your web browser and access the osTicket Web UI using the URL http://your-domain.com. You will be redirected to the following page:

Congratulations! You have successfully installed osTicket. Thanks for using this tutorial for installing osTicket with LEMP stack on Ubuntu 22.04 LTS Jammy Jellyfish system. For additional help or useful information, we recommend you check the official osTicket website.