How To Install OTRS on Fedora 42

OTRS (Open-source Ticket Request System) is a powerful, flexible ticketing solution that helps organizations manage customer service requests efficiently. Installing it on Fedora 42 requires careful preparation and configuration. This comprehensive guide walks you through each step of the installation process, from preparing your system to post-installation optimization. Whether you’re setting up a small helpdesk or a large-scale support system, this tutorial provides everything you need to get OTRS up and running smoothly on Fedora 42.
Understanding OTRS and System Requirements
OTRS is a robust open-source ticketing system designed for handling customer inquiries, support requests, and incident management. Before diving into installation, it’s crucial to ensure your Fedora 42 system meets the necessary hardware and software requirements.
Hardware Requirements
For optimal OTRS performance, your system should have:
- CPU: AMD Ryzen 7 3700X Octa-core or comparable processor
- Memory: Minimum 16GB RAM, recommended 64GB for production environments
- Storage: At least 200GB SSD storage, preferably 2 × 1TB NVMe SSDs in RAID 1 configuration
- Network: Gigabit LAN connection
The actual requirements may vary based on your expected ticket volume and user load.
Software Prerequisites
OTRS requires several key components:
- Perl 5.16.0 or higher with specific modules
- Web server: Apache or Nginx
- Database server: MySQL 5.0+, MariaDB, PostgreSQL 9.2+, or Oracle
- Elasticsearch (versions 6.x to 7.x)
- Node.js 16
OTRS cannot run on containerized environments or Windows systems – a bare metal server or virtual machine running Fedora 42 is required.
Preparing Your Fedora 42 Environment
Proper preparation of your Fedora 42 system is essential for a successful OTRS installation. This section covers the initial setup steps.
Updating Your System
First, ensure your Fedora 42 system is up-to-date:
sudo dnf update -yThis command updates all packages to their latest versions, providing a stable foundation for OTRS.
Disabling SELinux
OTRS requires SELinux to be disabled for proper functionality:
sudo setenforce 0To make this change permanent, edit the SELinux configuration file:
sudo nano /etc/selinux/configChange SELINUX=enforcing to SELINUX=disabled and save the file. Alternatively, you can set it to permissive mode if you prefer to receive warnings rather than blocking actions.
Configuring Firewall
Configure the firewall to allow HTTP and HTTPS traffic:
sudo firewall-cmd --zone=public --add-service=http --permanent
sudo firewall-cmd --zone=public --add-service=https --permanent
sudo firewall-cmd --reload
These commands ensure clients can connect to the OTRS web interface.
Creating OTRS User
Create a dedicated user and group for OTRS:
sudo useradd -r -d /opt/otrs -c 'OTRS user' otrs
sudo usermod -G apache otrs
This creates a system user with appropriate permissions for running OTRS services.
Installing Required Dependencies
OTRS depends on several software packages that must be installed before proceeding with the main installation.
Enabling EPEL Repository
First, enable the EPEL (Extra Packages for Enterprise Linux) repository, which contains many of the required packages:
sudo dnf install -y epel-releaseInstalling Perl and Required Modules
Install Perl and its required modules:
sudo dnf install -y perl perl-core perl-CPANOTRS requires numerous Perl modules. You can check which ones are needed using the OTRS environment checker after downloading the OTRS files.
Setting Up the Web Server
Install and configure Apache:
sudo dnf install -y httpd mod_perl
sudo systemctl enable httpd
sudo systemctl start httpd
These commands install Apache with mod_perl support and configure it to start automatically with the system.
Database Server Installation
OTRS supports multiple database systems. For this guide, we’ll use MariaDB:
sudo dnf install -y mariadb-server
sudo systemctl enable mariadb
sudo systemctl start mariadb
Secure the MariaDB installation:
sudo mysql_secure_installationFollow the prompts to set a root password, remove anonymous users, disallow root login remotely, and remove the test database.
Installing Elasticsearch
Install Elasticsearch for enhanced search capabilities:
sudo rpm --import https://artifacts.elastic.co/GPG-KEY-elasticsearchCreate a repository file for Elasticsearch:
sudo nano /etc/yum.repos.d/elasticsearch.repoAdd the following content:
[elasticsearch]
name=Elasticsearch repository for 7.x packages
baseurl=https://artifacts.elastic.co/packages/7.x/yum
gpgcheck=1
gpgkey=https://artifacts.elastic.co/GPG-KEY-elasticsearch
enabled=1
autorefresh=1
type=rpm-md
Install Elasticsearch:
sudo dnf install -y elasticsearch
sudo systemctl enable elasticsearch
sudo systemctl start elasticsearch
Installing Node.js
Install Node.js 16, which is required for OTRS:
sudo dnf install -y nodejsVerify the installation:
node --versionDownloading and Extracting OTRS
With all dependencies in place, you can now download and extract the OTRS package.
Downloading OTRS
Navigate to the /opt directory and download the latest OTRS Community Edition:
cd /opt
sudo wget https://otrscommunityedition.com/download/otrs-community-edition-6.0.41.tar.gz
Extracting the Archive
Extract the downloaded file:
sudo tar -xzf otrs-community-edition-6.0.41.tar.gzRename the extracted directory for easier management:
sudo mv otrs-* otrsSetting Permissions
Set the correct ownership and permissions:
sudo chown -R otrs:otrs /opt/otrs
sudo chmod -R 755 /opt/otrs
Verifying Installation Files
Check that all required modules are installed:
sudo /opt/otrs/bin/otrs.CheckEnvironment.plThis script will identify any missing Perl modules or other requirements.
Database Setup and Configuration
A properly configured database is essential for OTRS performance and reliability.
Creating the OTRS Database
Access the MariaDB command line:
sudo mysql -u root -pEnter the root password you set earlier, then create the OTRS database and user:
CREATE DATABASE otrs CHARACTER SET utf8 COLLATE utf8_general_ci;
CREATE USER 'otrs'@'localhost' IDENTIFIED BY 'your_secure_password';
GRANT ALL PRIVILEGES ON otrs.* TO 'otrs'@'localhost';
FLUSH PRIVILEGES;
EXIT;
Replace ‘your_secure_password’ with a strong, unique password.
Optimizing Database Performance
Edit the MariaDB configuration file to optimize for OTRS:
sudo nano /etc/my.cnf.d/server.cnfAdd these settings under the [mysqld] section:
max_allowed_packet = 20M
query_cache_size = 32M
innodb_log_file_size = 256M
innodb_buffer_pool_size = 512M
Restart MariaDB to apply the changes:
sudo systemctl restart mariadbThese settings enhance database performance for OTRS operations, especially with larger ticket volumes.
Web Server Configuration
Configuring your web server correctly ensures secure and reliable access to the OTRS interface.
Setting Up Apache Virtual Host
Create an Apache configuration file for OTRS:
sudo nano /etc/httpd/conf.d/otrs.confAdd the following configuration:
<VirtualHost *:80>
    ServerName otrs.your-domain.com
    DocumentRoot /opt/otrs/var/httpd/htdocs

    <Directory /opt/otrs/var/httpd/htdocs>
        AllowOverride None
        Require all granted
    </Directory>

    ErrorLog /var/log/httpd/otrs-error.log
    CustomLog /var/log/httpd/otrs-access.log combined
</VirtualHost>
Replace otrs.your-domain.com with your actual domain or server IP address.
Implementing SSL/TLS
For production environments, secure your OTRS installation with SSL/TLS:
sudo dnf install -y mod_ssl opensslGenerate a self-signed certificate (for testing) or install a valid SSL certificate:
sudo openssl req -x509 -nodes -days 365 -newkey rsa:2048 -keyout /etc/pki/tls/private/otrs.key -out /etc/pki/tls/certs/otrs.crtCreate an SSL virtual host configuration:
sudo nano /etc/httpd/conf.d/otrs-ssl.confAdd this configuration:
<VirtualHost *:443>
    ServerName otrs.your-domain.com
    DocumentRoot /opt/otrs/var/httpd/htdocs

    SSLEngine on
    SSLCertificateFile /etc/pki/tls/certs/otrs.crt
    SSLCertificateKeyFile /etc/pki/tls/private/otrs.key

    <Directory /opt/otrs/var/httpd/htdocs>
        AllowOverride None
        Require all granted
    </Directory>

    ErrorLog /var/log/httpd/otrs-ssl-error.log
    CustomLog /var/log/httpd/otrs-ssl-access.log combined
</VirtualHost>
Restart Apache to apply the changes:
sudo systemctl restart httpdRunning the OTRS Web Installer
With all components configured, you can now run the OTRS web installer to complete the setup.
Accessing the Installer
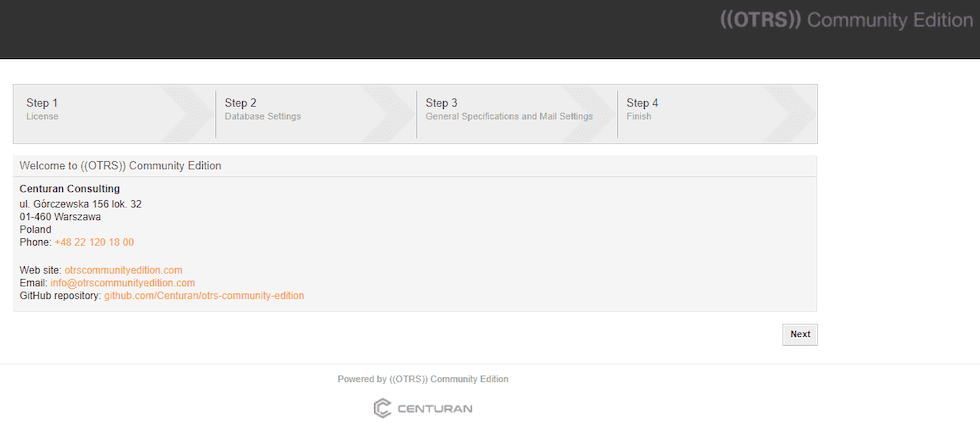
Navigate to your OTRS URL in a web browser:
http://otrs.your-domain.com/otrs/installer.plOr if using SSL:
https://otrs.your-domain.com/otrs/installer.pl
Configuring System Settings
Follow the web installer steps:
- Accept the license agreement
- Enter the database credentials you created earlier
- Configure basic system settings like system email addresses
- Create the administrator account with a secure password
The installer will perform database initialization and configuration automatically.
Email Account Setup
Configure email accounts for ticket creation and notification:
- Select “Email Accounts” from the Admin interface
- Click “Add Email Account”
- Enter the details for your mail server
- Test the connection before saving
Properly configured email accounts enable automatic ticket creation from incoming emails.
Configuring the OTRS Daemon
The OTRS daemon handles background tasks and scheduled jobs, which is essential for proper system operation.
Understanding the OTRS Daemon
The OTRS daemon manages processes like automatic ticket escalations, email sending, and scheduled reports. It runs as a separate service from the web interface.
Setting Up the Systemd Service
Create a systemd service file for the OTRS daemon:
sudo nano /etc/systemd/system/otrs-daemon.serviceAdd the following content:
[Unit]
Description=OTRS Daemon
After=syslog.target network.target

[Service]
Type=forking
User=otrs
Group=otrs
ExecStart=/opt/otrs/bin/otrs.Daemon.pl start
ExecStop=/opt/otrs/bin/otrs.Daemon.pl stop
PIDFile=/opt/otrs/var/run/otrs-daemon.pid

[Install]
WantedBy=multi-user.target
Enable and start the service:
sudo systemctl daemon-reload
sudo systemctl enable otrs-daemon
sudo systemctl start otrs-daemon
Verifying Daemon Operation
Check the daemon status:
sudo systemctl status otrs-daemonThe output should indicate the daemon is active and running.
Post-Installation Tasks
After completing the basic installation, perform these post-installation tasks to enhance your OTRS setup.
Creating Essential Ticket Queues
Log in to the OTRS admin interface and create necessary ticket queues:
- Navigate to Admin → Queues
- Click “Add Queue”
- Define queue properties and permissions
- Set up queue-specific email addresses if needed
Well-organized queues improve ticket routing and management efficiency.
Setting Up Automatic Maintenance Tasks
Configure the cron jobs for regular maintenance:
sudo -u otrs crontab -eAdd the following entries:
# Rebuild ticket index
45 * * * * /opt/otrs/bin/otrs.Console.pl Maint::Ticket::QueueIndexRebuild --quiet
# Clean the cache
35 * * * * /opt/otrs/bin/otrs.Console.pl Maint::Cache::Delete --expired --quiet
# Ticket statistics
45 0 * * * /opt/otrs/bin/otrs.Console.pl Maint::Ticket::Stats --quiet
These tasks keep OTRS running smoothly by performing regular maintenance operations.
User Management Configuration
Set up user roles and permissions:
- Navigate to Admin → Roles
- Create roles for different user types (agents, administrators)
- Assign appropriate permissions to each role
- Add users and assign roles as needed
Proper role management enhances security and improves workflow efficiency.
Security Hardening
Implementing security measures is crucial for protecting your OTRS installation and customer data.
Implementing Least Privilege Principles
Ensure users and processes have only the permissions they need:
sudo find /opt/otrs -type f -name "*.pl" -o -name "*.pm" | xargs sudo chmod 755
sudo find /opt/otrs -type f -name "*.sh" | xargs sudo chmod 755
sudo find /opt/otrs/var -type d | xargs sudo chmod 755
sudo find /opt/otrs/var -type f | xargs sudo chmod 644
Securing Database Connections
Edit the OTRS database configuration to use encrypted connections:
sudo nano /opt/otrs/Kernel/Config.pmLocate the database configuration section and add:
$Self->{DatabaseDSN} = "DBI:mysql:database=otrs;host=localhost;mysql_ssl=1";Setting Up Regular Backups
Create a backup script:
sudo nano /opt/otrs-backup.shAdd the following content:
#!/bin/bash
DATE=$(date +%Y-%m-%d)
BACKUP_DIR="/var/backups/otrs"

# Stop OTRS services
systemctl stop otrs-daemon
systemctl stop httpd

# Backup OTRS files
mkdir -p $BACKUP_DIR/$DATE
tar -czf $BACKUP_DIR/$DATE/otrs-files.tar.gz /opt/otrs

# Backup database
mysqldump -u root -p'your_root_password' otrs > $BACKUP_DIR/$DATE/otrs-db.sql

# Restart services
systemctl start httpd
systemctl start otrs-daemon
Make the script executable and create a scheduled task:
sudo chmod +x /opt/otrs-backup.sh
sudo crontab -e
Add:
0 2 * * * /opt/otrs-backup.shThis script performs daily backups at 2 AM.
Performance Optimization
Optimizing OTRS performance ensures a smooth experience for agents and administrators.
Database Query Optimization
Add indexes to frequently queried tables:
sudo mysql -u root -p otrsCREATE INDEX ticket_state_id ON ticket (ticket_state_id);
CREATE INDEX ticket_queue_id ON ticket (queue_id);
CREATE INDEX article_ticket_id ON article (ticket_id);
EXIT;Web Server Caching
Enable Apache caching for static content:
sudo nano /etc/httpd/conf.d/otrs.confAdd:
<IfModule mod_expires.c>
    ExpiresActive On
    ExpiresByType image/jpg "access plus 1 month"
    ExpiresByType image/jpeg "access plus 1 month"
    ExpiresByType image/gif "access plus 1 month"
    ExpiresByType image/png "access plus 1 month"
    ExpiresByType text/css "access plus 1 week"
    ExpiresByType application/javascript "access plus 1 week"
</IfModule>
Restart Apache:
sudo systemctl restart httpdResource Allocation Optimization
Adjust Apache settings for better resource usage:
sudo nano /etc/httpd/conf/httpd.confFind and modify these settings:
StartServers 8
MinSpareServers 5
MaxSpareServers 20
ServerLimit 256
MaxRequestWorkers 256
MaxConnectionsPerChild 4000
These settings optimize Apache for handling OTRS traffic efficiently.
Troubleshooting Common Issues
Even with careful installation, issues may arise. Here are solutions for common problems.
Resolving Permission Problems
If you encounter permission errors:
sudo find /opt/otrs -type d -exec chmod 755 {} \;
sudo find /opt/otrs -type f -exec chmod 644 {} \;
sudo find /opt/otrs/bin -type f -name "*.pl" -o -name "*.sh" | xargs chmod 755
sudo chown -R otrs:otrs /opt/otrs
Addressing Database Connection Issues
If OTRS cannot connect to the database:
- Verify database credentials in
/opt/otrs/Kernel/Config.pm - Ensure the MariaDB service is running:
sudo systemctl status mariadb - Check database permissions:
SHOW GRANTS FOR 'otrs'@'localhost';
Fixing Web Server Configuration Errors
If the web server returns errors:
- Check Apache error logs:
sudo tail -f /var/log/httpd/error_log - Verify syntax of configuration files:
sudo apachectl configtest - Ensure correct file paths in virtual host configurations
Handling Perl Module Dependencies
If Perl modules are missing:
sudo /opt/otrs/bin/otrs.CheckEnvironment.pl --listThis command shows installation commands for missing modules.
Congratulations! You have successfully installed OTRS. Thanks for using this tutorial for installing the OTRS (OpenSource Trouble Ticket System) on your Fedora 42 Linux system. For additional help or useful information, we recommend you check the official OTRS website.