How To Install PHPList on Ubuntu 22.04 LTS

In this tutorial, we will show you how to install PHPList on Ubuntu 22.04 LTS. PHPList is a robust, open-source newsletter manager that‘s packed with a plethora of features, making it a go-to choice for many businesses and individuals alike. This powerful tool allows you to manage mailing lists, send out newsletters, and keep track of your email marketing campaigns with ease.
This article assumes you have at least basic knowledge of Linux, know how to use the shell, and most importantly, you host your site on your own VPS. The installation is quite simple and assumes you are running in the root account, if not you may need to add ‘sudo‘ to the commands to get root privileges. I will show you the step-by-step installation of the PHPList on Ubuntu 22.04 (Jammy Jellyfish). You can follow the same instructions for Ubuntu 22.04 and any other Debian-based distribution like Linux Mint, Elementary OS, Pop!_OS, and more as well.
Prerequisites
- A server running one of the following operating systems: Ubuntu 22.04, 20.04, and any other Debian-based distribution like Linux Mint.
- SSH access to the server (or just open Terminal if you’re on a desktop).
- Basic knowledge of the Linux command-line interface (CLI). This guide assumes you’re comfortable with executing commands in a terminal.
- An active internet connection. You’ll need an internet connection to download the necessary packages and dependencies for PHPList.
- PHPList requires a LAMP (Linux, Apache, MySQL, PHP) stack to function. If you haven’t installed LAMP on your server, you’ll need to do so before proceeding.
- A
non-root sudo useror access to theroot user. We recommend acting as anon-root sudo user, however, as you can harm your system if you’re not careful when acting as the root.
Install PHPList on Ubuntu 22.04 LTS Jammy Jellyfish
Step 1. Start by updating your system packages. Open your terminal and execute the following commands:
sudo apt update
sudo apt upgrade
Step 2. Install PHP and Required Extensions.
PHPList requires PHP and several extensions. Install them using the following commands:
sudo apt install apache2 php libapache2-mod-php php-mysql php-gd php-cli php-xml php-mbstring
Step 3. Install and Configure MariaDB.
MariaDB is a popular MySQL-compatible database. Install it using the following command:
sudo apt install mariadb-server
After installation, secure your MariaDB installation by running the security script that comes with MariaDB:
sudo mysql_secure_installation
During the secure installation, you’ll be prompted to set a root password and make several security-related decisions.
PHPList uses a database to store information about your subscribers, campaigns, and more. You can use either MySQL or MariaDB for this purpose. To create a new database, log in to your MariaDB server and enter the following commands:
CREATE DATABASE phplist;
CREATE USER 'phplistuser'@'localhost' IDENTIFIED BY 'your-strong-passwd';
GRANT ALL PRIVILEGES ON phplist.* TO 'phplistuser'@'localhost';
FLUSH PRIVILEGES;
EXIT;
Step 4. Installing PHPList on Ubuntu 22.04.
Next, we’ll download the latest version of PHPList. Navigate to the directory where you want to download PHPList, then use the wget command followed by the download link for the latest PHPList version. After downloading, extract the file using the tar command:
export VER="3.6.14"
wget https://sourceforge.net/projects/phplist/files/phplist/${VER}/phplist-${VER}.tgz
tar xvf phplist-${VER}.tgz
Move the folder public_html/lists/to the /var/wwwdirectory:
sudo mv phplist-${VER}/public_html/lists /var/www/phplist
Navigate to the PHPList directory and locate the config.php file. Open this file in a text editor and find the section for database settings. Replace the default values with your database name, username, and password:
// what is your Mysql database server hostname
$database_host = 'localhost';

// what is the name of the database we are using
$database_name = 'phplist';

// what user has access to this database
$database_user = 'phplist';

// and what is the password to login to control the database
$database_password = 'your-strong-passwd';
Step 5. Configuring Apache for PHPList.
Apache serves your PHPList installation to users. To do this, it needs a virtual host file configured specifically for PHPList. Create a new virtual host file in the /etc/apache2/sites-available/ directory. In this file, add the following configuration, replacing ‘your_domain‘ with your actual domain:
sudo nano /etc/apache2/sites-available/phplist.conf
Add the following content to the file:
<VirtualHost *:80>
    ServerAdmin admin@your_domain
    DocumentRoot /var/www/phplist
    ServerName your_domain
    <Directory /var/www/phplist/>
        Options FollowSymLinks
        AllowOverride All
        Order allow,deny
        allow from all
    </Directory>
    ErrorLog ${APACHE_LOG_DIR}/error.log
    CustomLog ${APACHE_LOG_DIR}/access.log combined
</VirtualHost>
Before we can use PHPList, we need to set the correct ownership permissions for the PHPList directory. Use the chown command to set the owner to the Apache user, usually ‘www-data’:
sudo chown -R www-data:www-data /var/www/phplist
Finally, restart Apache to apply all the changes:
sudo a2dissite phplist.conf
sudo rm /var/www/html/index.html
sudo systemctl restart apache2
Step 6. Accessing PHPList Web UI.
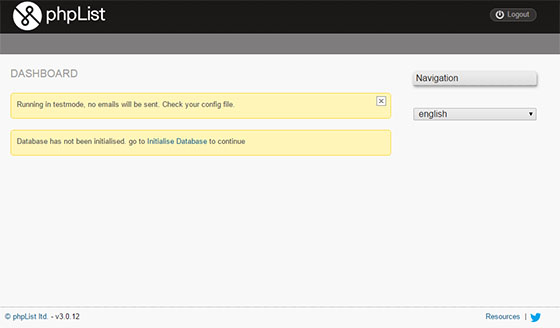
To access the PHPList web user interface (UI) on Ubuntu, you need to navigate to the appropriate URL in your web browser. The URL will typically follow the format of your server’s IP address or domain name, followed by the PHPList installation directory:
http://your_domain/admin

Congratulations! You have successfully installed PHPList. Thanks for using this tutorial for installing PHPList on the Ubuntu 22.04 LTS Jammy Jellyfish system. For additional help or useful information, we recommend you check the official PHPList website.