How To Install phpMyAdmin on Linux Mint 21

In this tutorial, we will show you how to install phpMyAdmin on Linux Mint 21. For those of you who didn’t know, phpMyAdmin is a free software tool written in PHP, intended to handle the administration of MySQL and MariaDB over the Web. It has become one of the most popular MySQL administration tools, especially for web hosting services.
This article assumes you have at least basic knowledge of Linux, know how to use the shell, and most importantly, you host your site on your own VPS. The installation is quite simple and assumes you are running in the root account, if not you may need to add ‘sudo‘ to the commands to get root privileges. I will show you the step-by-step installation of phpMyAdmin on Linux Mint 21 (Vanessa).
Prerequisites
- A server running one of the following operating systems: Linux Mint 21 (Vanessa).
- It’s recommended that you use a fresh OS install to prevent any potential issues.
- SSH access to the server (or just open Terminal if you’re on a desktop).
- A
non-root sudo useror access to theroot user. We recommend acting as anon-root sudo user, however, as you can harm your system if you’re not careful when acting as the root.
Install phpMyAdmin on Linux Mint 21 Vanessa
Step 1. Before running the tutorial below, it’s important to make sure your system is up to date by running the following apt commands in the terminal:
sudo apt update
sudo apt install software-properties-common apt-transport-https wget ca-certificates gnupg2
Step 2. Installing the LAMP Server.
Before installing phpMyAdmin on your Linux Mint, a LAMP server is required. If you do not have LAMP installed, you can follow our guide here.
Step 3. Installing phpMyAdmin on Linux Mint 21.
By default, phpMyAdmin is available on the Linux Mint 21 base repository. Now run the following command below to install the latest version of phpMyAdmin to your Linux Mint system:
sudo apt install phpmyadmin
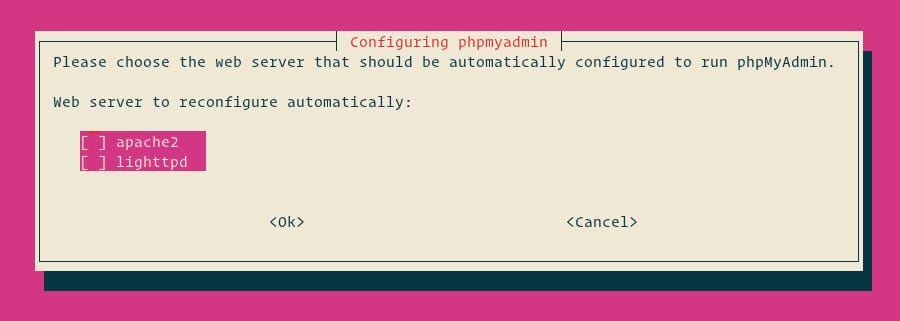
During installation, when prompted to choose the web server, press ‘spacebar’ to select apache2 and an asterisk will appear next to it.

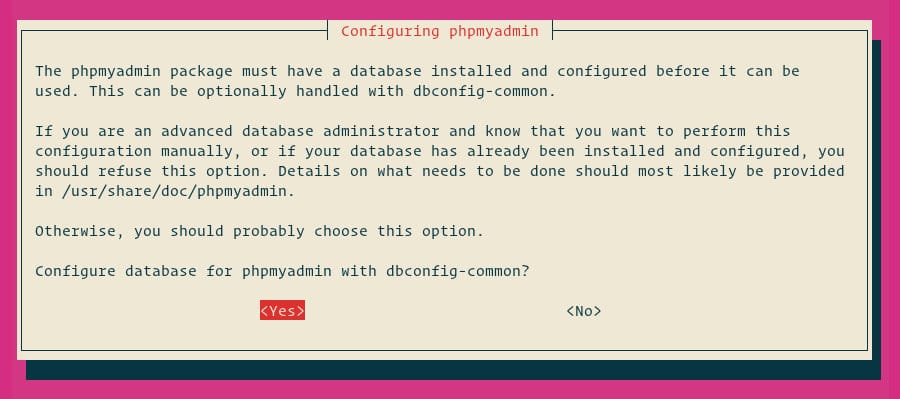
Press ‘Enter’ to continue. The installation will continue until prompted with a dialogue box asking you to agree to configure the database for phpMyAdmin.

The next dialogue box is for confirming the password. Enter the same password and press ‘Enter’. The installation will continue to completion.

Step 4. Accessing phpMyAdmin Web Interface.
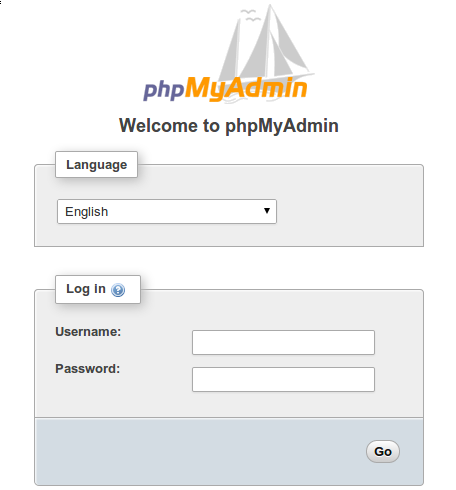
Once successfully installed, now we open your browser and open URL to http://your-IP-address/phpmyadmin and your PHPMyAdmin will ask you for the user and password of your MySQL installation, you can use root as the user and the root MySQL password, or any other MySQL user/password.

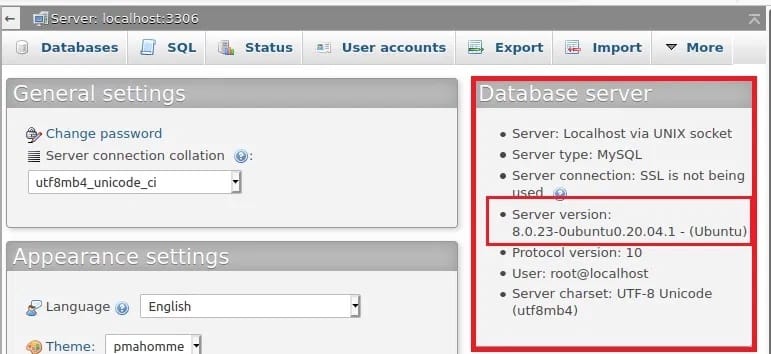
After you have logged in to the phpMyAdmin dashboard you can create and manage all databases:

*If get an Error 404 upon visiting http://your-IP-address/phpmyadmin, now we configure Apache using the following command below:
sudo ln -s /etc/phpmyadmin/apache.conf /etc/apache2/conf-available/phpmyadmin.conf
sudo a2enconf phpmyadmin
sudo systemctl restart apache2
Congratulations! You have successfully installed phpMyAdmin. Thanks for using this tutorial for installing the latest version of phpMyAdmin on the Linux Mint system. For additional help or useful information, we recommend you check the official phpMyAdmin website.