In this tutorial, we will show you how to install phpPgAdmin on Debian 11. For those of you who didn’t know, phpPgAdmin is a free web-based administration tool for managing PostgreSQL databases. It allows you to perform activities like creating, modifying, and deleting databases, tables, views, and fields. PhpPgAdmin is written in PHP and it makes the administration of PostgreSQL databases easier, not to mention the web-based GUI making everything more user-friendly and easier to use.
This article assumes you have at least basic knowledge of Linux, know how to use the shell, and most importantly, you host your site on your own VPS. The installation is quite simple and assumes you are running in the root account, if not you may need to add ‘sudo‘ to the commands to get root privileges. I will show you the step-by-step installation of phpPgAdmin on a Debian 11 (Bullseye).
Prerequisites
- A server running one of the following operating systems: Debian 10 or Debian 11.
- It’s recommended that you use a fresh OS install to prevent any potential issues
- A
non-root sudo useror access to theroot user. We recommend acting as anon-root sudo user, however, as you can harm your system if you’re not careful when acting as the root.
Install phpPgAdmin on Debian 11 Bullseye
Step 1. Before we install any software, it’s important to make sure your system is up to date by running the following apt commands in the terminal:
sudo apt update
sudo apt upgrade
Step 2. Installing Apache Web Server.
Now we install Apache Web Server on the Debian system by running the following command below:
sudo apt install apache2 apache2-utils
Confirm Apache build and version:
apache2 -v
Before starting the configurations, make sure that Apache services are running on your system. Run the following command to check apache services status:
sudo systemctl status apache2
sudo systemctl start apache2
sudo systemctl enable apache2
Step 3. Installing PostgreSQL.
By default, PostgreSQL is not available to install directly from the Debian 11 base repository. Now we add the official PostgreSQL repository to your system:
echo "deb [signed-by=/usr/share/keyrings/postgresql-keyring.gpg] http://apt.postgresql.org/pub/repos/apt/ bullseye-pgdg main" | sudo tee /etc/apt/sources.list.d/postgresql.list
Next, import the PostgreSQL signing key:
curl -fsSL https://www.postgresql.org/media/keys/ACCC4CF8.asc | sudo gpg --dearmor -o /usr/share/keyrings/postgresql-keyring.gpg
Finally, run the following command below to install PostgreSQL:
sudo apt update
sudo apt install postgresql-13
After installing PostgreSQL, start the PostgreSQL service and enable it to start at system reboot:
sudo systemctl start postgresql
sudo systemctl enable postgresql
sudo systemctl status postgresql
For additional resources on installing PostgreSQL, read the post below:
Step 4. Installing phpPgAdmin on Debian 11.
Now phpPgAdmin packages are also available under default Debian repositories. Use the following command below to install phpPgAdmin:
sudo apt install phppgadmin
Step 5. Configure phpPgAdmin.
Next, now we edit the phpPgAdmin configuration file to add PostgreSQL instances:
sudo nano /etc/phppgadmin/config.inc.php
Add the following files:
// Display name for the server on the login screen
$conf['servers'][0]['desc'] = 'PostgreSQL 13';

// Hostname or IP address for server. Use '' for UNIX domain socket.
// use 'localhost' for TCP/IP connection on this computer
$conf['servers'][0]['host'] = 'localhost';

// Database port on server (5432 is the PostgreSQL default)
$conf['servers'][0]['port'] = 5432;
Set extra_login_security value to false:
$conf['extra_login_security'] = false;
Step 6. Configure Apache.
Create a new Apache configuration file for phpPgAdmin:
sudo nano /etc/apache2/conf-enabled/phppgadmin.conf
Modify the following lines:
.   .   .
.   .   .

</IfModule>
AllowOverride None

# Only allow connections from localhost:
Require all granted

<IfModule mod_php.c>

.   .   .
.   .   .
Save and close, then restart the Apache webserver so that the changes take place:
sudo systemctl restart apache2
Step 7. Accessing PhpPgAdmin Web Interface.
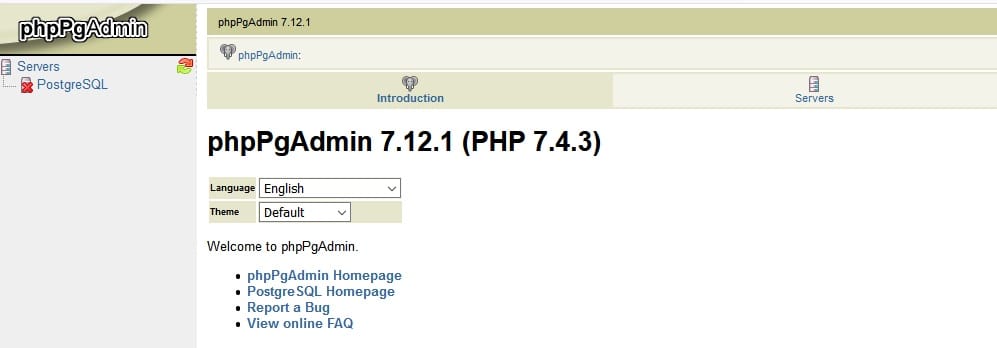
Once successfully installed, open your web browser and access the PhpPgAdmin web console using the URL http://your-server-ip-address/phppgadmin. You should see the PhpPgAdmin Interface:

Congratulations! You have successfully installed phpPgAdmin. Thanks for using this tutorial for installing the latest version of phpPgAdmin on Debian 11 Bullseye. For additional help or useful information, we recommend you check the official phpPgAdmin website.