How To Install Portainer on Fedora 38

In this tutorial, we will show you how to install Portainer on Fedora 38. In the dynamic world of containerization, where speed and efficiency are paramount, tools like Portainer emerge as invaluable assets. Portainer is a user-friendly, open-source container management platform that simplifies the complexities of Docker, making it accessible to users of all expertise levels.
This article assumes you have at least basic knowledge of Linux, know how to use the shell, and most importantly, you host your site on your own VPS. The installation is quite simple and assumes you are running in the root account, if not you may need to add ‘sudo‘ to the commands to get root privileges. I will show you the step-by-step installation of the Portainer on a Fedora 38.
Prerequisites
- A server running one of the following operating systems: Fedora 38.
- It’s recommended that you use a fresh OS install to prevent any potential issues.
- SSH access to the server (or just open Terminal if you’re on a desktop).
- An active internet connection. You’ll need an internet connection to download the necessary packages and dependencies for Portainer.
- A
non-root sudo useror access to theroot user. We recommend acting as anon-root sudo user, however, as you can harm your system if you’re not careful when acting as the root. - Portainer relies on Docker, so it’s crucial that you have Docker installed on your Fedora 38 system.
Install Portainer on Fedora 38
Step 1. Before we can install Portainer on Fedora 38, it’s important to ensure that our system is up-to-date with the latest packages. This will ensure that we have access to the latest features and bug fixes and that we can install Portainer without any issues:
sudo dnf update
Step 2. Installing Portainer on Fedora 38.
Portainer is available as a Docker image on the Docker Hub. To acquire the Portainer image, utilize the following command:
sudo docker pull portainer/portainer-ce
This command fetches the Portainer Community Edition (CE) image to your system.
To enable effective communication for Portainer, create a dedicated Docker network using the following command:
sudo docker network create portainer-net
sudo docker volume create portainer_data
sudo docker run -d -p 9000:9000 --name=portainer --restart=always -v /var/run/docker.sock:/var/run/docker.sock -v portainer_data:/data portainer/portainer-ce
Let’s break down this command:
-d: Runs the container in detached mode, allowing it to operate in the background.-p 9000:9000: Maps port 9000 from your host to the container, making Portainer accessible via a web browser.--name=portainer: Assigns the container the name “portainer” for easy management.--restart=always: Instructs Docker to restart the Portainer container automatically in case of system reboots.-v /var/run/docker.sock:/var/run/docker.sock: Grants Portainer access to the Docker socket, enabling it to manage Docker resources.-v portainer_data:/data: Connects the previously created data volume to store Portainer data.
Step 3. Accessing Portainer Web Interface.
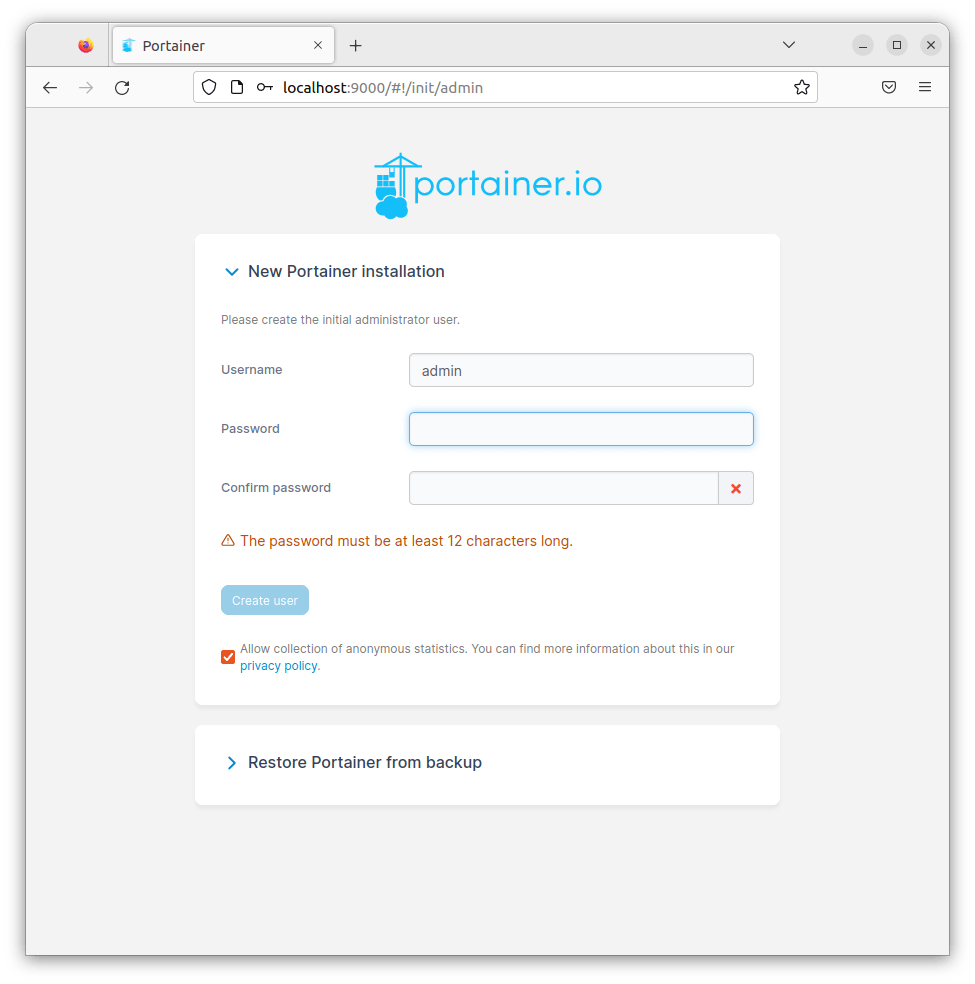
Simply open your web browser and navigate to http://<your_server_ip>:9000. You’ll be welcomed by the Portainer login screen.

On your first visit, you’ll be prompted to set up an admin password. Choose a robust and secure password, then click “Create User.”
After successfully creating an admin user, log in with the provided credentials. You are now ready to navigate the Portainer dashboard.