How To Install Portainer on Ubuntu 22.04 LTS

In this tutorial, we will show you how to install Portainer on Ubuntu 22.04 LTS. For those of you who didn’t know, Portainer is a powerful and user-friendly tool for managing Docker environments. Whether you’re an experienced Docker user or just starting out, Portainer provides an easy-to-use interface that makes it simple to manage your containers, images, networks, and volumes. Additionally, its monitoring capabilities ensure that administrators can keep their Docker environments running smoothly, with real-time updates on the status of containers and resources.
This article assumes you have at least basic knowledge of Linux, know how to use the shell, and most importantly, you host your site on your own VPS. The installation is quite simple and assumes you are running in the root account, if not you may need to add ‘sudo‘ to the commands to get root privileges. I will show you the step-by-step installation of the Portainer on Ubuntu 22.04 (Jammy Jellyfish). You can follow the same instructions for Ubuntu 22.04 and any other Debian-based distribution like Linux Mint, Elementary OS, Pop!_OS, and more as well.
Prerequisites
- A server running one of the following operating systems: Ubuntu 22.04, 20.04, and any other Debian-based distribution like Linux Mint.
- It’s recommended that you use a fresh OS install to prevent any potential issues.
- An active internet connection. You’ll need an internet connection to download the necessary packages and dependencies for Portainer.
- SSH access to the server (or just open Terminal if you’re on a desktop).
- A
non-root sudo useror access to theroot user. We recommend acting as anon-root sudo user, however, as you can harm your system if you’re not careful when acting as the root.
Install Portainer on Ubuntu 22.04 LTS Jammy Jellyfish
Step 1. First, make sure that all your system packages are up-to-date by running the following apt commands in the terminal.
sudo apt update
sudo apt upgrade
sudo apt install wget apt-transport-https gnupg2 software-properties-common
Step 2. Installing Docker.
By default, Docker is not available on Ubuntu 22.04 base repository. Now run the following command below to add the Docker repository to the system:
echo "deb [arch=$(dpkg --print-architecture) signed-by=/usr/share/keyrings/docker-archive-keyring.gpg] https://download.docker.com/linux/ubuntu $(lsb_release -cs) stable" | sudo tee /etc/apt/sources.list.d/docker.list
Next, import the GPG key to your system:
curl -fsSL https://download.docker.com/linux/ubuntu/gpg | sudo gpg --dearmor -o /usr/share/keyrings/docker-archive-keyring.gpg
After the repository is enabled, now install the latest version of the Docker package using the below command:
sudo apt update
sudo apt install docker-ce docker-ce-cli containerd.io docker-compose-plugin
You can verify that Docker is installed and about the current version:
docker -v
Once successfully installed, enable Docker (to start automatically upon system boot), start, and verify the status using the commands below:
sudo systemctl enable docker
sudo systemctl start docker
sudo systemctl status docker
In addition, consider adding the currently logged-in user to the docker group. This allows you to run docker without invoking sudo:
sudo usermod -aG docker my_user
newgrp docker
For additional resources on installing Docker, read the post below:
Step 3. Create Portainer Server Docker Data Volume.
Portainer needs persisting data (for storing user passwords for example). Let’s create a docker volume to store this data:
docker volume create portainer_data
Next, inspect the volume to get its location for example:
docker volume inspect portainer_data
Step 4. Installing Portainer on Ubuntu 22.04.
Now run the following command below to install the Portainer server Docker container to your Ubuntu system:
docker run -d -p 9000:9000 --name=portainer --restart=always -v /var/run/docker.sock:/var/run/docker.sock -v portainer_data:/data portainer/portainer-ce
Here is the detail of each option:
docker runis the base command to start a container-dmeans detach. It runs the container in the background.-pexpose UI over port 9000, portainer GUI will be at URLhostname:9000--name=portainernames the container portainer--restart=alwaysalways restart Portainer (after a crash or at machine or daemon restart)-v /var/run/docker.sock:/var/run/docker.sockmounts the volume/var/run/docker.sockfrom the host machine to the Portainer container./var/run/docker.sockis actually the Docker daemon socket. Portainer needs this socket to get Docker status.-v portainer_data:/datamounts the volume created previouslyportainer/portainer-ceis the name of the Portainer Community Edition image.
Step 5. Accessing the Portainer Web Interface.
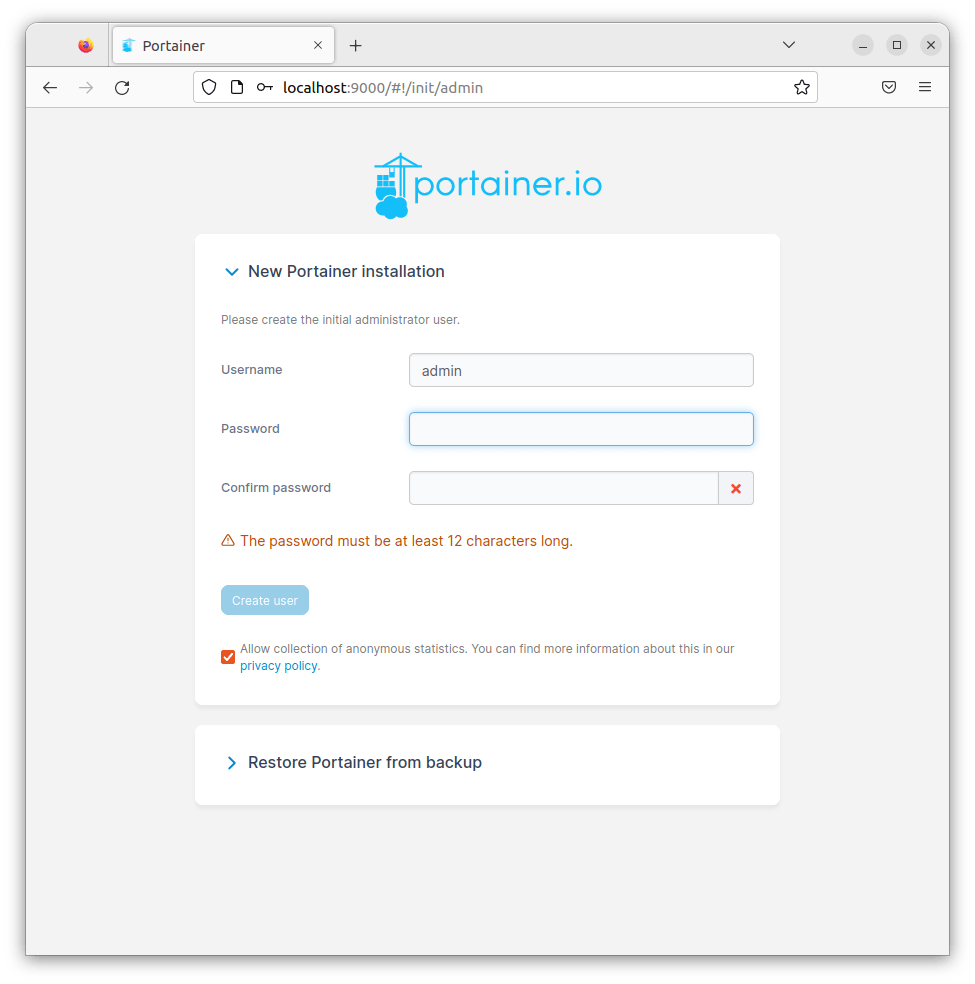
Once the Portainer container is up and running, open your web browser and access the Cerb Web UI using the URL http://your-IP-address:9000. You will be redirected to the following page:

Congratulations! You have successfully installed Portainer. Thanks for using this tutorial for installing the Portainer on Ubuntu 22.04 LTS Jammy Jellyfish system. For additional help or useful information, we recommend you check the official Portainer website.